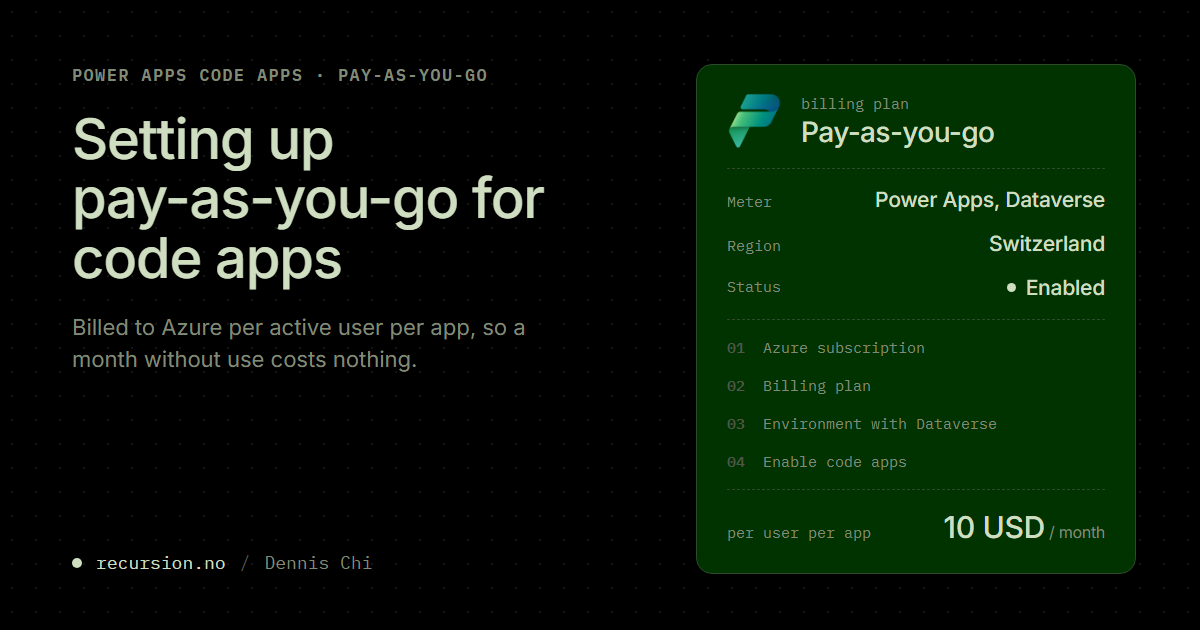
In this blog I set up a pay-as-you-go environment for code apps in my own tenant. I found several places where the Power Platform admin center did not match the Microsoft learn documentation.
Pay-as-you-go fits a code app whose users open it a few times a month and have no Power Apps Premium licence. The Microsoft documentation says those users need a Premium licence, pay-as-you-go enabled on the environment, an App Pass, or auto-claim. Pay-as-you-go bills an Azure subscription 10 USD per active user per app per month (Learn documentation), so a user who does not open the app in a month costs nothing that month.
Pay-as-you-go also helps with the licensing change Microsoft makes in February 2027. The Power Apps licensing FAQ documentation says that from February 2027 a user without a qualifying licence cannot open an app in three cases where Power Apps has let users through until now (apps in a managed environment, model-driven apps, and apps used outside a Dynamics 365 environment). Before that date the admin has to give each of those users a qualifying licence (Power Apps Premium, a per app plan, or an environment linked to pay-as-you-go). The admin can see who needs one in the Power Apps licensing report (Power Platform admin center > Licensing > Power Apps > Download report).
The categories of the setup
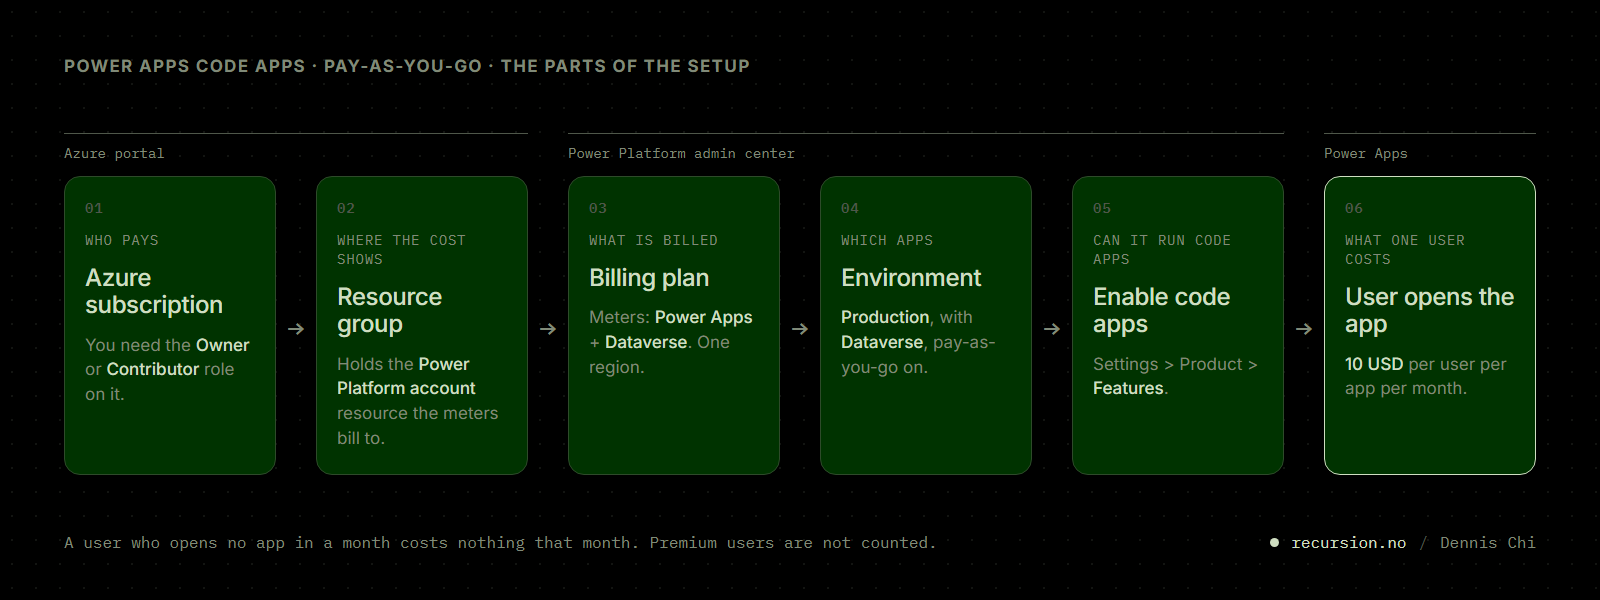
- Someone with the Owner or Contributor role on an Azure subscription sets up the payment.
- Azure shows the cost in a resource group, where the billing plan creates a Power Platform account resource that the meters bill to.
- You tick the meters on a billing plan in the Power Platform admin center (PPAC): Power Apps for each user who opens an app in a month and Dataverse for storage.
- The billing plan bills every app in the environment you link to it.
- The environment needs Enable code apps turned on in its settings before it can run code apps.
- One user costs 10 USD for each app the user opens at least once in a month (Learn documentation). A user who opens three apps in May costs 30 USD for May, and a user who opens none costs nothing. The meter does not count users with Power Apps Premium. The Dataverse meter bills storage above what the environment includes on top of that, per environment and not per user.
A billing plan belongs to one region, so you create it for the region the environment will be in.
Setting it up
Step 1. Check the Azure subscription
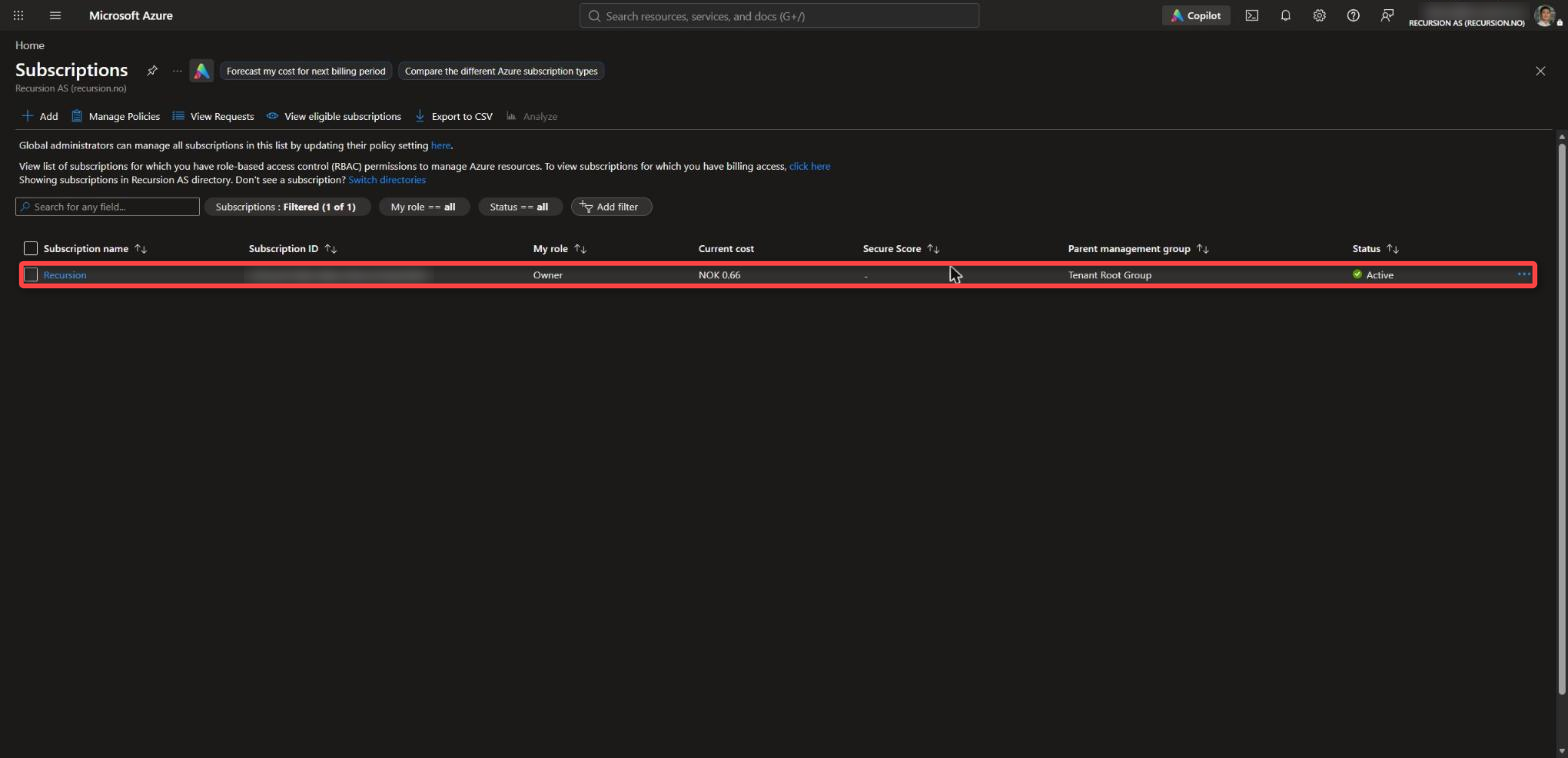
You need the Owner or Contributor role on the Azure subscription that pays for the app use, because the billing plan creates a resource in the subscription and registers a resource provider there (Learn documentation). If you have neither role, ask the subscription owner to create the resource group and the billing plan.
Step 2. Create a resource group
Azure shows the cost in a resource group. Create one in the Azure portal under Create a resource group, then Review + create and Create.
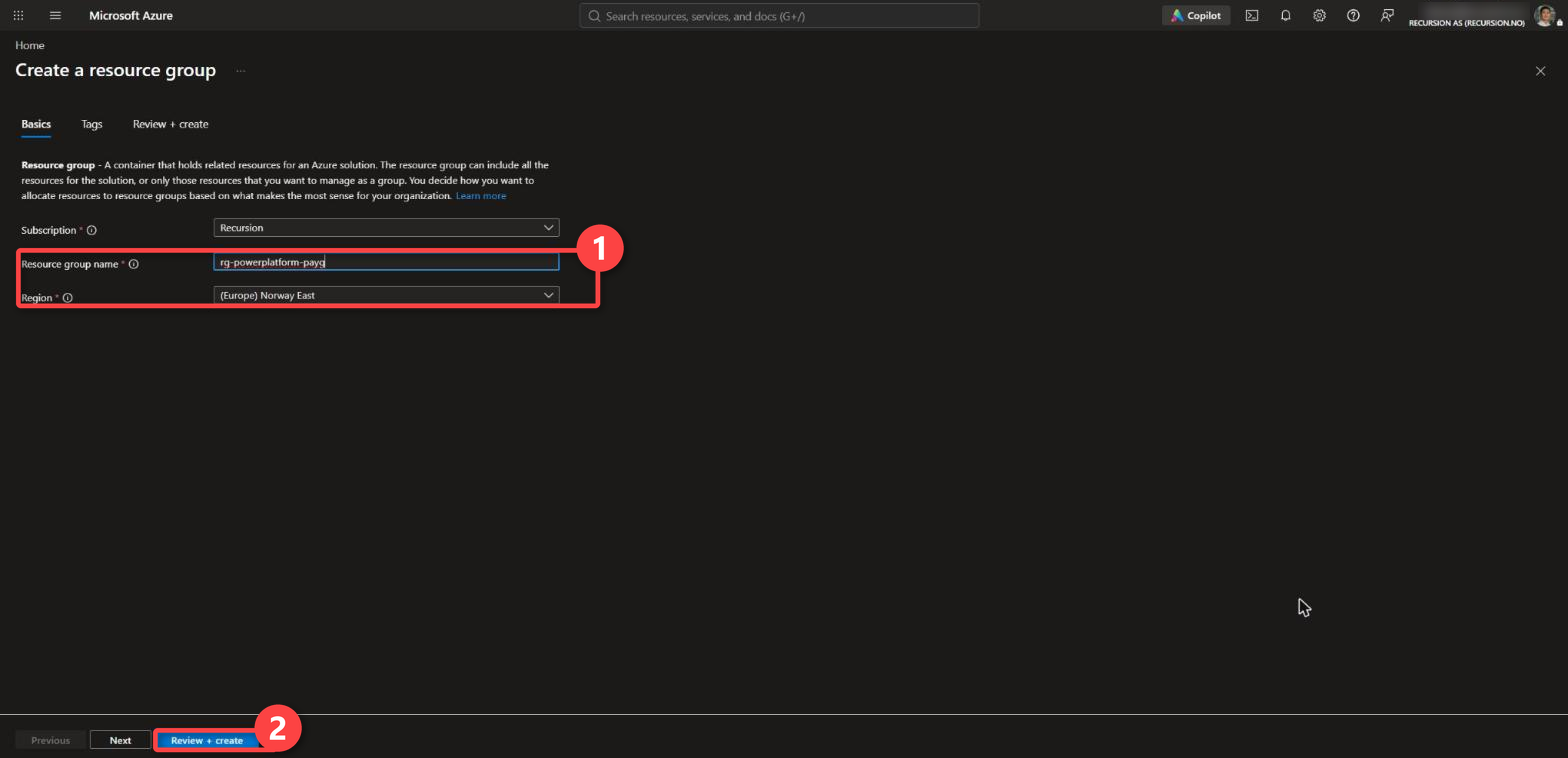
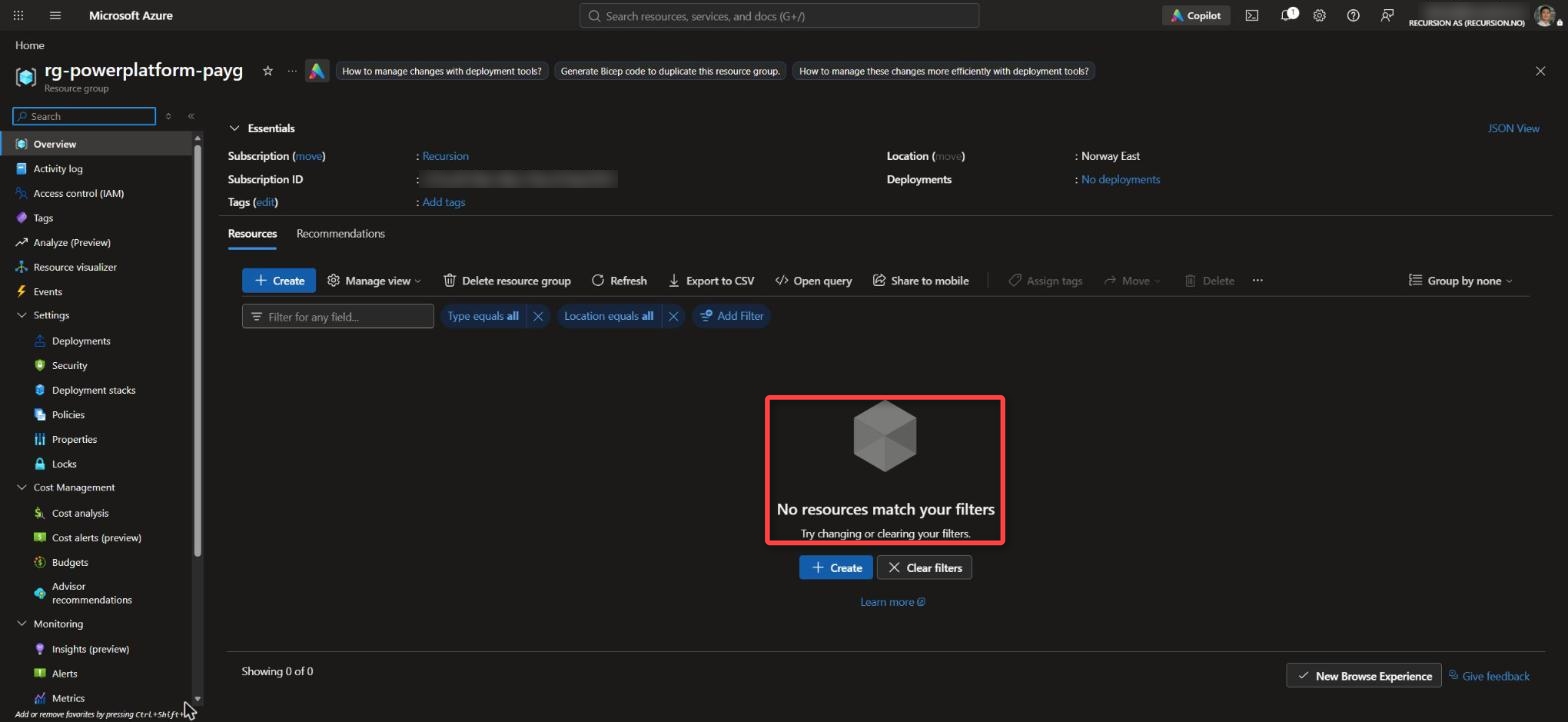
In my tenant the resource group is in Norway East, while the Power Platform account resources it later held are in Switzerland and Europe. The resource group’s region does not have to match the environment’s region.
Step 3. Create the billing plan in the right region
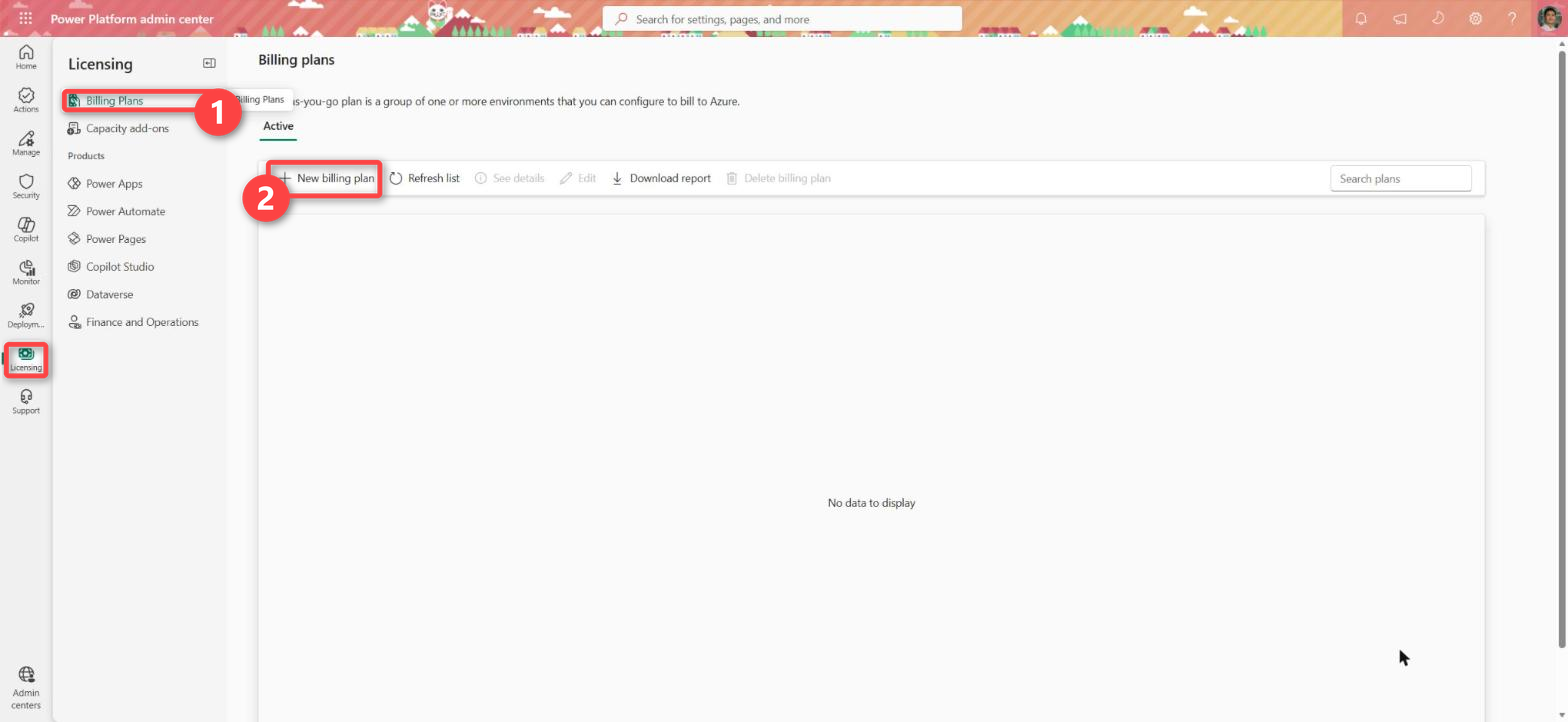
On the billing plan you choose the meters to bill, the subscription that pays and the region. The Microsoft documentation tells you to go to Licensing > “Pay-as-you-go plans”. In my tenant the menu item is called Billing Plans and the field in the environment pane where you pick one is called Billing policy.
Before you create it, find out which region the admin center will put your environment in. You choose a macro region for a new environment, and the admin center assigns a specific region within it based on capacity. Open Manage > Environments > New, choose Production and the macro region, and set Pay-as-you-go with Azure? to Yes under Change default settings. The line under Billing policy then says “Showing billing policies for” followed by the region. Write it down and select Cancel.
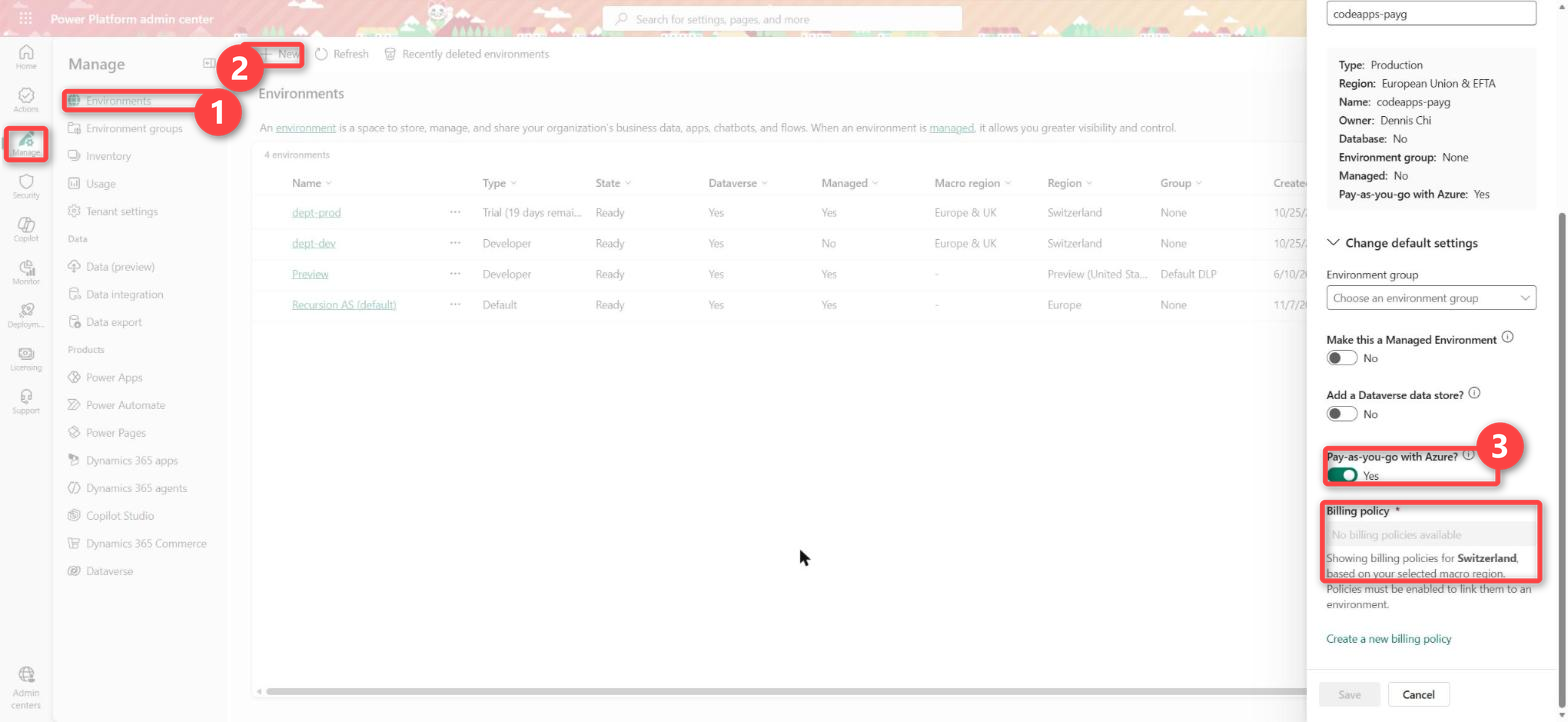
In my tenant both “European Union & EFTA” and “Europe & UK” resolved to Switzerland. The environment pane never offered my first billing plan, which was for Europe, so I created a second one for Switzerland.
Then go to Licensing > Billing Plans > New billing plan and fill in Name, Azure subscription, Resource group and Meter.
Tick both Power Apps and Dataverse under Meter. The Power Apps meter bills the app use. In my tenant the environment pane only offered plans that include the Dataverse meter.
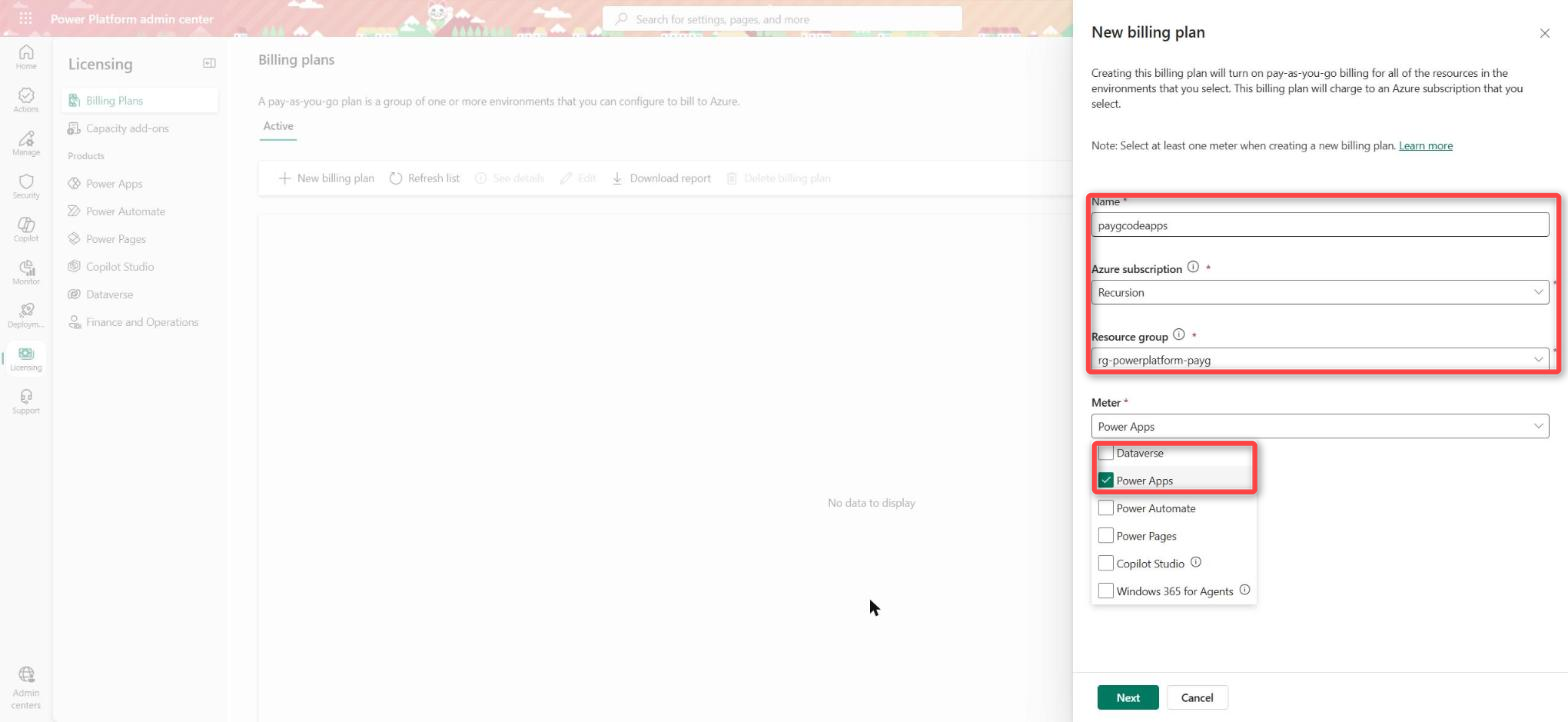
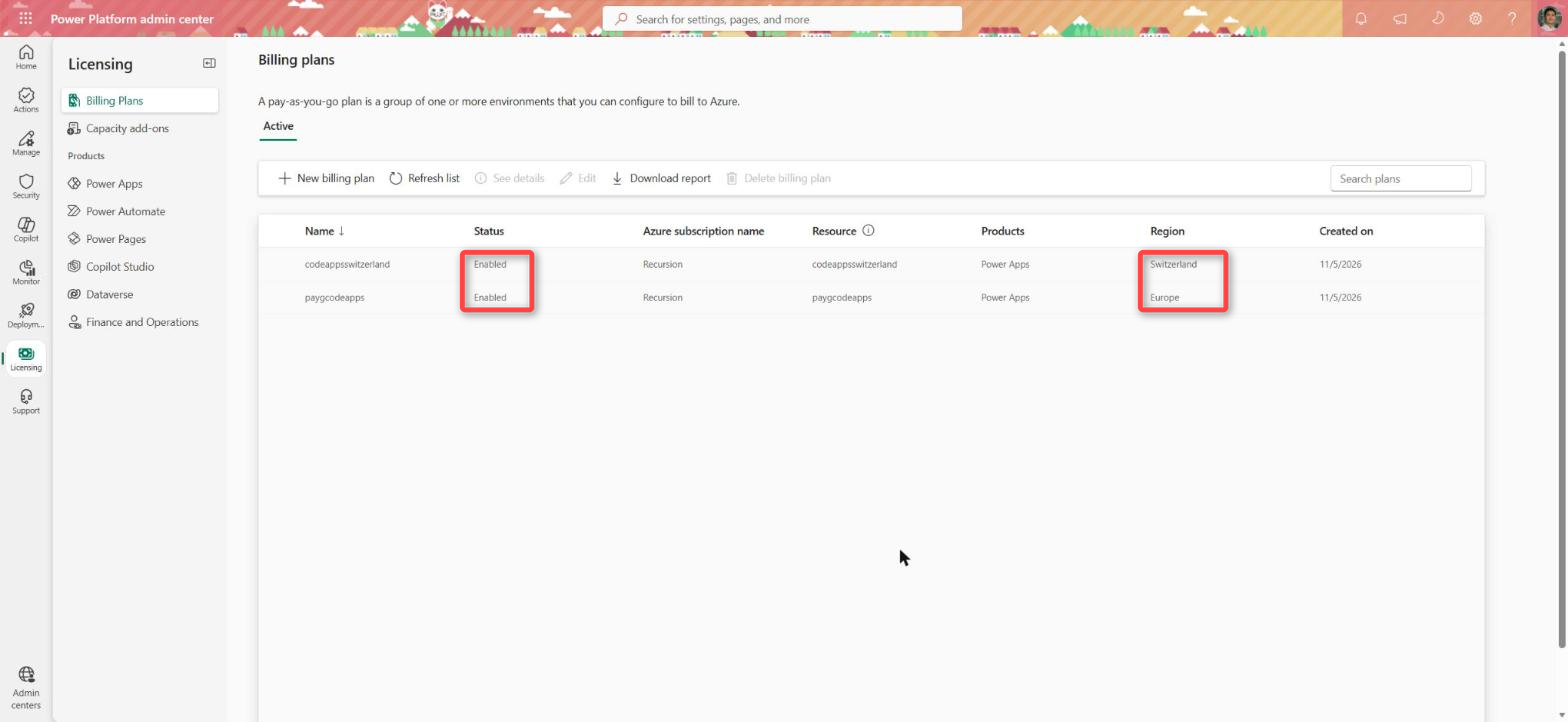
I first ticked only Power Apps, so that Azure would not bill storage. The plan was Enabled in the right region, and the environment pane still said “No billing policies available”. After I added the Dataverse meter to the plan under Edit > Meter, the plan appeared under Billing policy. The Microsoft documentation does not say that a plan needs the Dataverse meter to appear there. The Name field also dropped the hyphen (payg-codeapps became paygcodeapps), so choose a name without hyphens.
The Dataverse meter costs nothing until the environment uses more storage than a pay-as-you-go environment includes. The Microsoft documentation says the rates are:
- database storage above 1 GB: 48 USD per GB per month
- file storage above 1 GB: 2.40 USD per GB per month
- log storage, which is only used when auditing is on: 12 USD per GB per month from the first GB
An environment with 3 GB of database storage costs 96 USD a month for the 2 GB above the included 1 GB.
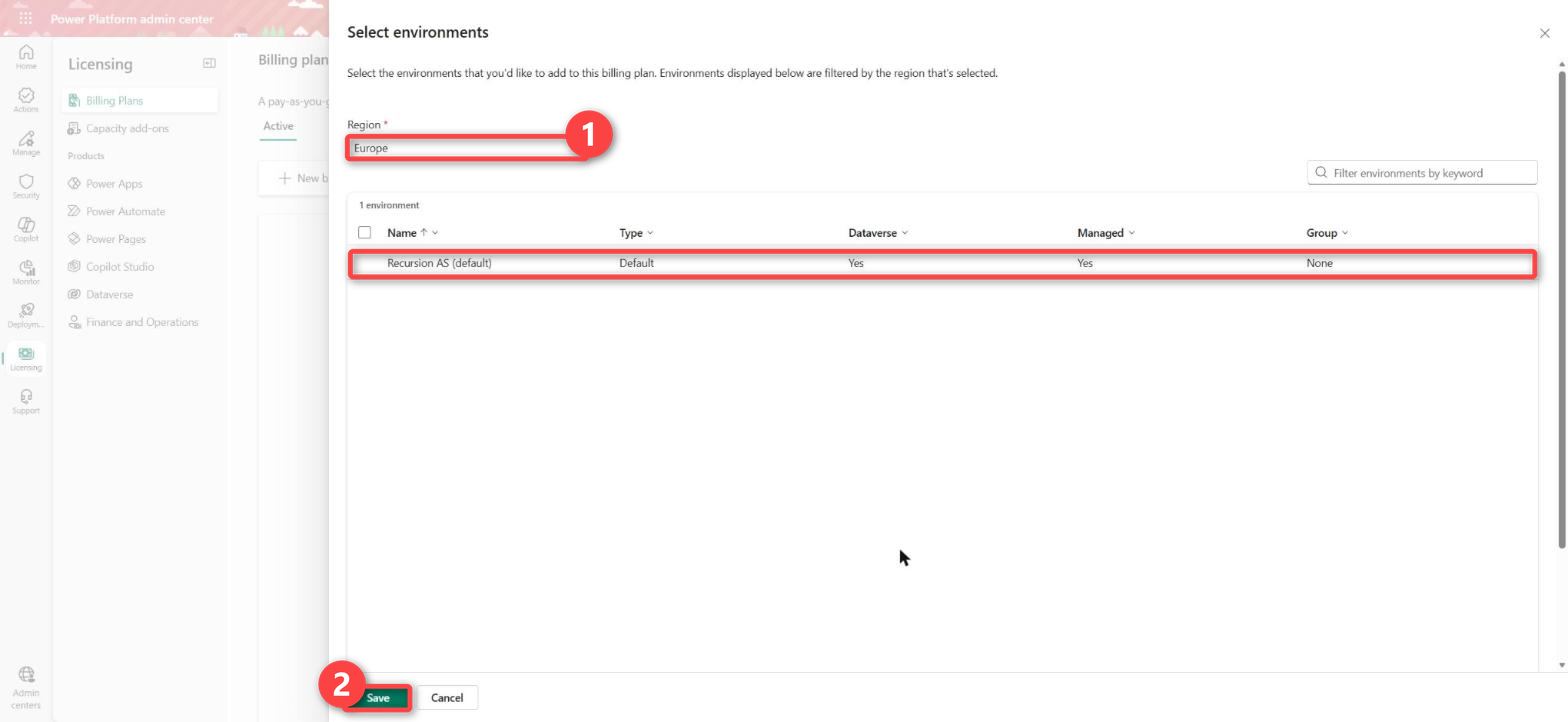
Select Next, set Region to the region you wrote down, tick no environment and select Save. You link the environment when you create it in the next step. Do not tick the default environment, because linking an environment turns on pay-as-you-go billing for every app in it (Learn documentation).
Wait until Status on the Billing plans page changes from Provisioning to Enabled.
Step 4. Create the environment with Dataverse and pay-as-you-go
The environment hosts the code app. Go to Manage > Environments > New and set:
- Type: Production. Pay-as-you-go is only available for production and sandbox environments (Learn documentation), so you cannot use a developer or trial environment.
- Macro Region Geography: the same macro region as in step 3.
- Add a Dataverse data store?: Yes, under Change default settings.
- Pay-as-you-go with Azure?: Yes, and then the billing plan under Billing policy.
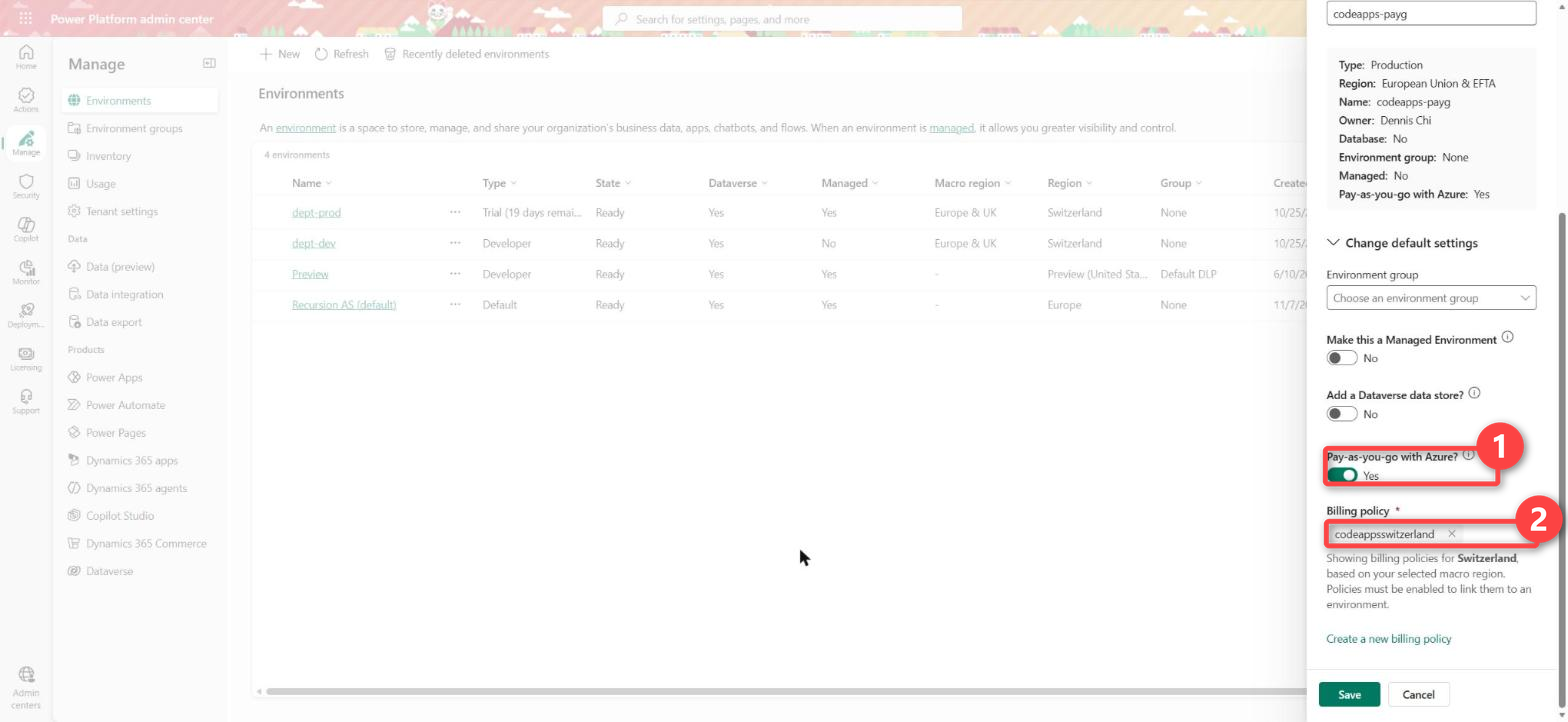
Set Add a Dataverse data store? to Yes, even when the app uses no tables. Without Dataverse the environment has no Settings, so you cannot turn on the switch in step 5.
In my tenant I created the environment without Dataverse. It had no Settings in its command bar, so I could not reach Enable code apps. I pushed a test app to it, and the pa CLI (Code Apps) answered “Dataverse is not enabled in this environment; pushing the app without a solution” and then HTTP 403 CodeAppOperationNotAllowedInEnvironment. The 403 message ends with “Please reach out to your environment admin to enable Code app operations.” I am the environment admin, so that did not help.
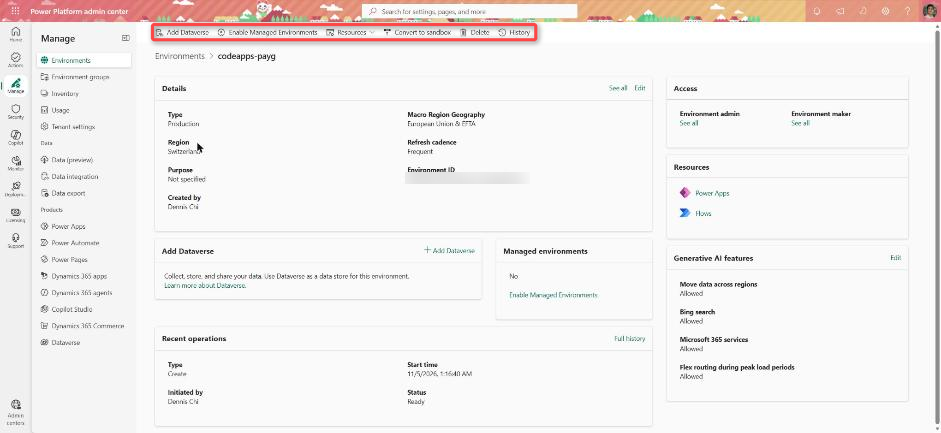
If your environment already exists without Dataverse, select Add Dataverse in its command bar. The pane also asks Enable Dynamics 365 apps?, and you cannot change that choice later.
After I added Dataverse to the pay-as-you-go environment, Settings appeared in the command bar and pa app push published the app.
The Microsoft documentation says you can publish a code app to an environment without Dataverse, and that it then goes in without a solution. In my tenant the pa CLI refused that push, because the switch was off and I could not reach it. The documentation also describes an environment group rule for code apps, and environment groups only hold managed environments (Learn documentation). I have not tested that rule on an environment without Dataverse.
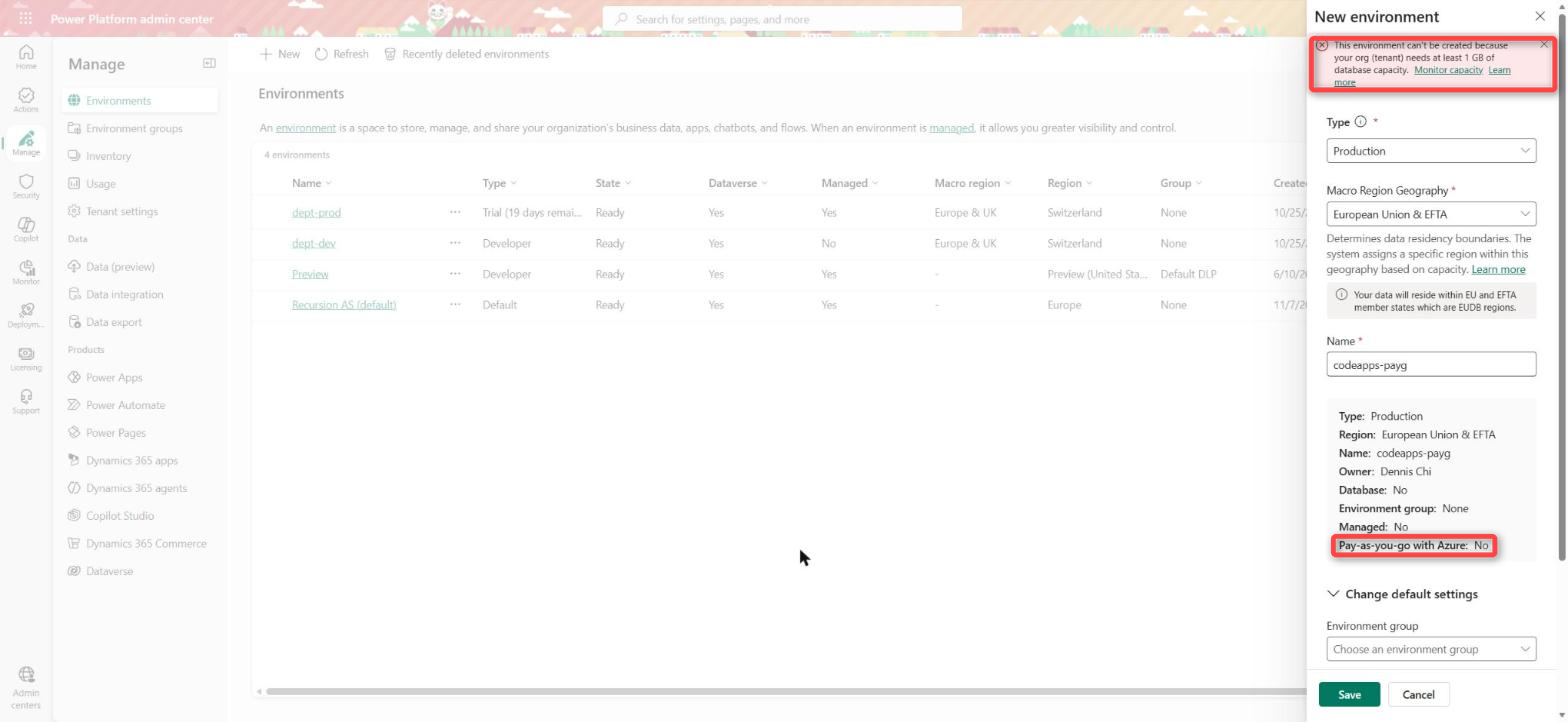
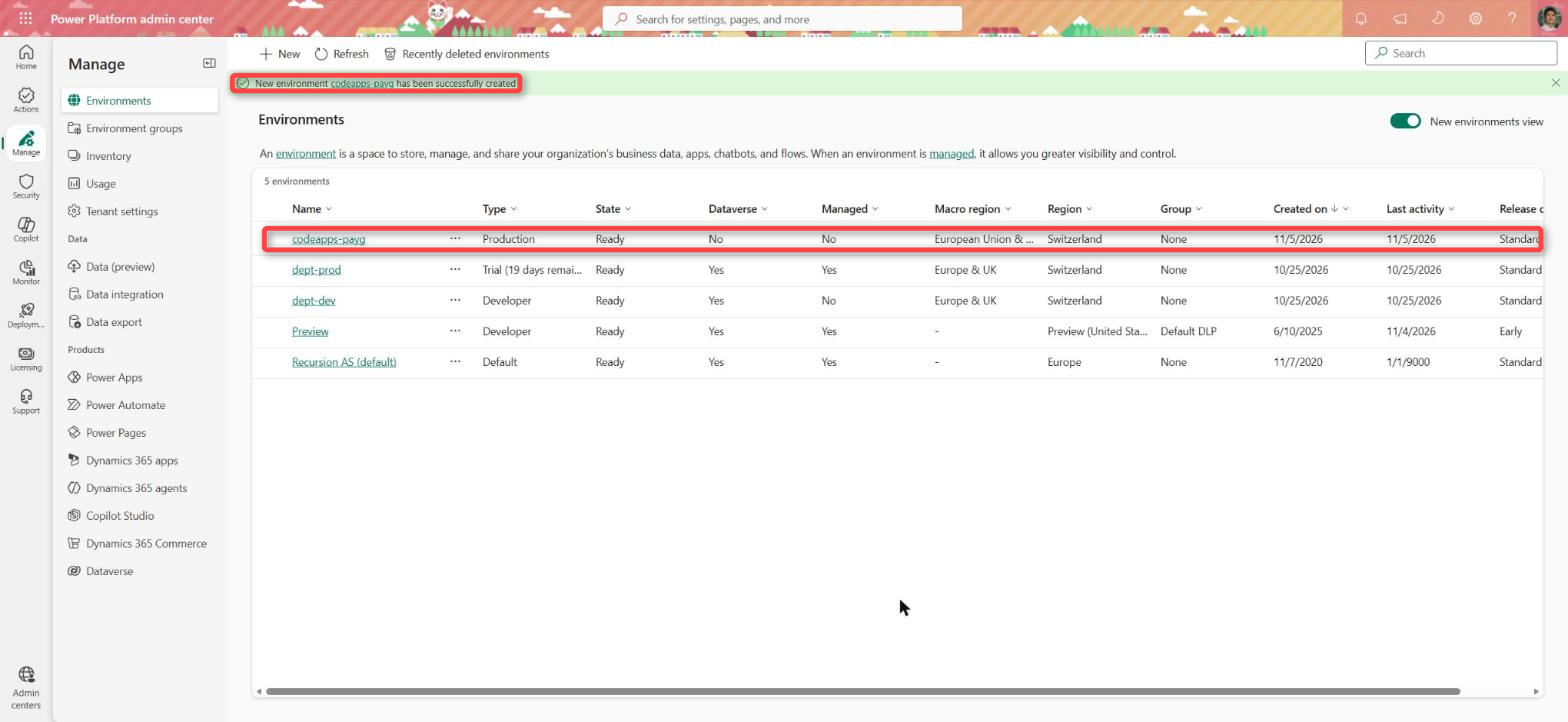
Without pay-as-you-go, Save failed with “This environment can’t be created because your org (tenant) needs at least 1 GB of database capacity.” My tenant has 0 MB of database capacity, and the Microsoft documentation says an environment needs 1 GB of available database capacity. With pay-as-you-go on and the billing plan selected, the admin center created the environment.
Step 5. Turn on code apps
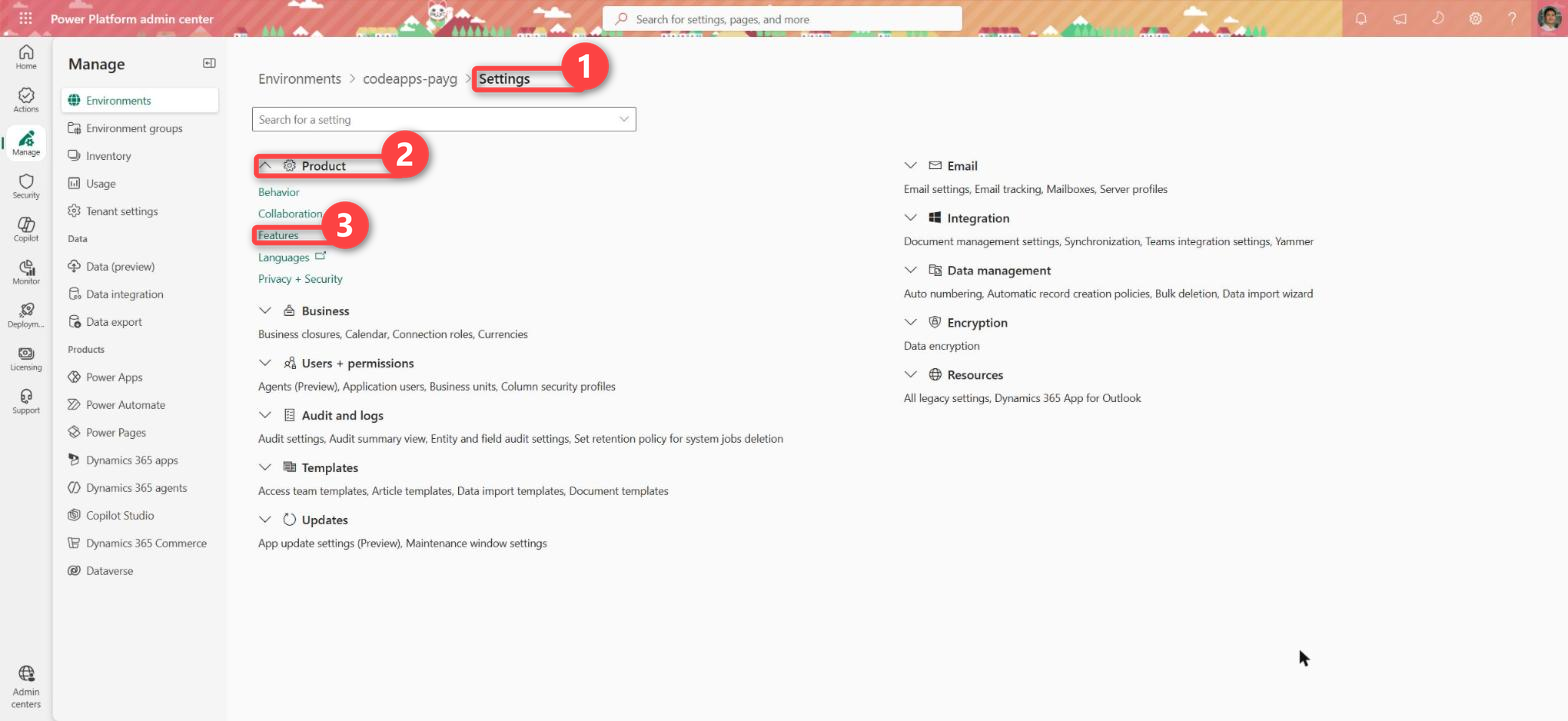
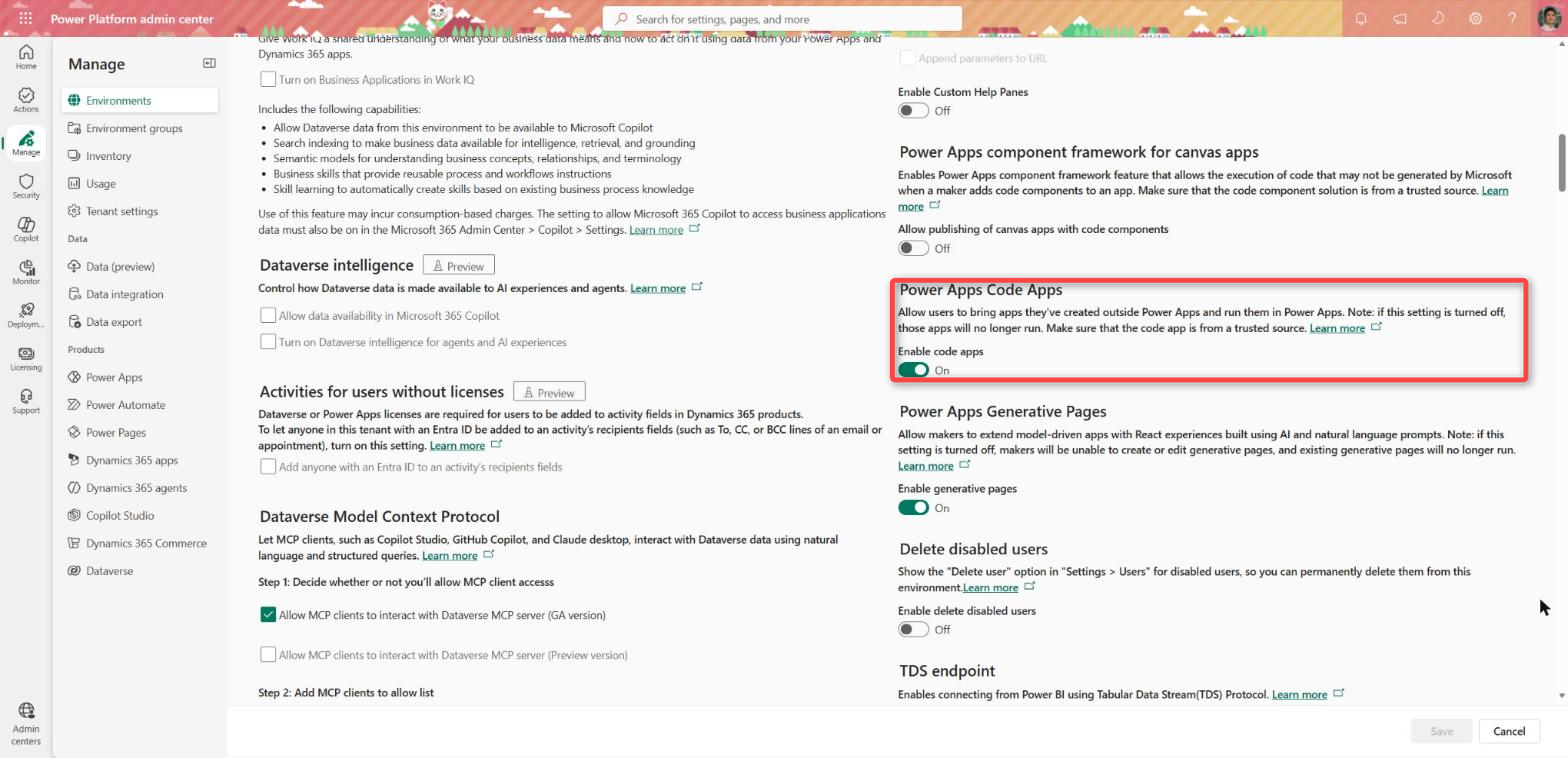
You can only publish code apps to the environment and run them in it when this switch is on. Go to Manage > Environments, select the environment, then Settings > Product > Features, turn Enable code apps on under Power Apps Code Apps and select Save.
Step 6. Check the billing resource in Azure
Azure Cost Management shows the charges on the Power Platform account resource that the billing plan created. Open the resource group from step 2 and select Manage view > Show hidden types. Each billing plan has one resource of the type Microsoft.PowerPlatform/accounts with the plan’s name.
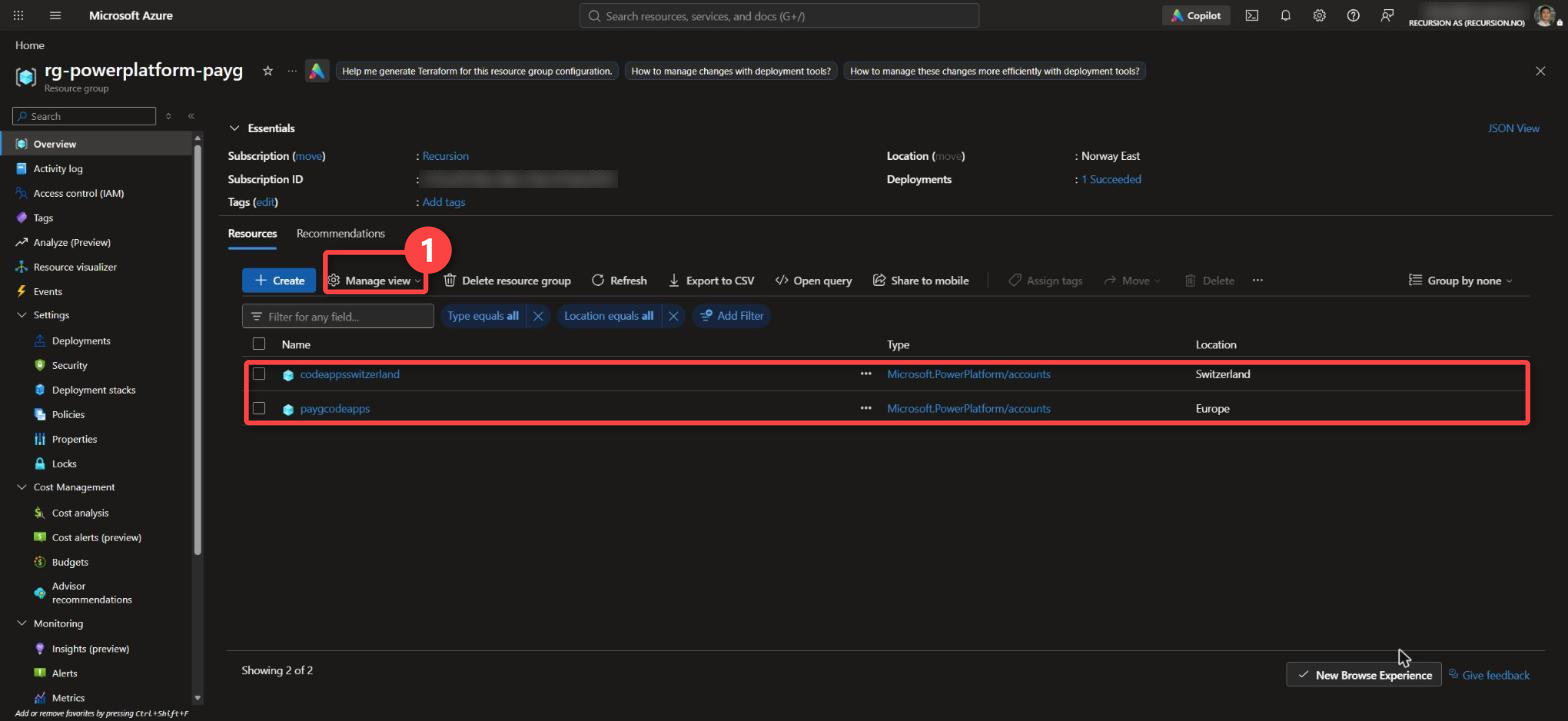
Licensing checks before the first user opens the app
Before you calculate what the app will cost, list which of the users already have Power Apps Premium. A pay-as-you-go environment ignores app passes assigned to it and does not consume them (Learn documentation), so move them to another environment if you have any.
Check the auto-claim policy as well, because auto-claim comes before pay-as-you-go. Auto-claim gives a user without a licence a Power Apps Premium licence from the tenant’s pool when the user opens a premium app, if one is free (Learn documentation). A user with that licence is no longer counted by the pay-as-you-go meter (Learn documentation). If you want the app use billed through Azure, limit the policy to managed environments or turn it off (Power Platform admin center > Settings > Auto-claim policies, and the policy itself in the Microsoft 365 admin center > Billing > Licenses > Auto-claim policy).
What I have not tested yet
After adding Dataverse I pushed a test app, shared it with one user without a licence and one user with a Dynamics 365 licence, and both users opened the app. I have not tested:
- Whether the pay-as-you-go meter counts a code app. The Microsoft documentation describes the Power Apps per-app meter for canvas and model-driven apps. The code apps overview documentation says pay-as-you-go is an option for users.
- Whether the meter counts the user with a Dynamics 365 licence.
- The usage report under Billing Plans > Download report, and the charge in Azure Cost Management, which the Microsoft documentation says can take up to 24 hours to show up. The report I downloaded the same evening had no rows.
To stop pay-as-you-go billing, remove the environment from the billing plan or delete the plan. Deleting the plan does not delete the Power Platform account resource in Azure, so delete that in the Azure portal afterwards (Learn documentation).
Leave a Reply