Power Automate: Working with GraphQL API and getting Cloudflare traffic notifications
GraphQL is a powerful query language that enables developers to easily access and edit API data. With the help of nice little features from API tools like Postman or Insomnia – it is also possible to use GraphQL API to automate workflows and processes in Power Automate. This article will provide an overview of how you can make GraphQL API requests in Power Automate and parse its responses with an HTTP-action intended for (but not limited to) REST API.
For the demo purpose, I will extract traffic information from my site through my CDN provider Cloudflare and send me a notification on my phone when it has reached an all time high value of visitors.
The problems we are solving in Power Automate:
Learn how to work with dynamic values in Power Automate and GraphQL requests.
Get to know how to extract stringified JSON payload (raw GraphQL query string) through Insomnia or Postman and use it as a template for HTTP actions in Power Automate.
Prerequisites:
Power Automate Premium license to use HTTP-actions
Insomnia client application or Postman client application to work with GraphQL API.
Access to a GraphQL API that you can send request to.
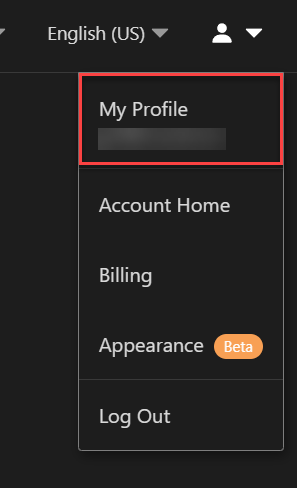
In this demo, I am going to fetch a summary of web-traffic from Cloudflare and push out a notification when it is at its record high to my cellphone. To start, I first need to setup my existing Cloudflare API access for my website along with a token I can use. For this I start with logging in to my Cloudflare account and navigate to my Profile Account settings:
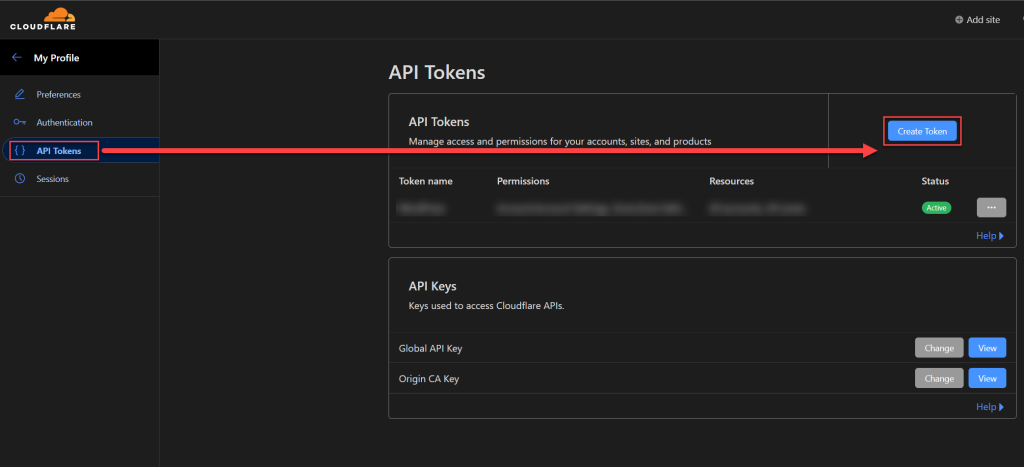
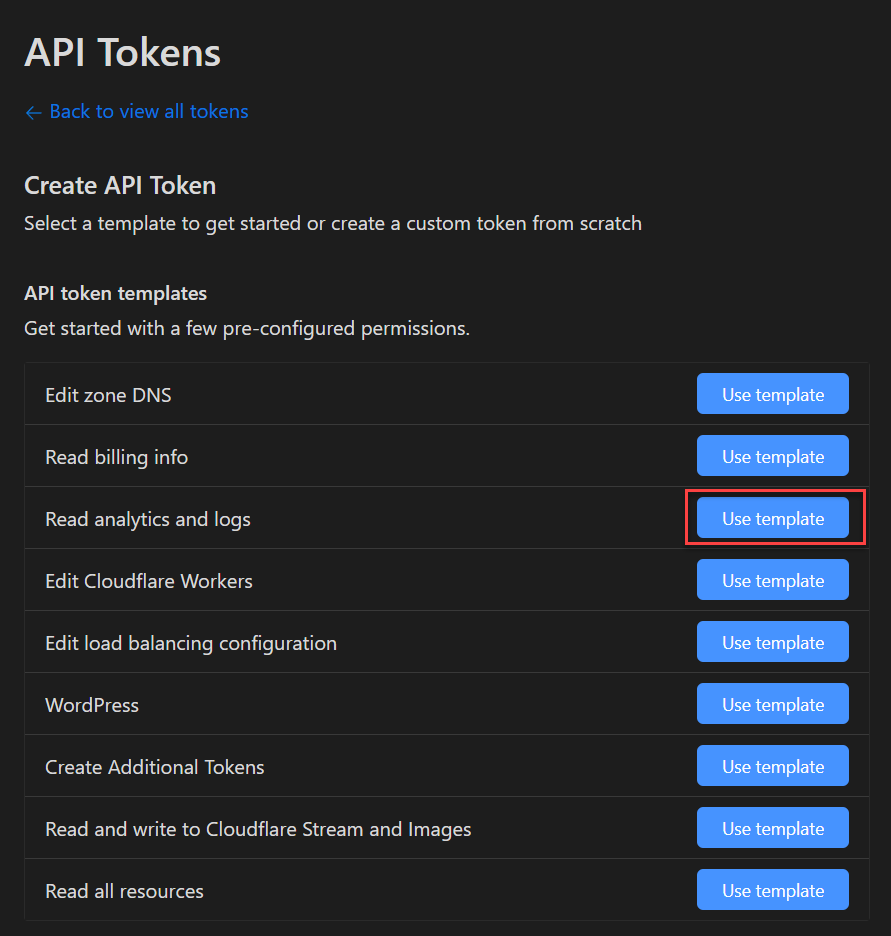
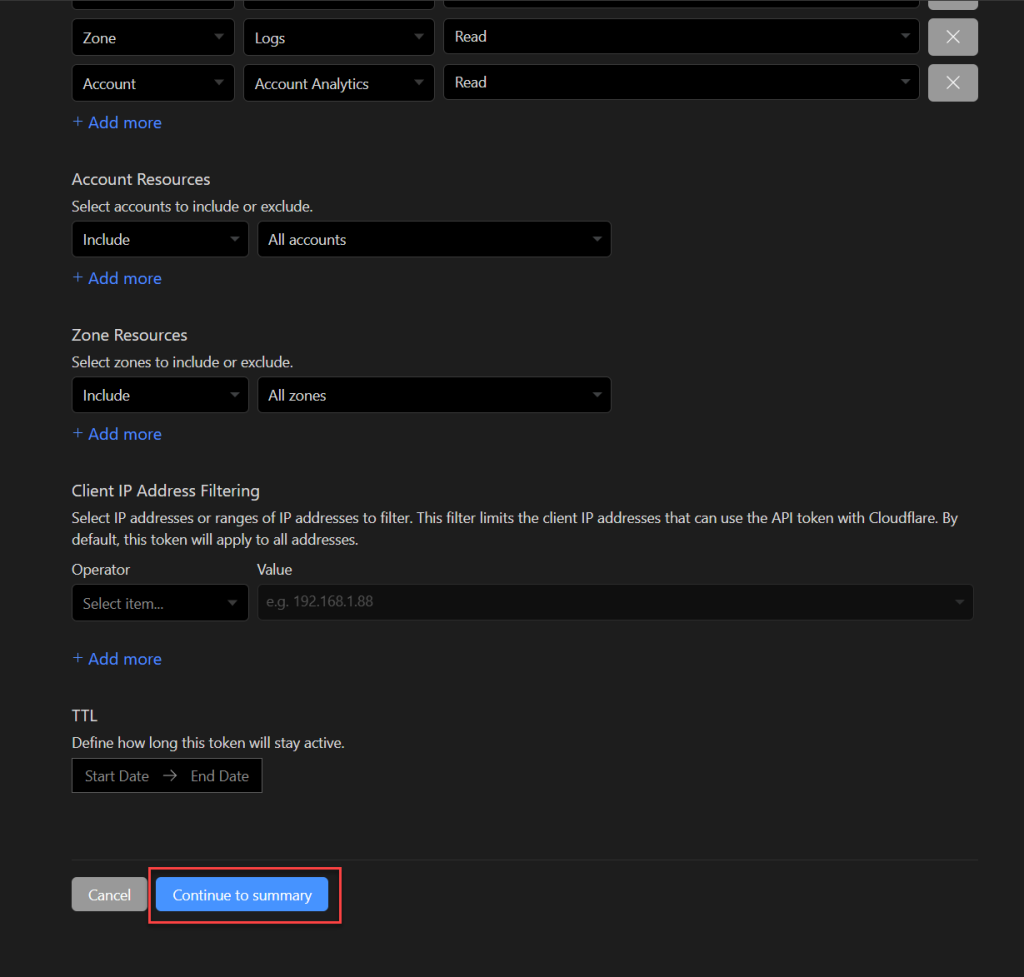
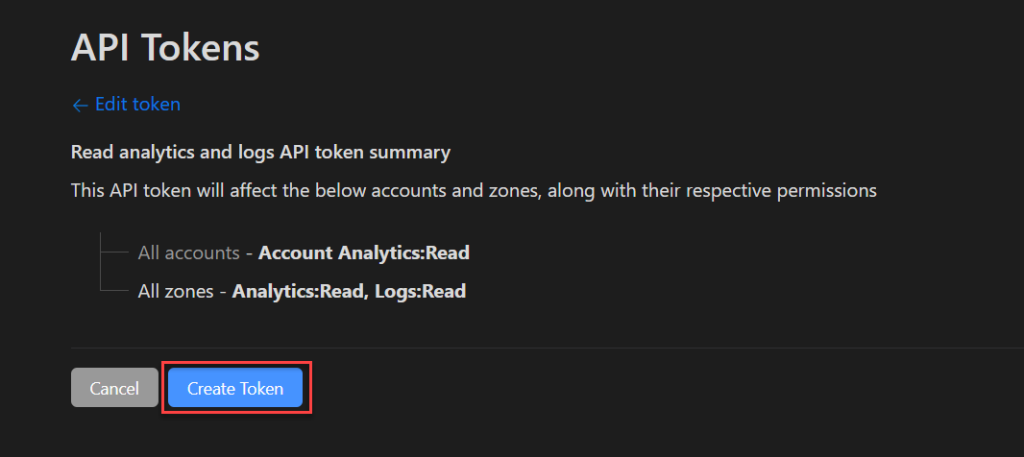
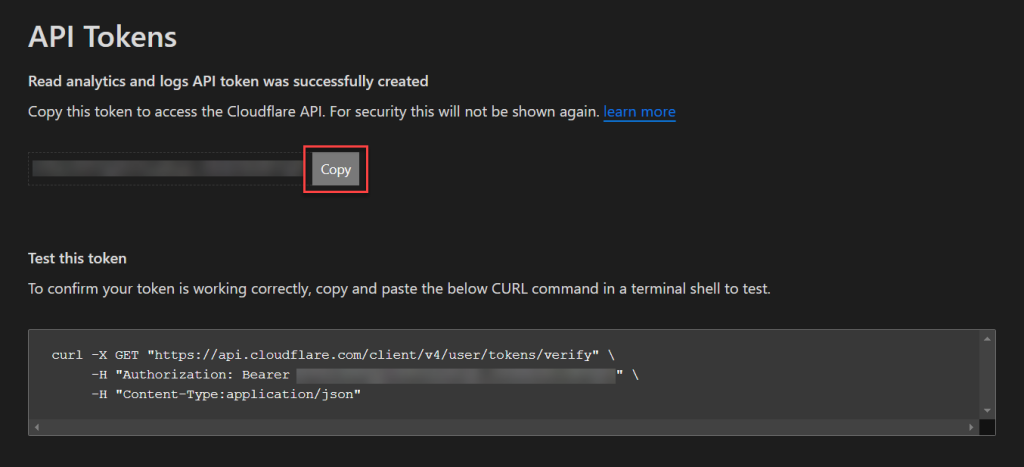
Navigate to “My Profile” to configure your API-accessClick on “API Tokens” and “Create Token“In this scenario, I will restrict our API access to only read analytics and logs from my Cloudflare account. Click on the “Use template” button related to your preferred access for the API tokenReview the access and restrict if necessary, scroll down and click on “Continue to summary“.As a last step click “Create token”.Now, copy the API token and store it somewhere safe and accessible for later use. If you know me by now, I prefer to store it in an Azure Key Vault.
Building our GraphQL query and getting the raw request payload as string
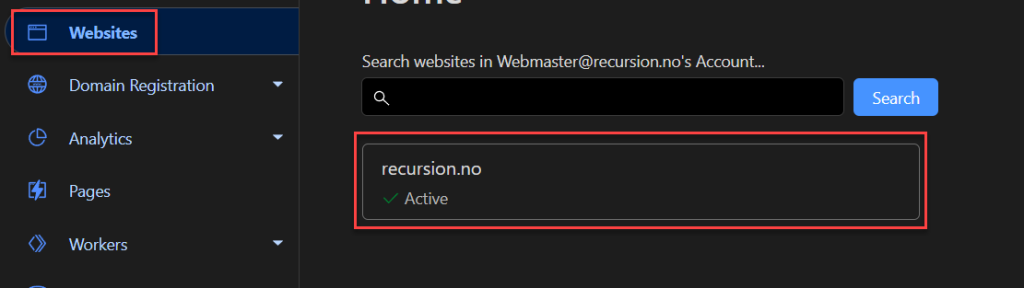
For this part I am going to use my preferred API platform Insomnia. I will also show the Postman method to get the payload as well. But first, head over to your websites overview section.
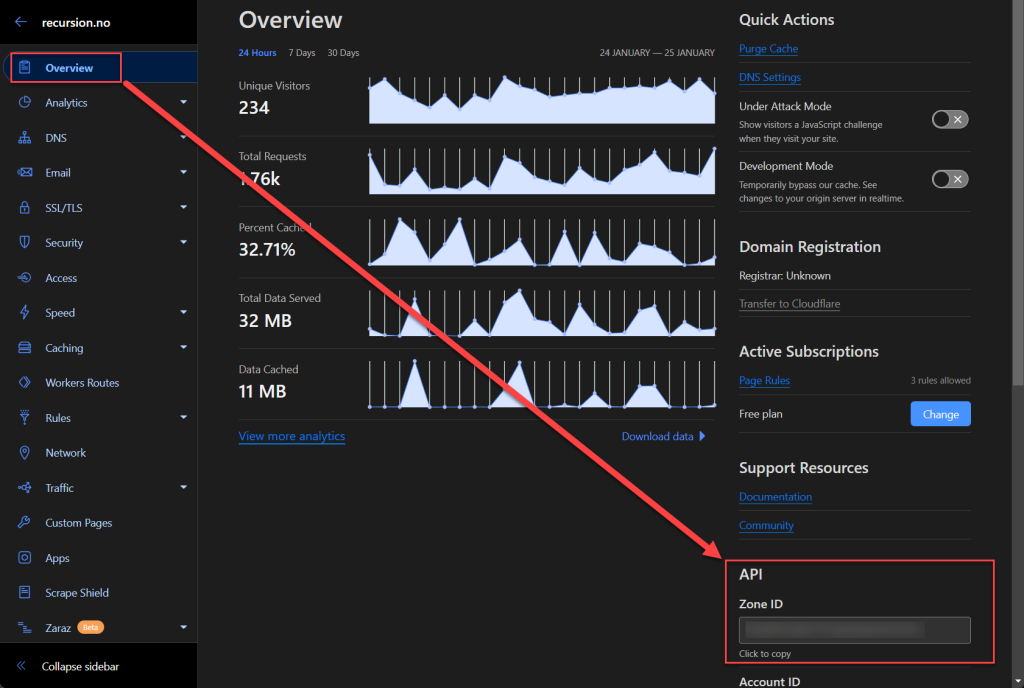
On the main page, head to the “Websites” category and click on your active website.On the Overview page, look to the lower right corner of the page and look for your Zone ID. This will be used later on as part of the GraphQL query – so keep the value as a copy if you can.
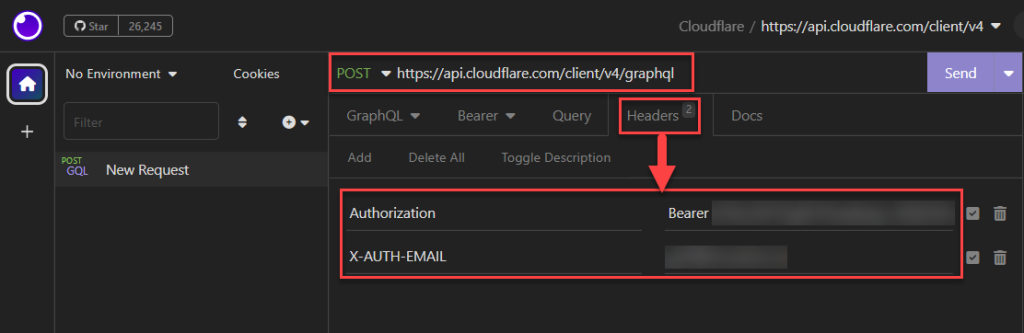
Now, in order to be able to query requests, Cloudflare requires two headers included. Below is the query details:
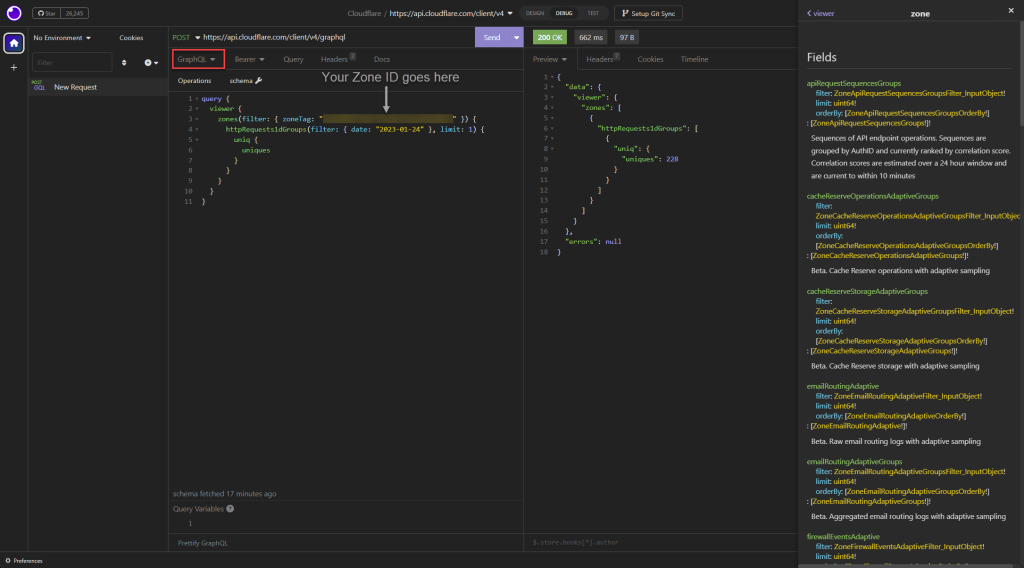
To start composing the body I click on “GraphQL” as format, then I start writing the query based on the schema documentation to the far right, I then test it by sending a request – and if done correctly – it should give me a response with the value I’m looking for.
Now create your request, below is the query syntax for unique visitors.
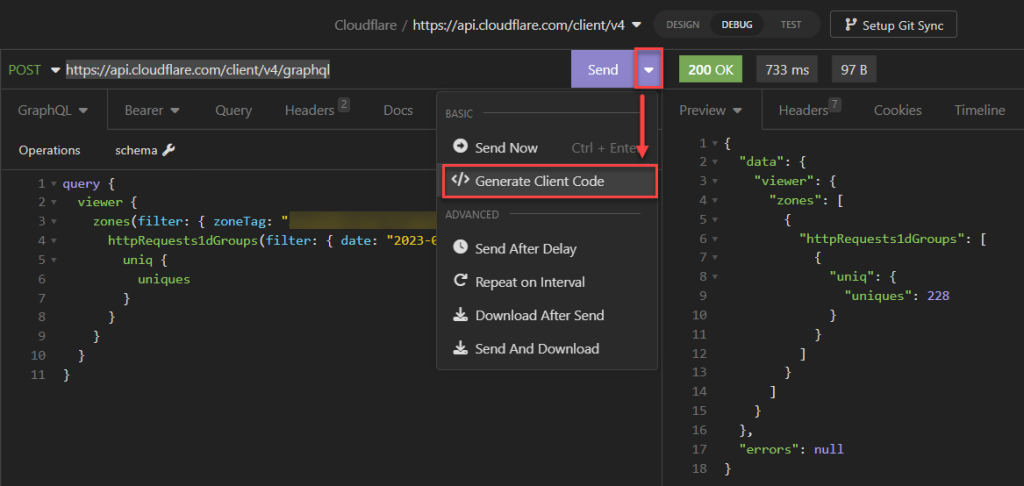
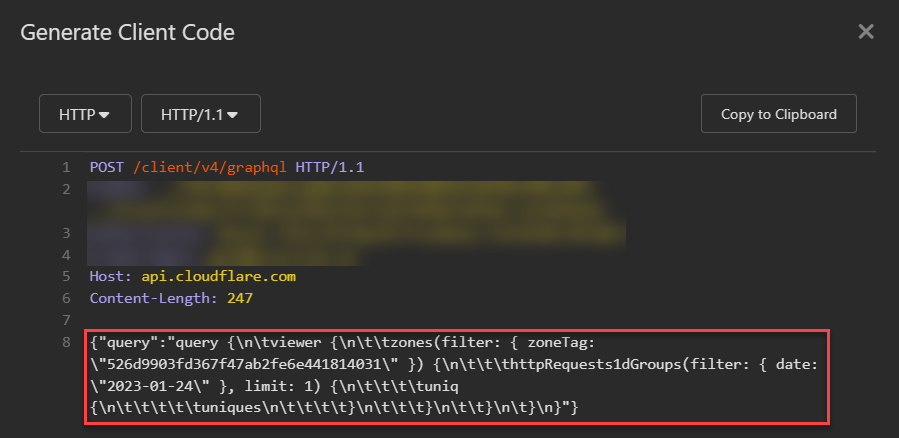
Now that we’re done with building and testing the query, select the down-arrow and select “Generate Client Code“Copy the white lines (the stringified JSON body that we just built)
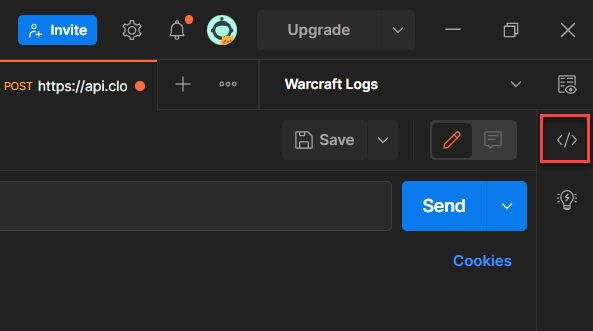
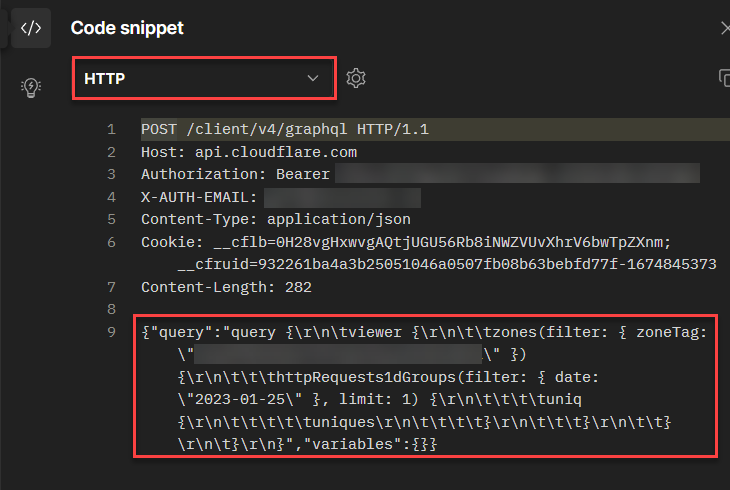
Here’s the Postman equivalent method to extract the same JSON body:
Click on the “code” icon in upper right corner of Postman interfaceSelect “HTTP” on dropdown menu and copy the query body.
Great! We got the necessary information we need, lets head to Power Automate and create our notification flow!
Create a scheduled Power Automate flow to notify record high visitor counts
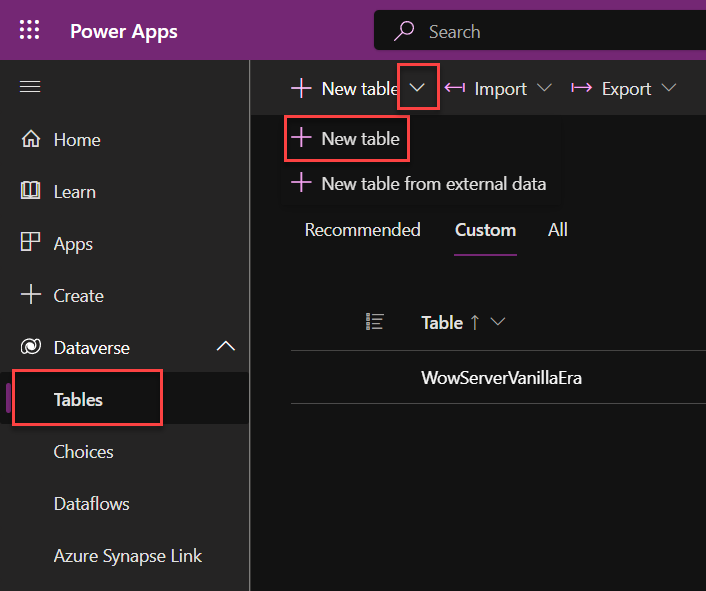
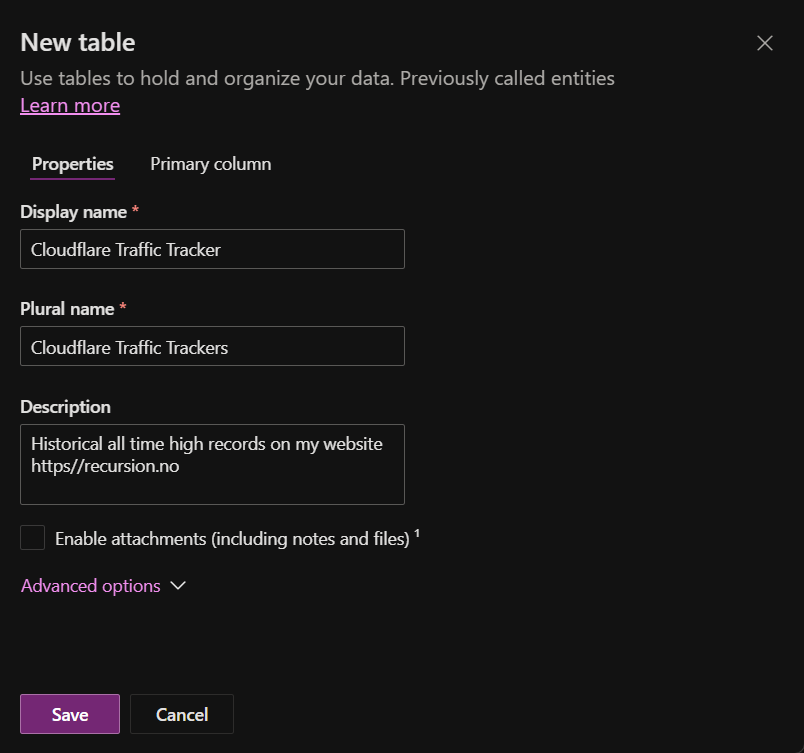
Now to prepare our Power Automate flow, I want to include a Dataverse table that the flow can use to track previous data and store new data from our , each time it runs. I basically want it to be a log it can lookup previous data records and compare before sending me a new notification.
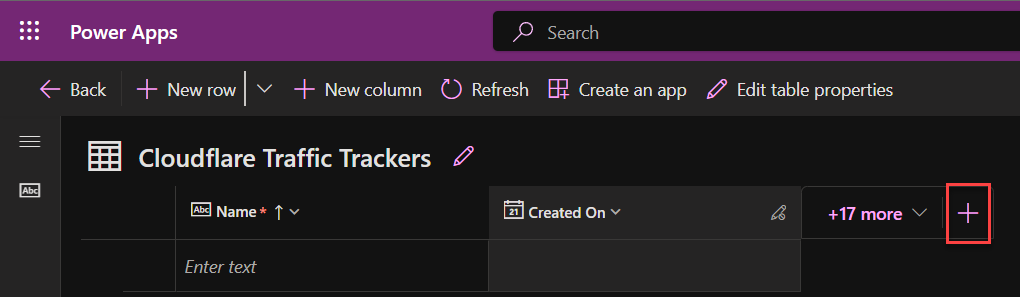
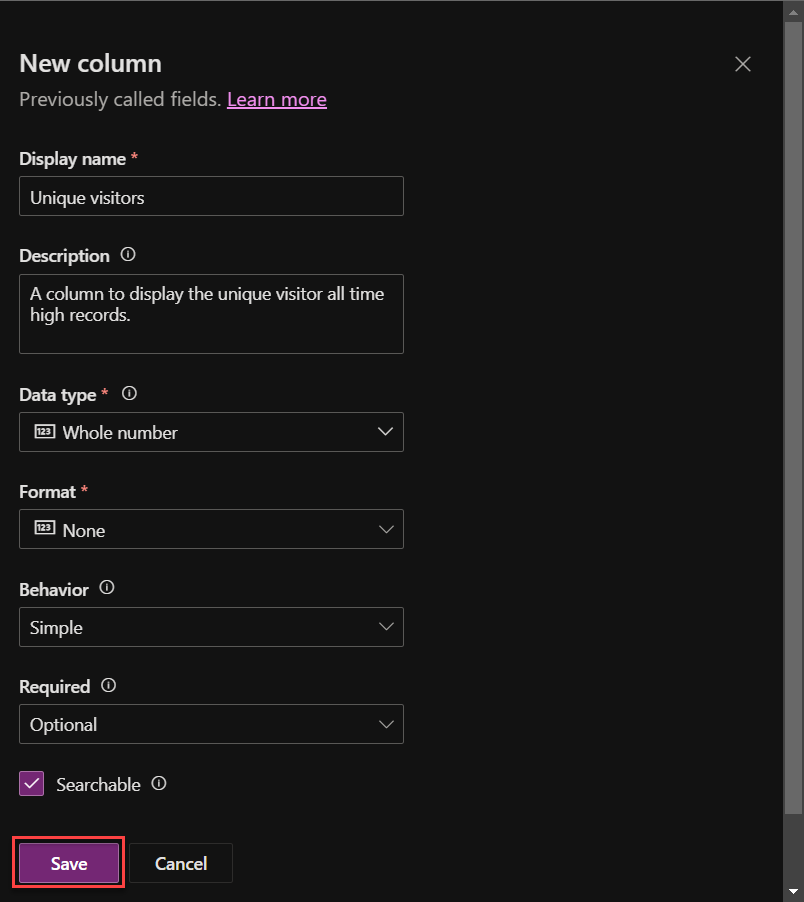
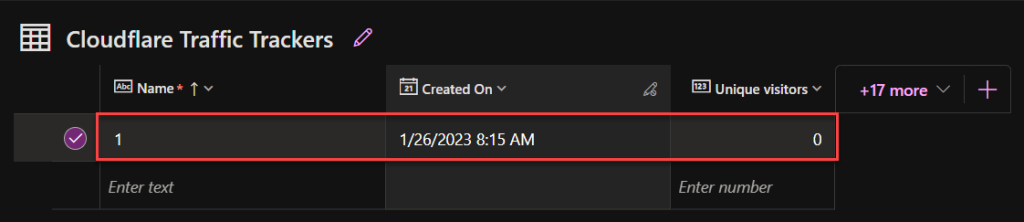
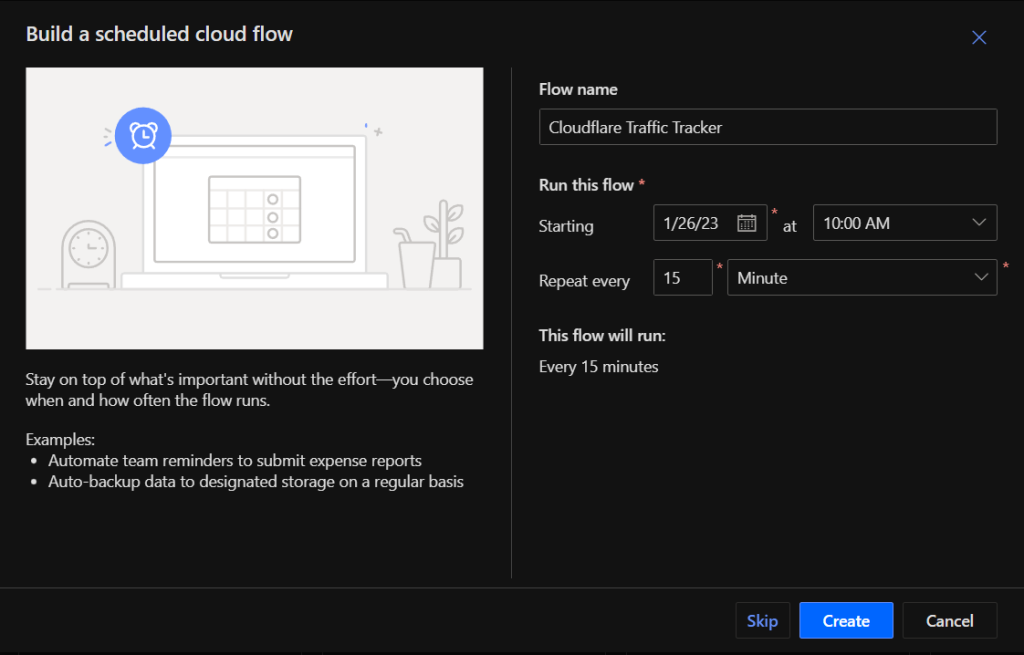
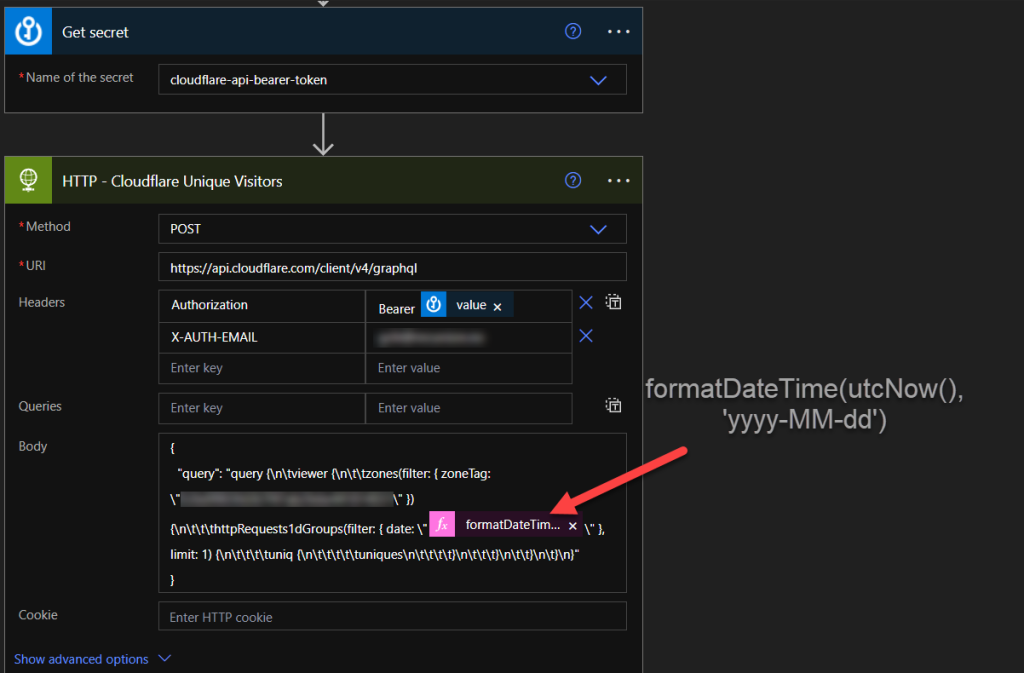
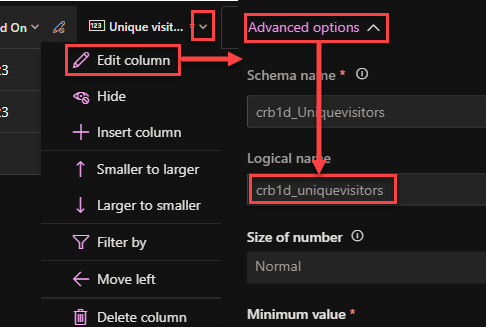
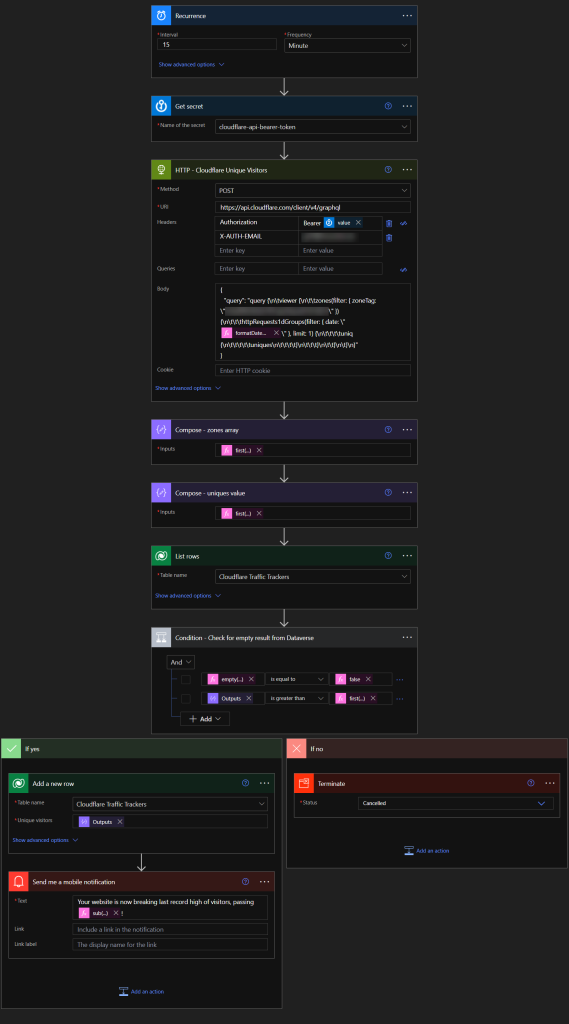
I’ll create a new table (exclusively through the Power Apps portal, as it is redirected from the Power Automate portal)Give the table a suitable name and click on “Save“Now add a new column for our unique visitor counterNow fill out the column details and change it to integer value, click on “Save” when you’re done.We also want to create an initial row so our flow can compare and run the first time using dummy data. Go to Power Automate and create a scheduled flow that triggers with your preferred intervals. In my case I chose every 15 minutes. (Now we are also going to build logics that prevents notifications more than once a day – so don’t worry, we’re not going to get spammed).The first action I will start with is the “HTTP” action reflecting the values from Cloudflare. Since I also took the time to store my token from Cloudflare in my Azure Key Vault, I am also passing it to the Authorization header from the “Get secret” action. Copy and paste in the same headers and raw JSON body that we fetched from our API client and replace the date field to reflect a dynamic value based on today’s date.
Today’s date:
formatDateTime(utcNow(), 'yyyy-MM-dd')
Run the flow once from here on so that we can examine the response payload.
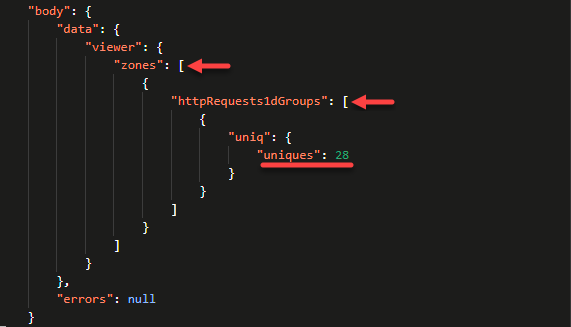
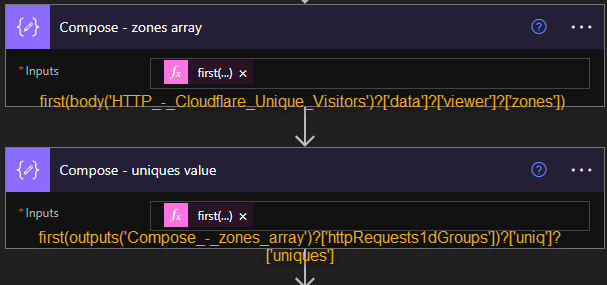
Since our response gives us the “uniques” value nested in two arrays with only one object represented, I want to parse through the JSON arrays to extract this value. To achieve this, I am simply going to use two “Compose” actions to target the “uniques” value.
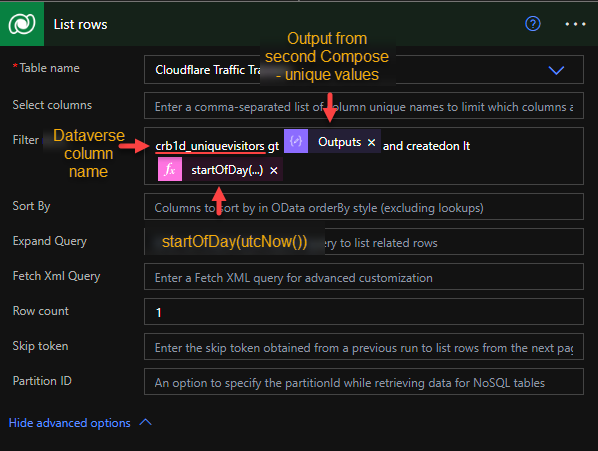
Great! Now that we have extracted the unique visitor value to the second compose action, we can focus on the Dataverse row filter to check if there are any records from the past with a value greater than our current unique visitor value. If there are no previous records higher than our current value, then we should check if there have been any values recorded for today’s date. <- this last logic will be used to check if I’ve already received a notification today, and if so – don’t send me another one for the rest of the day.
Add a “List rows” action for Dataverse. For “Table name” field, select the Dataverse table that we created earlier on. In the “Filter name” field – identify your Dataverse column’s logical name first, then paste in the syntax:
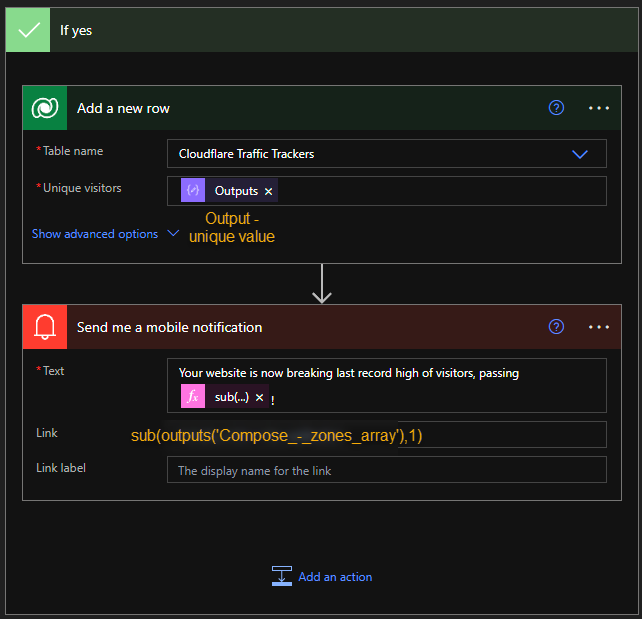
In the Yes-branch add two actions, “Add a new row” action with the “Output – unique visitors” value and “Send me a mobile notification” action with your custom message. If you’re curious about it, my message is set to the following:
Your website is now breaking last record high of visitors, passing @{sub(outputs('Compose_-_zones_array'),1)}!
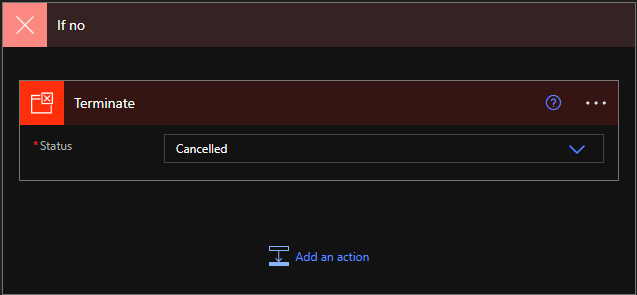
In the No-branch, add a “Terminate” action and set the “Status field” to “Cancelled“.
Congratulations! We’ve now setup a notification flow for my website whenever I get a record high visitors! 😂
Summary
Through this demo, we’ve learned how to create an integration to Cloudflare’s GraphQL API by using Power Automates HTTP-action.
We’ve also had some hands on experience working with some complicated and nested values from the response and dig through the response payload to get our values by using the Compose actions with custom PowerFx formulas.
Last but not least, we’ve learned how to filter our Dataverse table by using multiple conditions to return specific row items when matched, and used a condition action to limit the notification triggers.


Leave a Reply