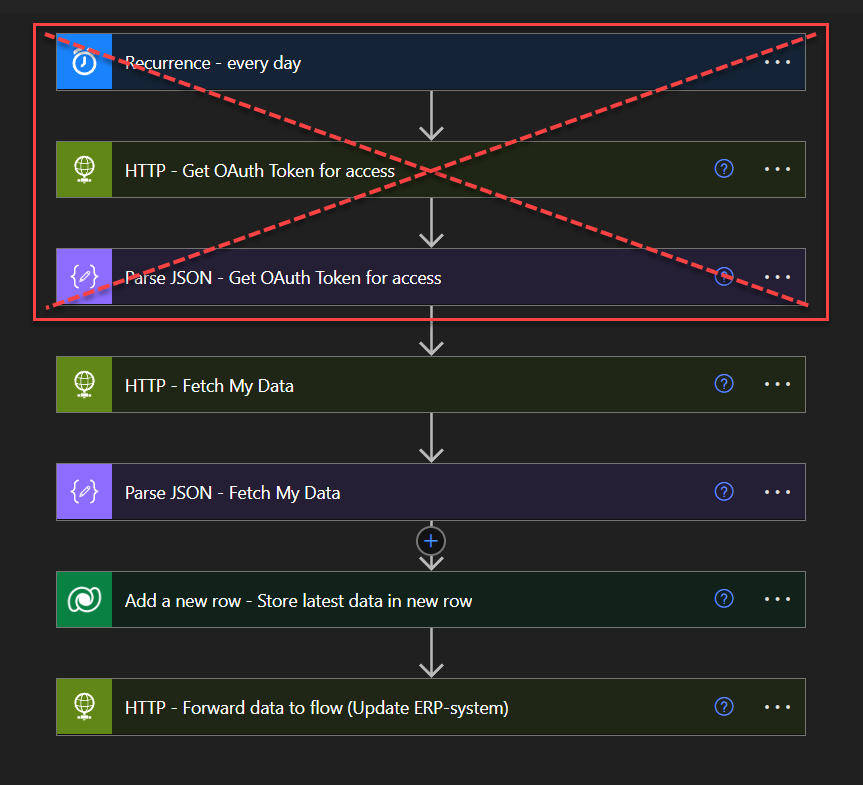
In many Power Automate solutions, it’s common to see API credentials being fetched at the start of the flows – like client IDs and secrets exposed within HTTP actions. While this might be a quick setup, it poses some security risks and can lead to developers using it in an insecure environment. Also, if one single Power Automate flow is configured to authenticate every five minutes, 24/7, it results in 288 unnecessary actions per day just for retrieving and parsing a token. This can quickly consume your “Actions per 24 hours” limit, as outlined in Microsoft’s documentation.
A more secure and efficient approach is to have one Power Automate flow with integration to update Azure Key Vault based on its token lifetime dynamically. By storing your API credentials securely in Azure Key Vault, you can safeguard sensitive information while also enabling automatic token renewal. This ensures your tokens are updated seamlessly without manual intervention, reducing the risk of credential exposure and minimizing management overhead.
In today’s blog post, we’ll guide you through setting up a Power Automate flow that automatically renews an OAuth token using Azure Key Vault. We’ll show you how to securely store your client ID and client secret in Azure Key Vault, then use Power Automate to retrieve and renew the token based on its expiry date. This approach is particularly useful for teams managing multiple APIs, as it streamlines credential management and enhances security.
What this topic will go through:
- How to create a scheduled Power Automate flow that updates a Key Vault secret, such as an OAuth token, when it nears expiry.
- How to securely store and manage your API credentials in Azure Key Vault, protecting client IDs and secrets.
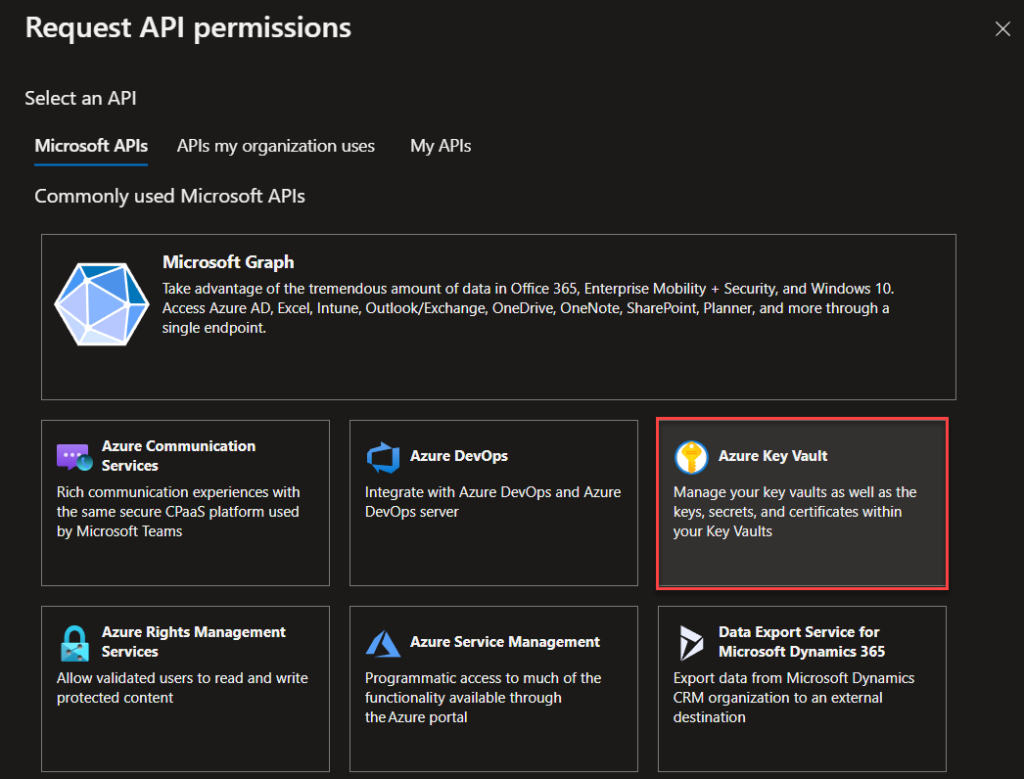
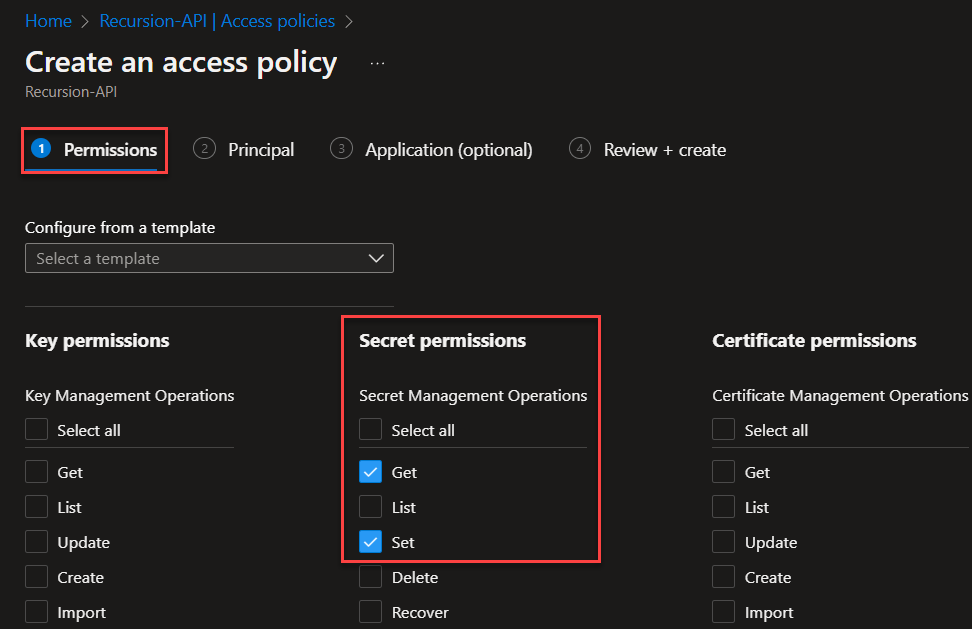
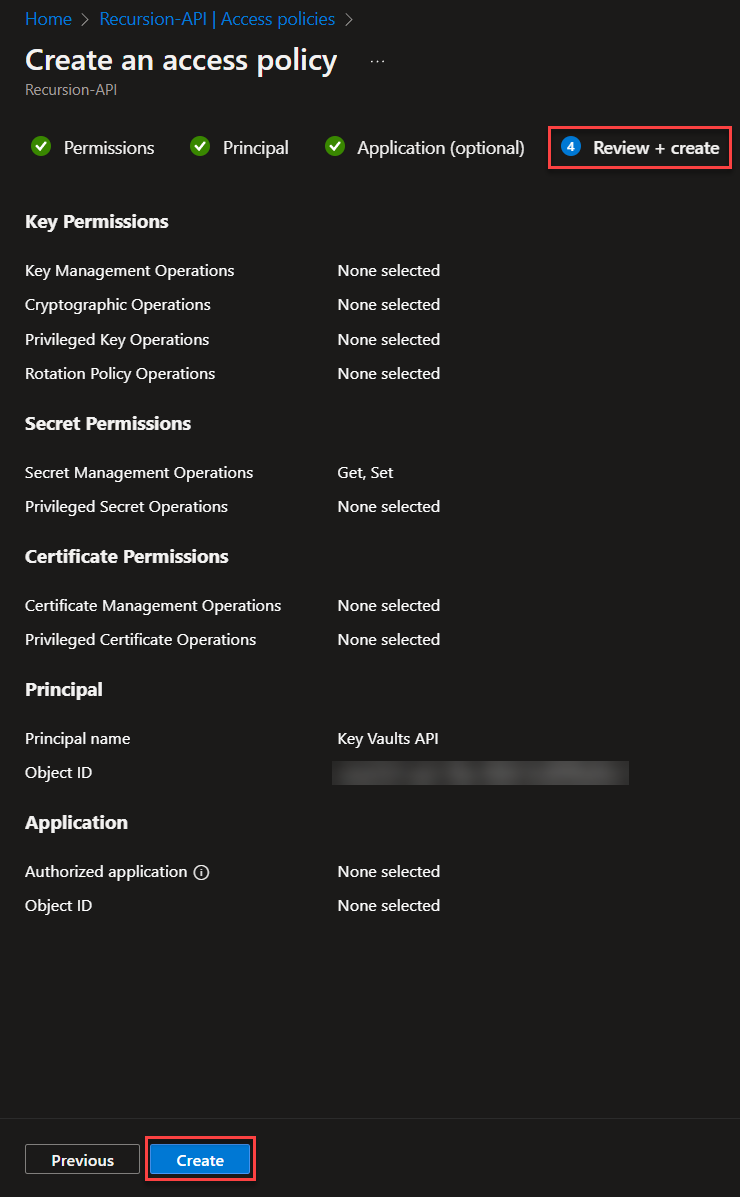
- How to create and configure an Azure AD App registration to securely manage access to Azure Key Vault, allowing Power Automate to retrieve secrets or make HTTP calls for token renewal.
Prerequisites:
- Access to create and manage Azure Key Vaults.
- Access to create and manage Azure App registrations.
- A Power Automate Premium license to use HTTP actions.
This guide is designed to work with any API, so feel free to follow along using your preferred service. For this example, we’ll use the Discord API:
- Discord Developer Portal — OAuth2 Documentation for authentication.
- Discord Developer Portal — Reference Documentation for other operations.
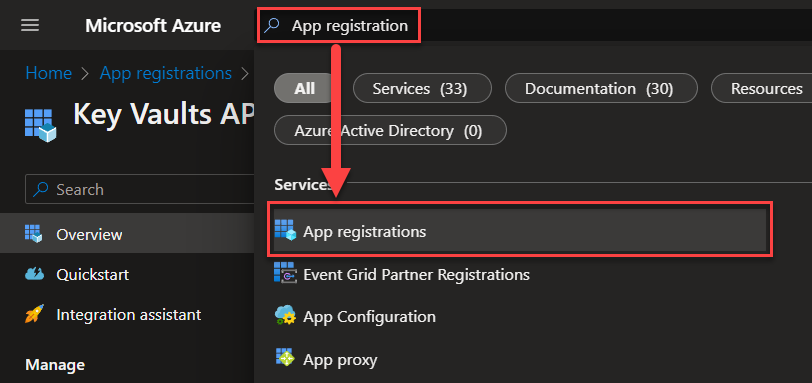
Getting Started: An Introduction to create Key Vaults for Beginners
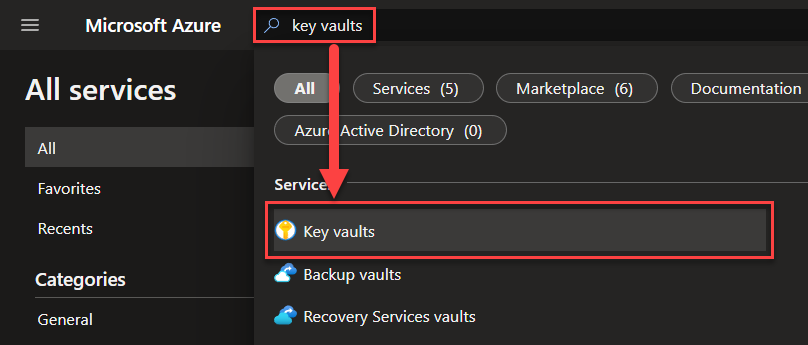
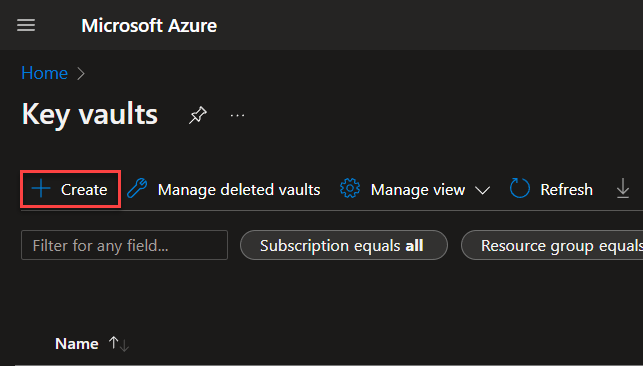
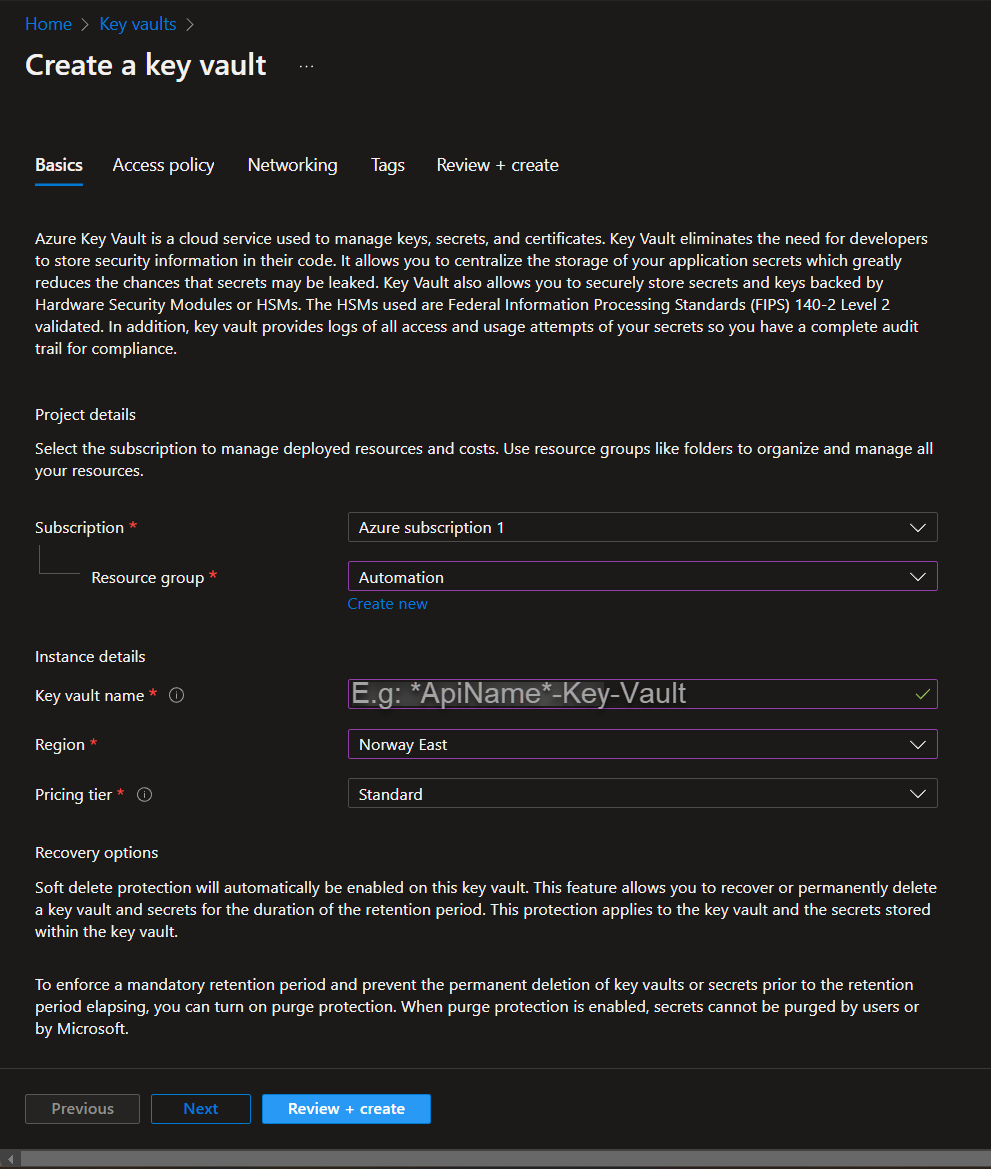
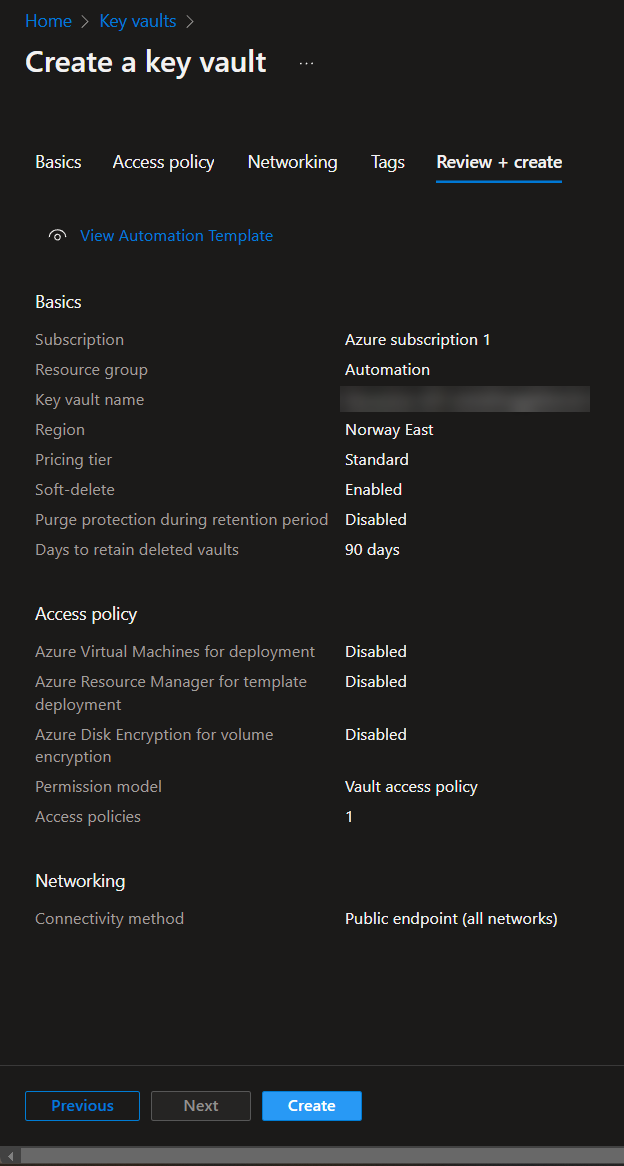
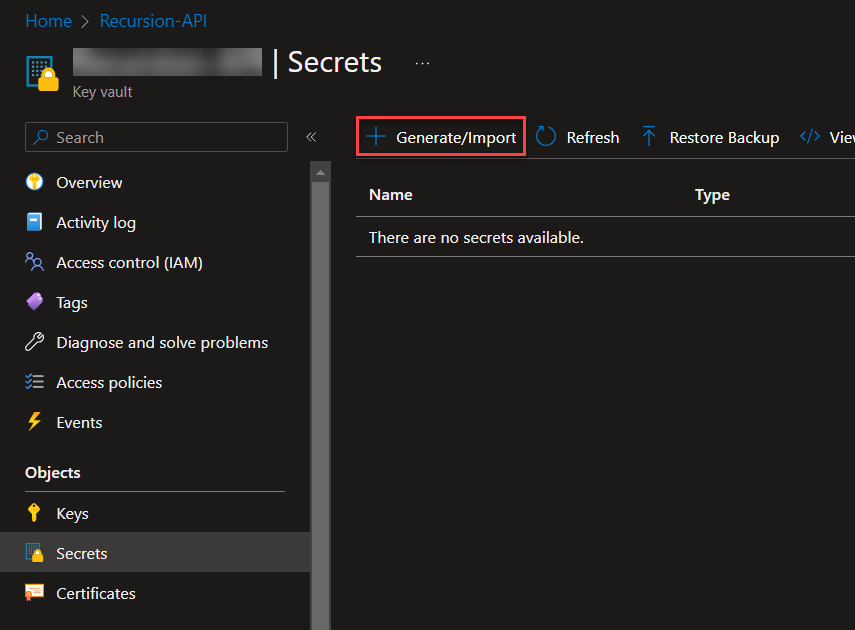
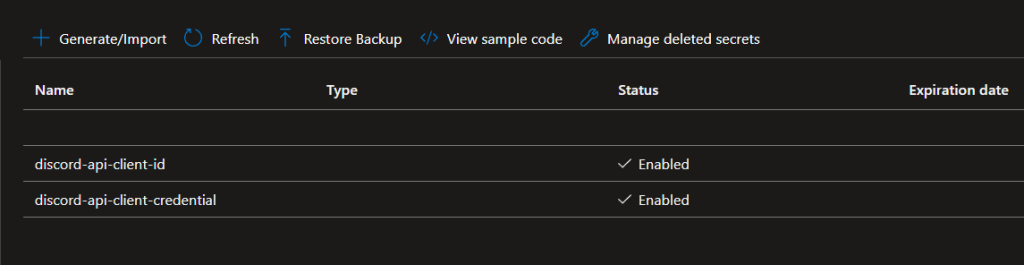
Lets start with creating an Azure key vault, with two key vaults secrets. Make your way and login to the Azure portal (Microsoft Azure) and follow below:
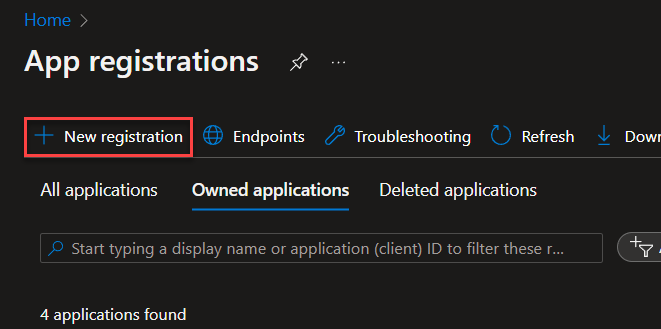
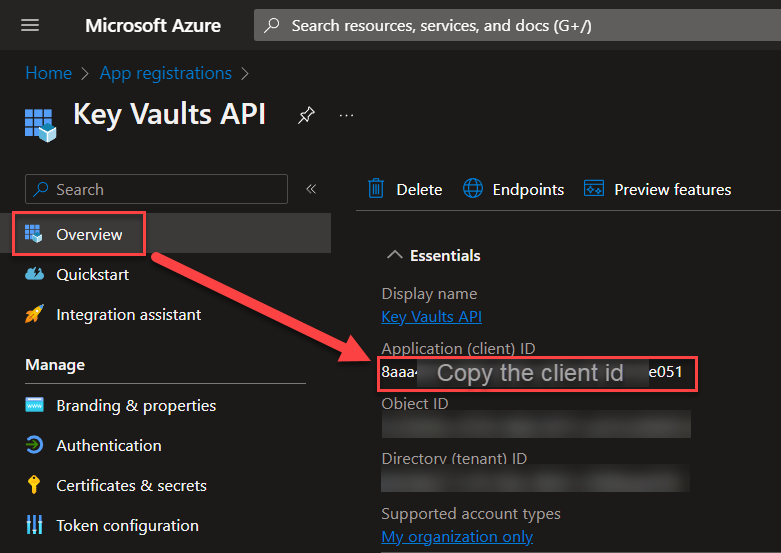
Great! Now we’ve setup the Azure Key Vault, next we’re going to use the Azure App registration to create an application that gives us the proper access to interact with this new Azure Key Vaults through API calls. This is because the default Power Automate – Key Vault connector is limited to what we are going to do!
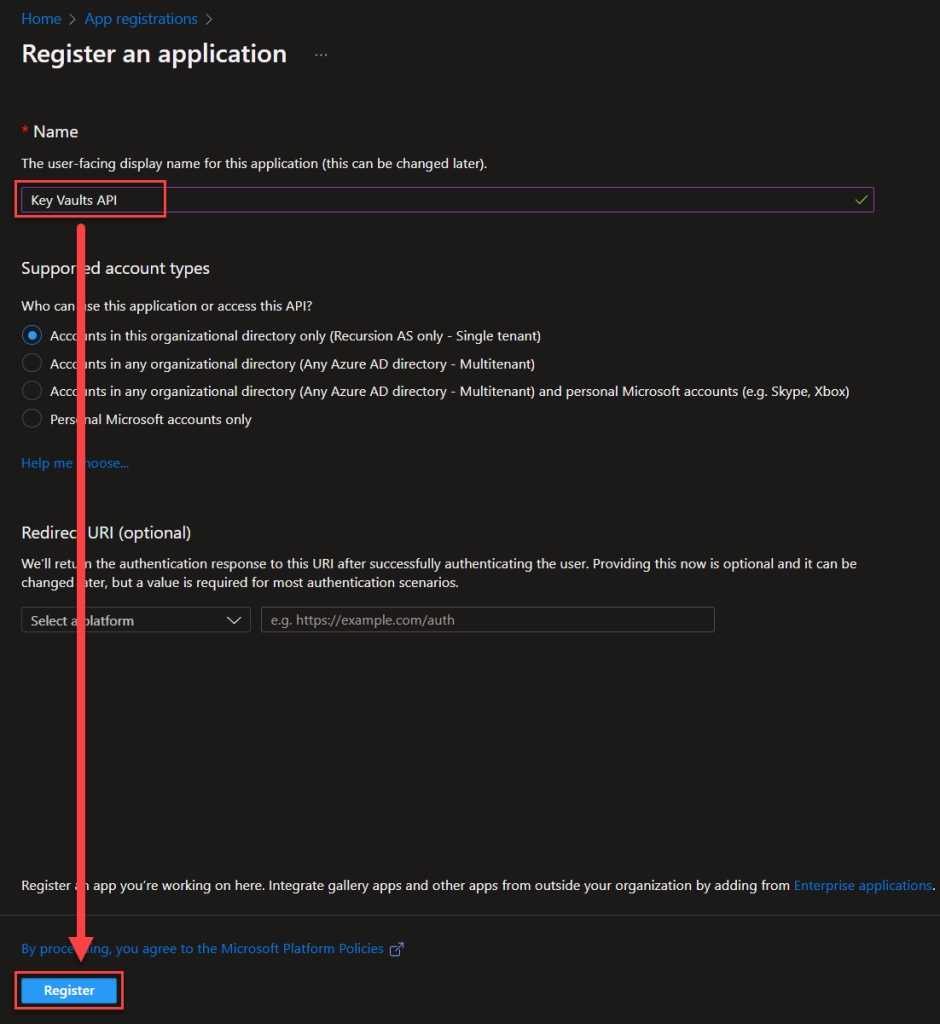
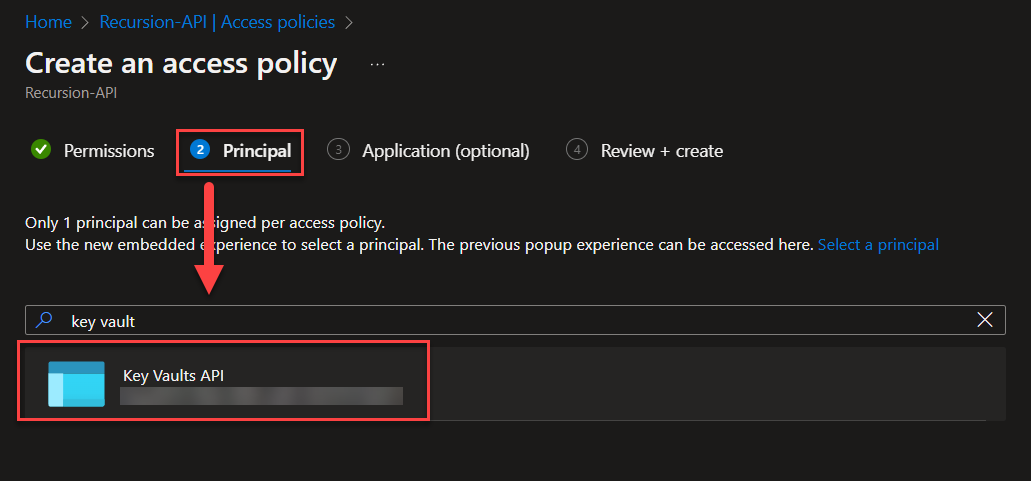
Creating the Key Vaults API application for our HTTP update requests in Power Automate
This API application is designed to allow for updating our Key Vault secrets through the Power Automate HTTP action, as the Power Automate Key Vault connector does not have an action for updating Key Vault secrets.

![]()
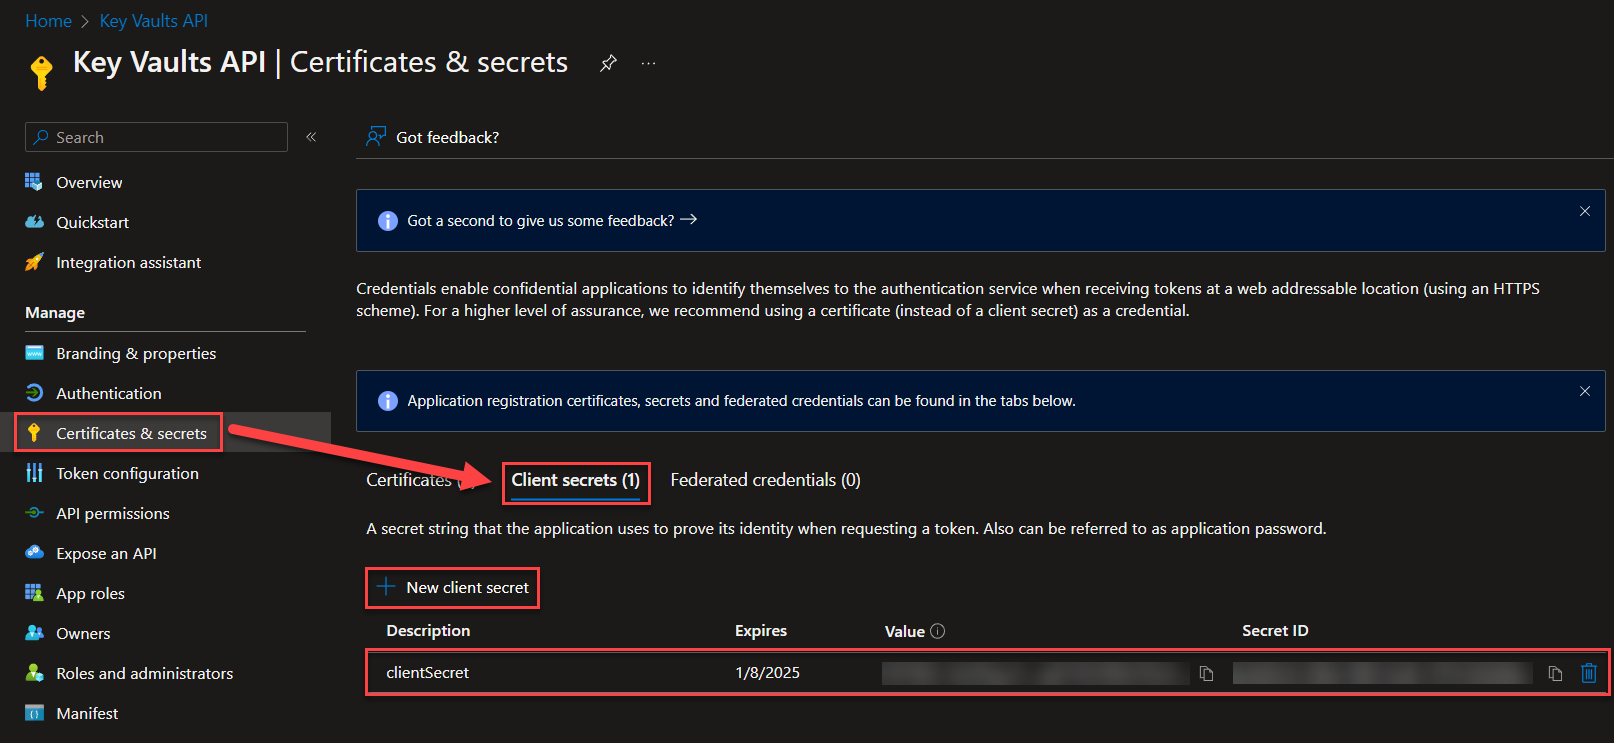 Now the last few configurations that we need before we’re done with the whole Key Vault thing… Save the Client secret value

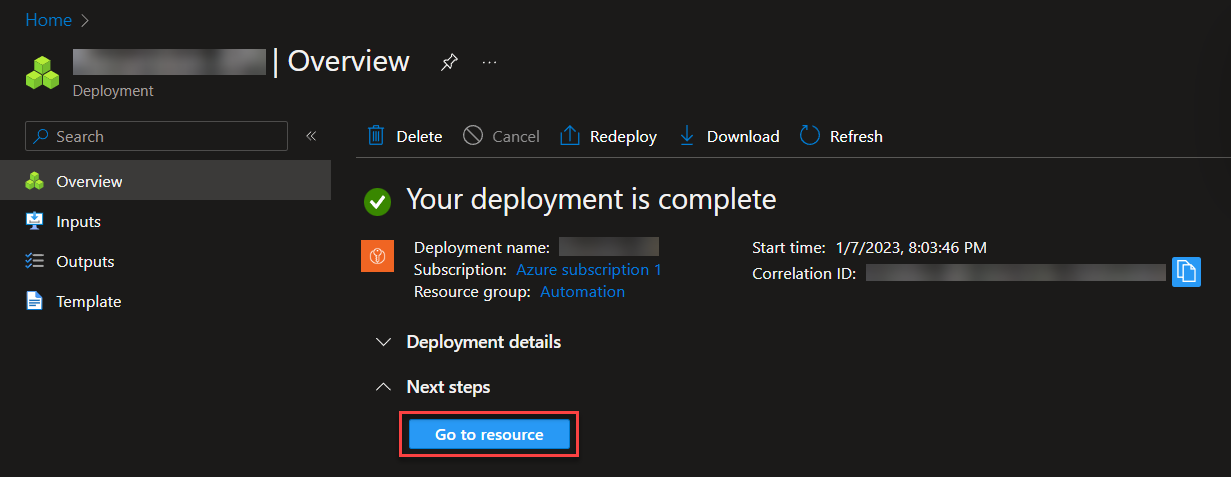
You’ve now managed to setup your new Azure Key Vaults! Next up is creating the flow for auto-updating the token!
Creating the Power Automate flow to get the OAuth token and its lifecycle information
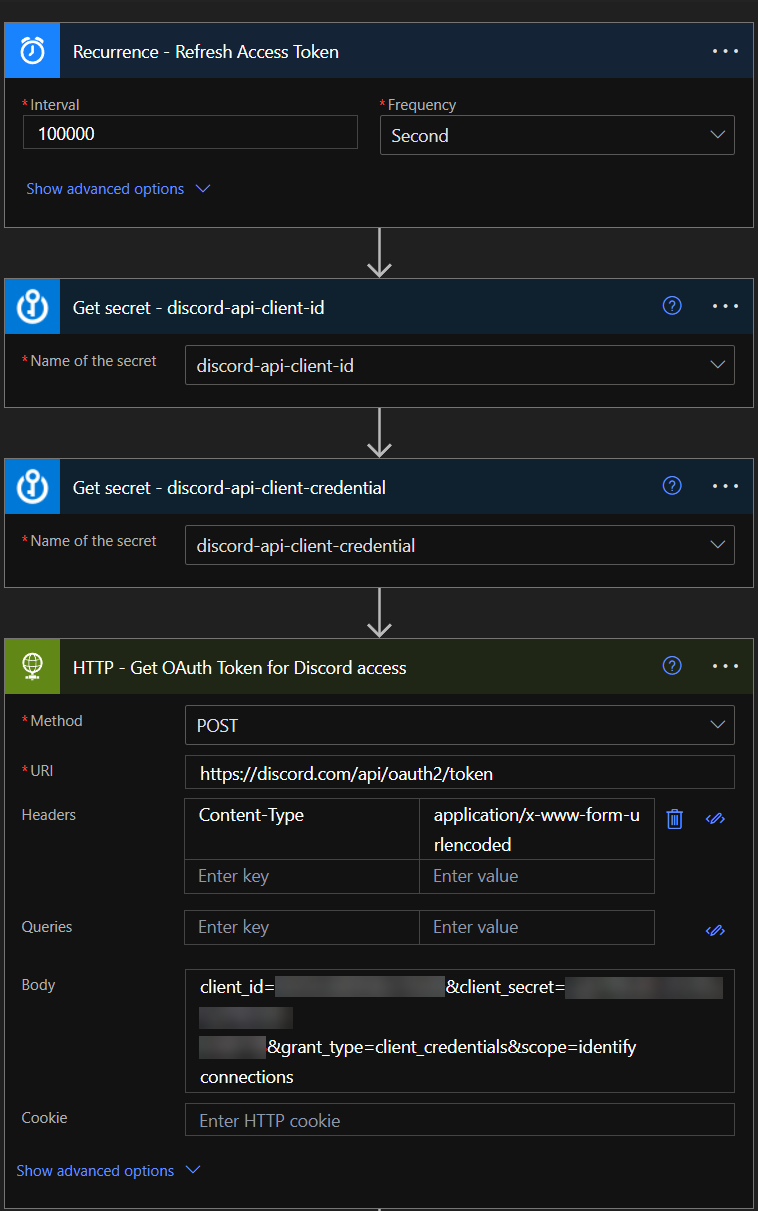
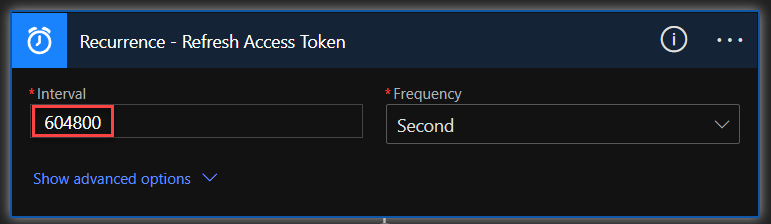
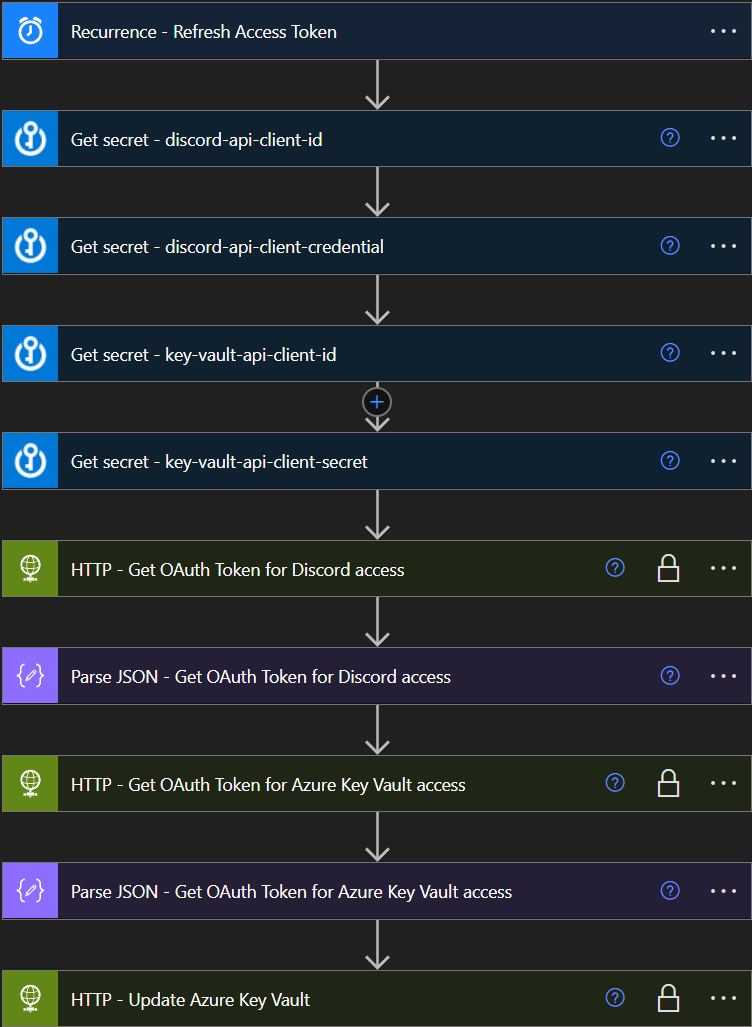
For this auto-update scenario, create a new flow that is specifically triggered by “Recurrence” and set it to any interval, as long as it does not interfere with our initial testing. Set it in the value of seconds (e.g. 100000 seconds). Additionally, add two new actions to get the Key Vault secrets, and then add an HTTP action to get the OAuth token from Discord (or the API of your preference). Use the secret values from the two Key Vault secrets actions for “client-id” and “client-credential” in the HTTP action.
The beginning of the flow should end up looking like this:
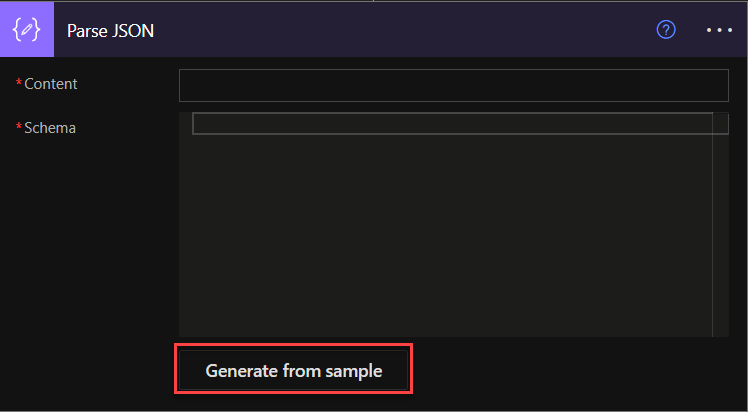
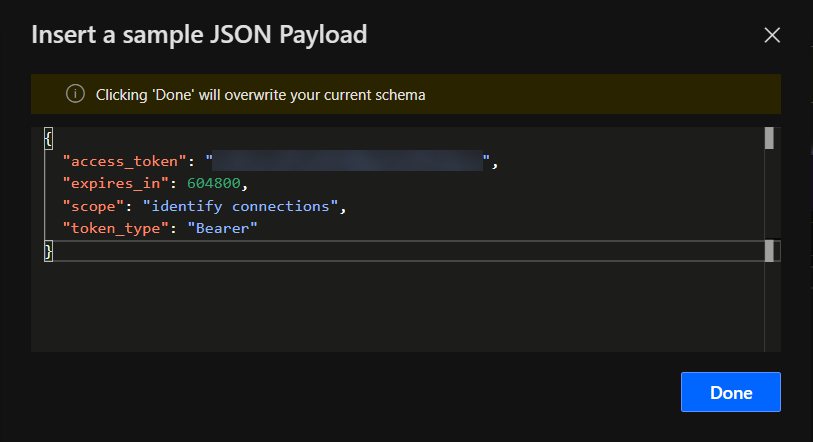
Back in “Edit” mode, add a “Parse JSON” action to the flow.

Building the flow to update the access token value in Azure Key Vaults
Great! Now the last part that’s left is adding the things that will make this flow to automate itself.
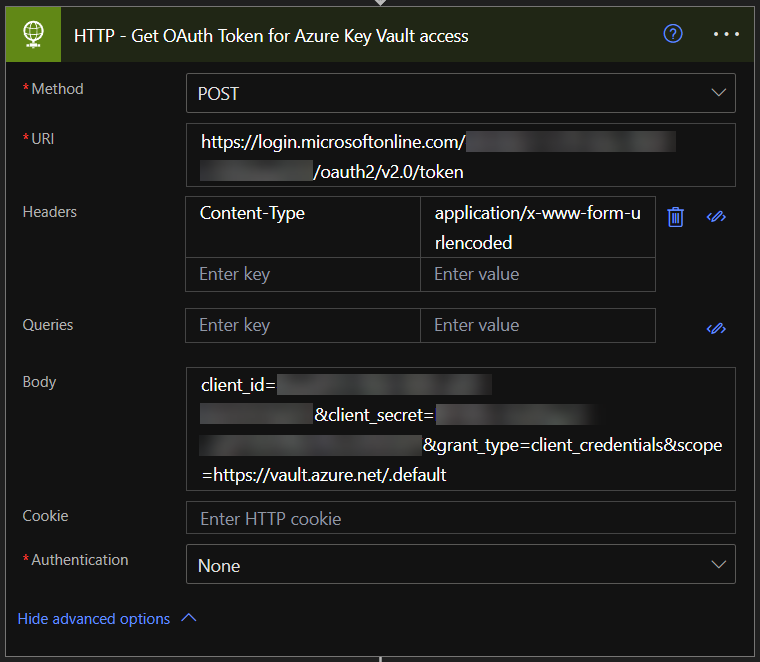
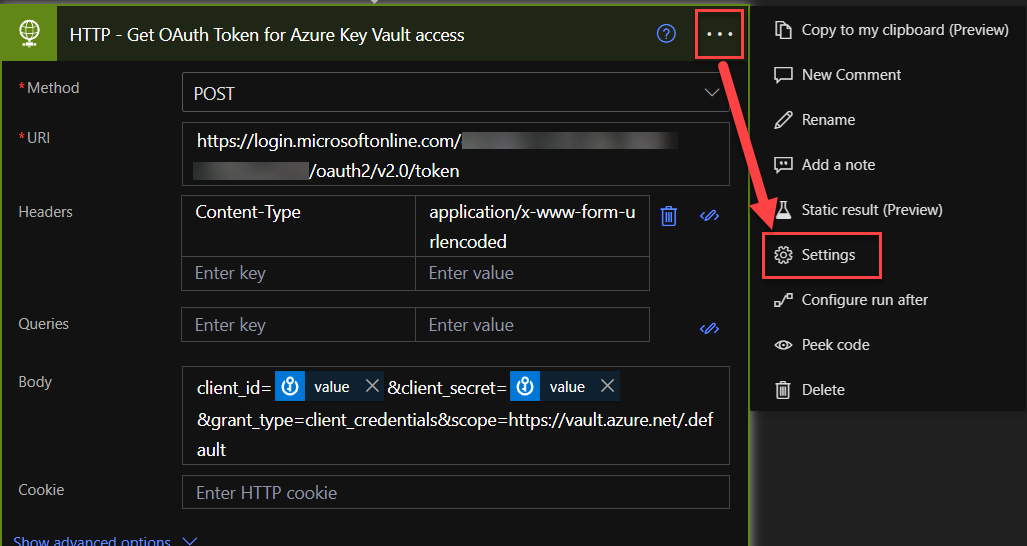
Add a “HTTP” action with POST method with the following information:
URI:
https://login.microsoftonline.com/{directory-tenant}/oauth2/v2.0/tokenHeader:
Content-Type = application/x-www-form-urlencodedBody:
client_id={app_client_id}&client_secret={app_client_secret}&grant_type=client_credentials&scope=https://vault.azure.net/.default
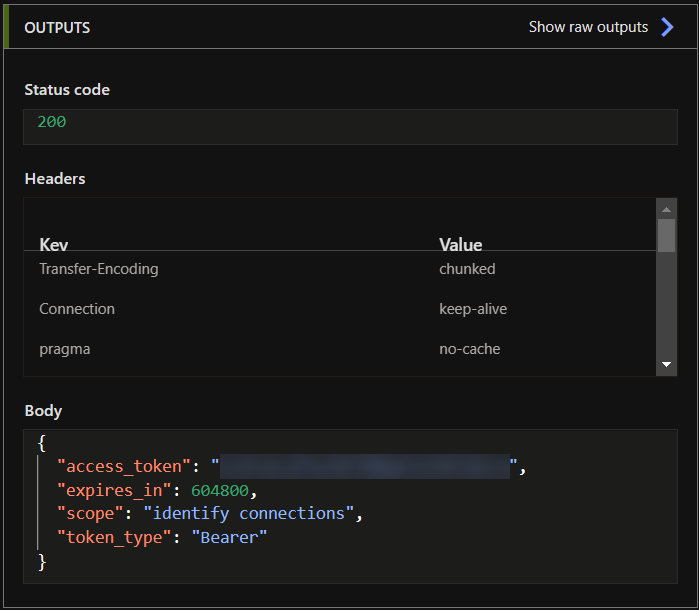
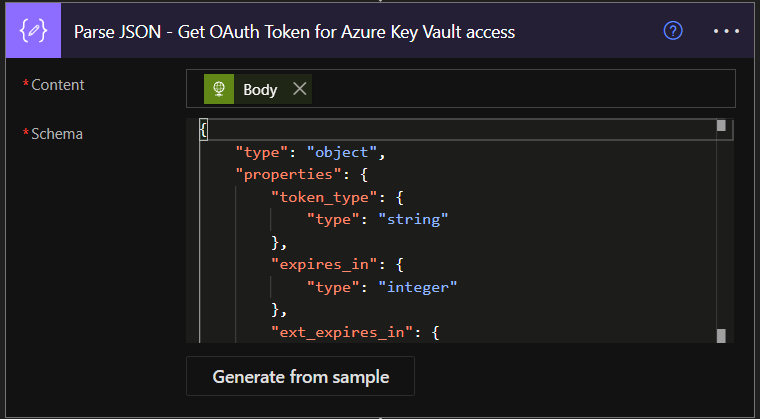
Cool, now save the flow and run it. Again, we want the response body and parse it as well, generating from sample and then go back to edit mode.
Now use the parsed outputs to update the Azure Key Vault secret “discord-api-oauth-token” as seen on the picture below:
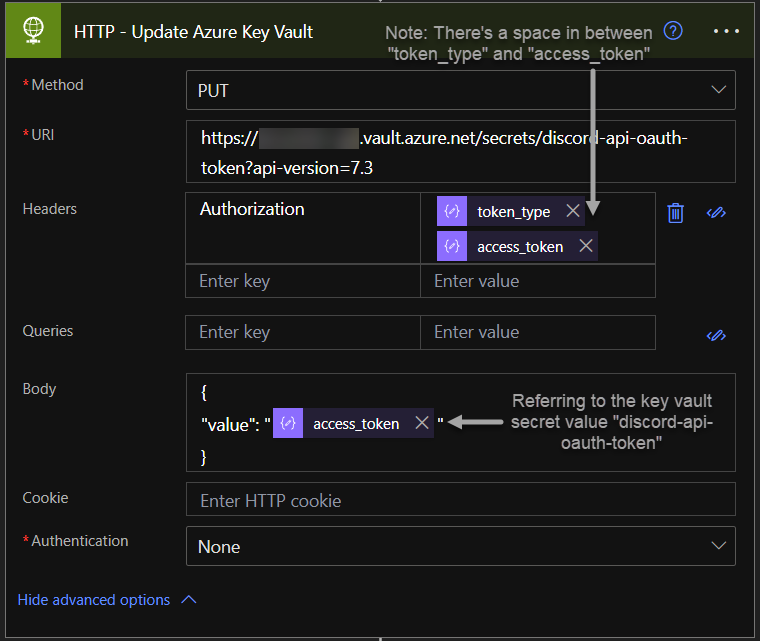
URI:
https://{vault name}.vault.azure.net/secrets/{secret name}?api-version=7.3Header:
Authorization = Bearer {token from previous HTTP call}Body:
{

"value": "{new access token}

}
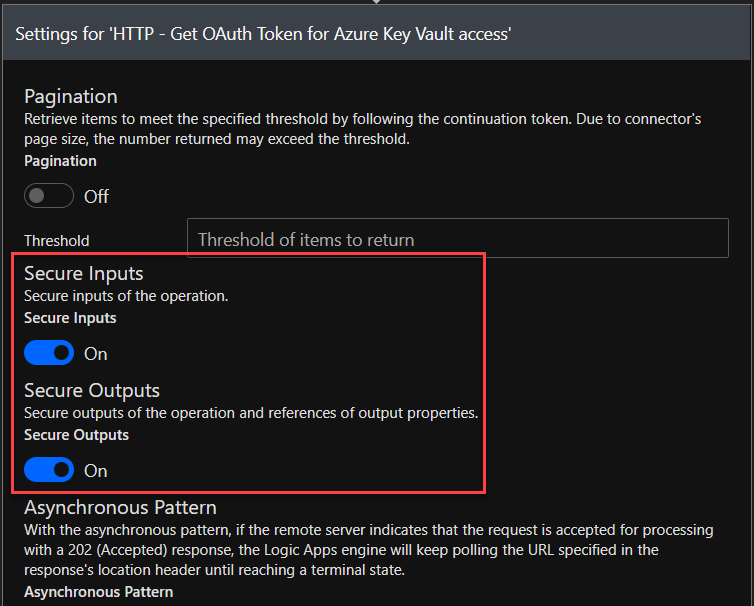
And last but not least, especially before you run the flow!…
Make sure your settings for all of the HTTP-actions has these settings turned on. It will hide the credential details in the logs.
Nice work! You’ve made it to the end of the tutorial! Now a quick recap!
Summary
We’ve successfully created an Azure Key Vault with secret values where we are storing our API credentials (client ids, client secrets, OAuth tokens)
- We’ve successfully setup an API application with token through Azure AD App registration to use API calls with the Graph API serv.
- We’ve successfully scheduled a Power Automate flow to update a Key Vault secret (in this case an OAuth token stored as a Key Vault Secret) independently. This means that all your future Power Automate flows will only need to relate to the token, without an authentication. This is especially great for big consulting companies with many different client credentials towards different services in-house – where a new developer only need to relate to the token instead, making it a more secure framework.
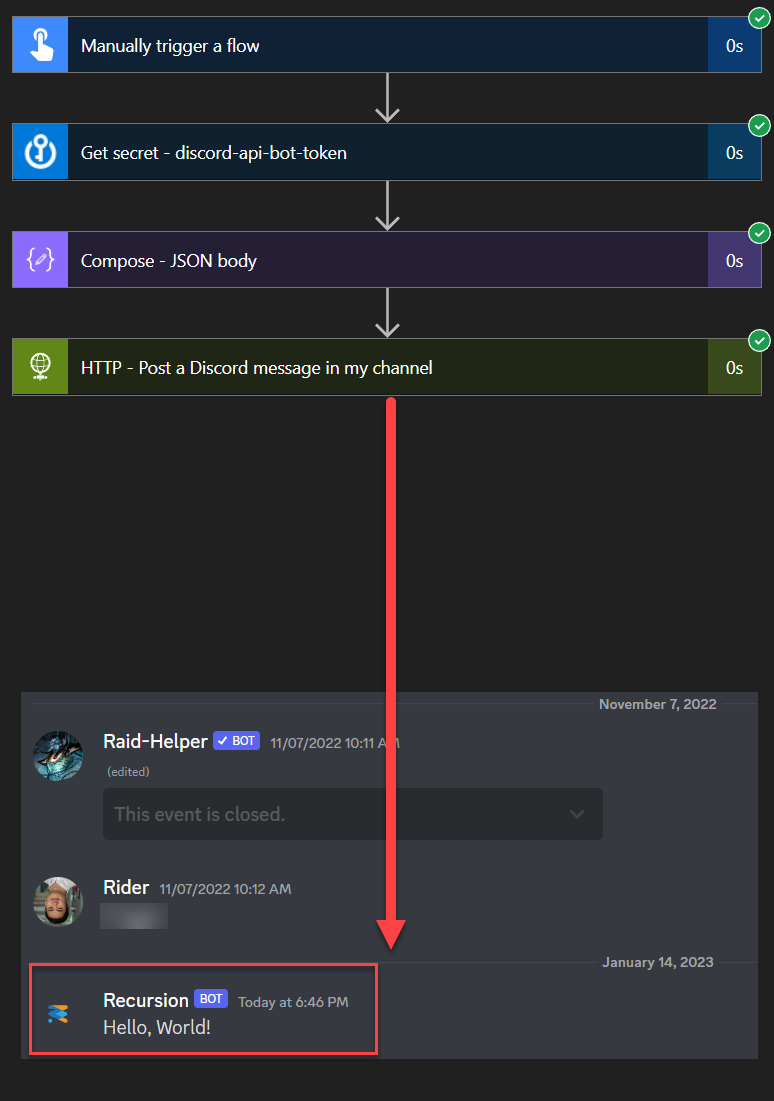
In my personal projects, I take advantage of the Key Vault so much that I don’t even need to remember the client_id or client_secret anymore and am only invoking the automatically updated token as seen on the example below. 😎
Leave a Reply