
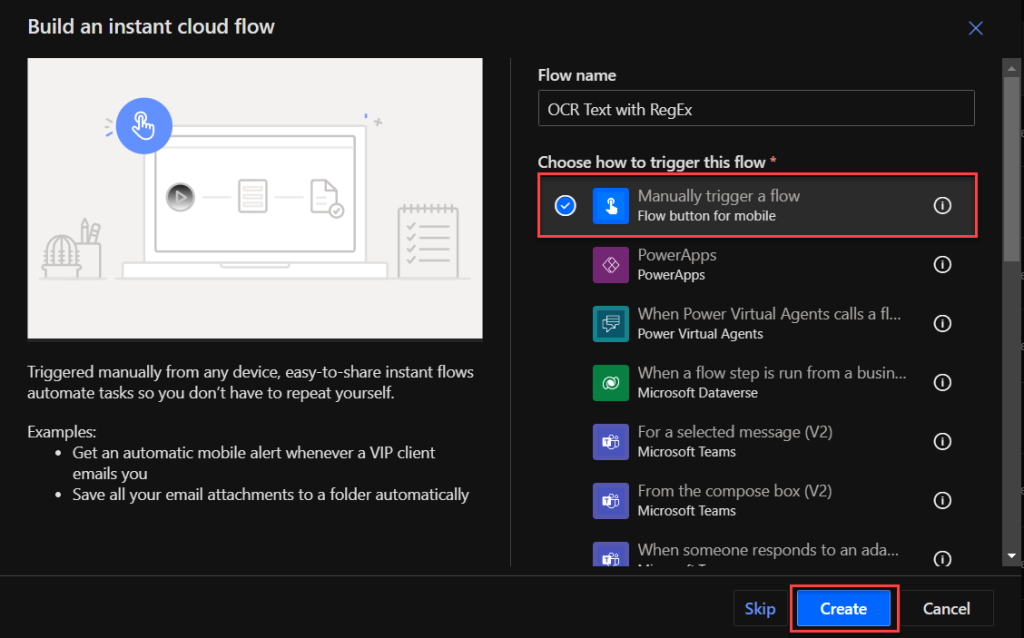
Hey Power Addicts! 😎 In today’s blog post, we’ll discuss the possibilities of invoking regular expression (RegEx) from creating a Logic Apps HTTP Trigger with JavaScript code. Now the most common way for this has been through use of a cloud stored Excel-file and invoking the TypeScript RegEx from the Excel Automation tool in Power Automate. However in this guide, I’m going to spice it up with a different approach – mostly because I’m more used to do it this way from the past.
We’ll explore how to create a Power Automate flow with a Computer Vision service to read image based text and call a Logic Apps flow. We’ll then invoke a JavaScript code with RegEx patterns that outputs the matches, resulted back to our Power Automate flow.
So, whether you’re a developer, business owner, or just looking to optimize your workflow with RegEx, this guide is for you as well.
Our goals:
- Combine Azure Computer Vision service to recognize text in images and convert it to structured text in Power Automate flow
- Integrate a Power Automate flow to use the Logic Apps as a RegEx tool.
- Configure a dedicated Logic Apps for RegEx-filtering with JavaScript.
Prerequisite:
- Azure Subscription to create a FREE Azure Computer Vision service
- Azure Subscription to create a FREE integration account
- Azure Subscription to create an Azure Logic Apps.
- Power Automate license to use HTTP-actions (Premium Connector)
- Basic JavaScript skills for beginner!
- Some RegEx experience… 😂
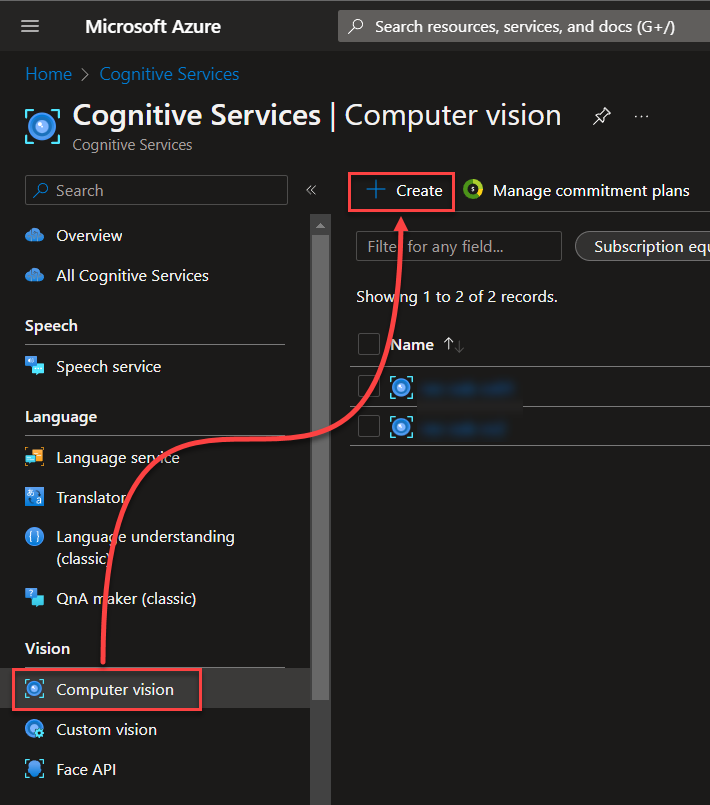
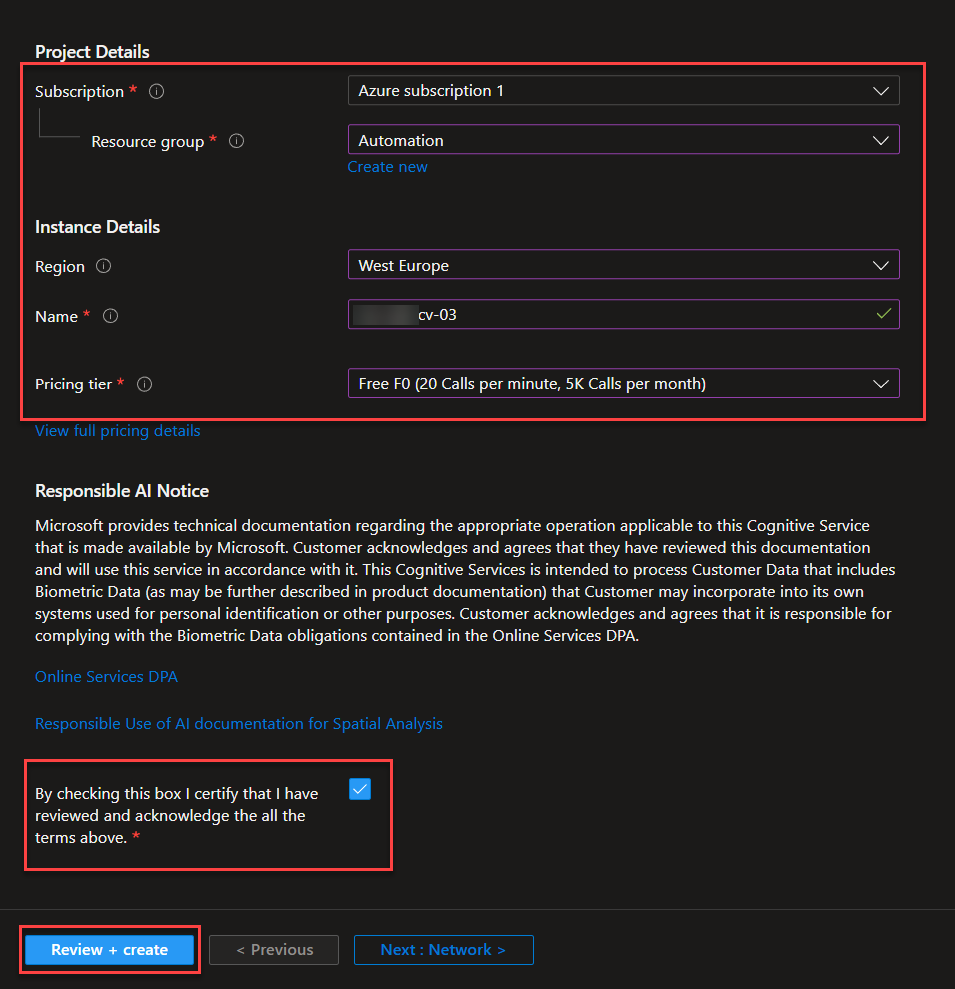
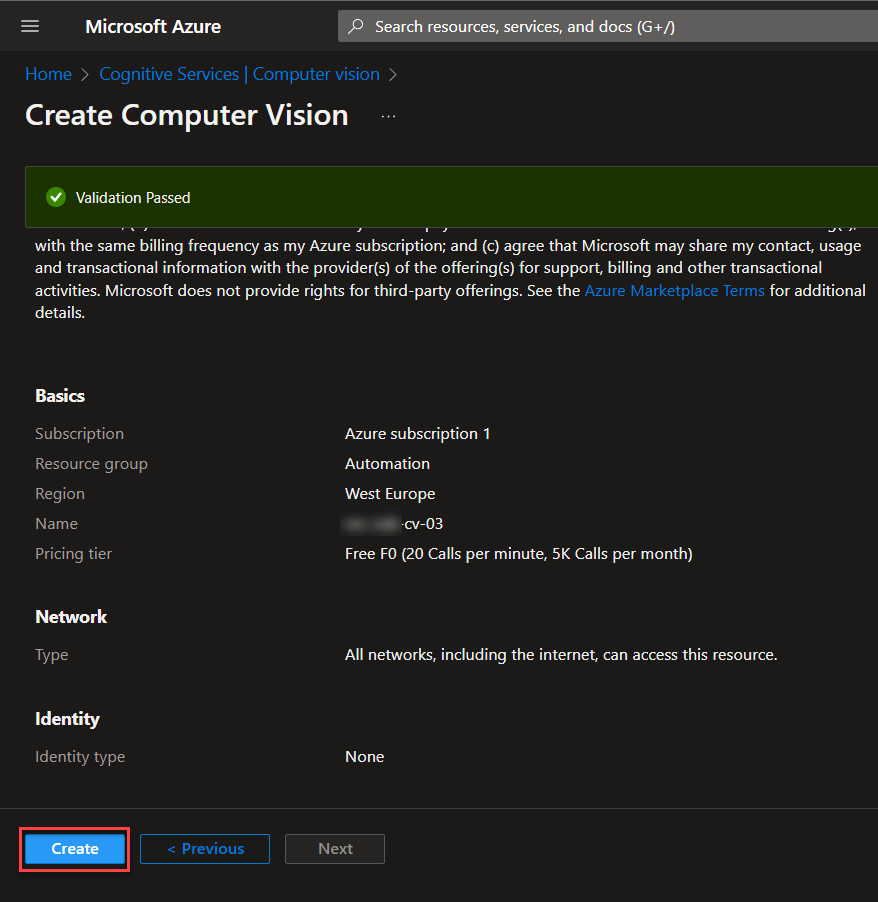
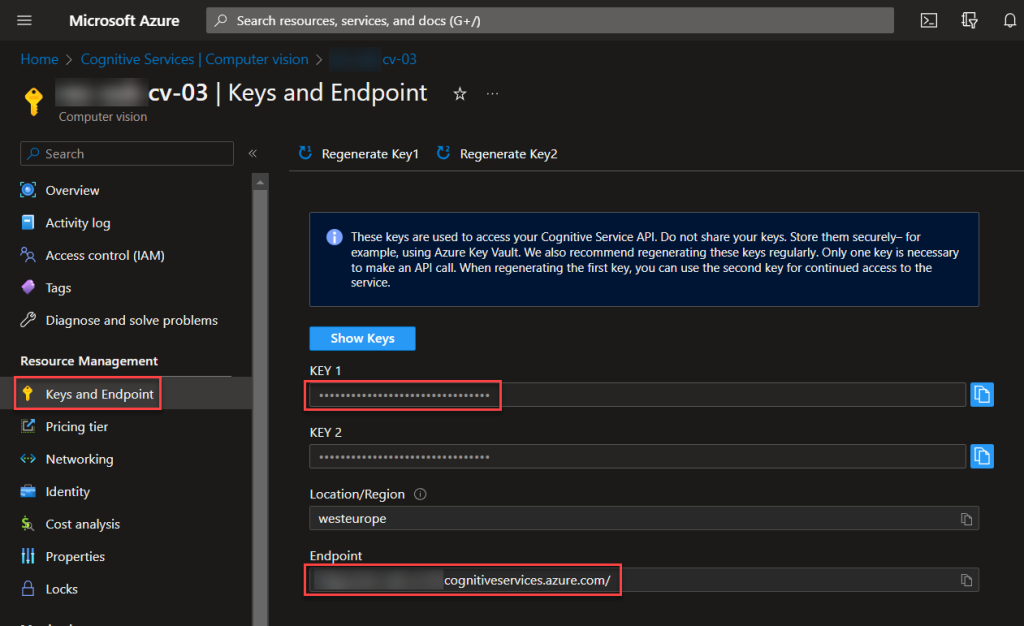
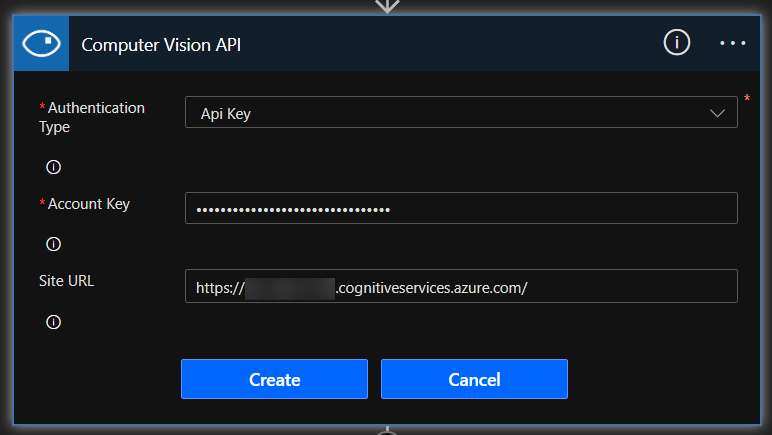
Creating the Azure Computer Vision Service
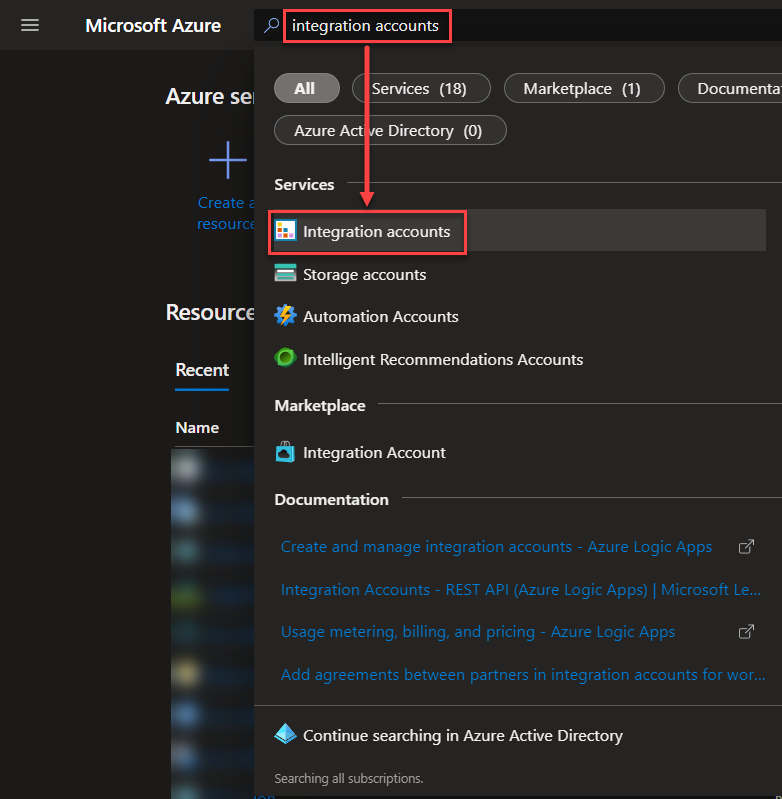
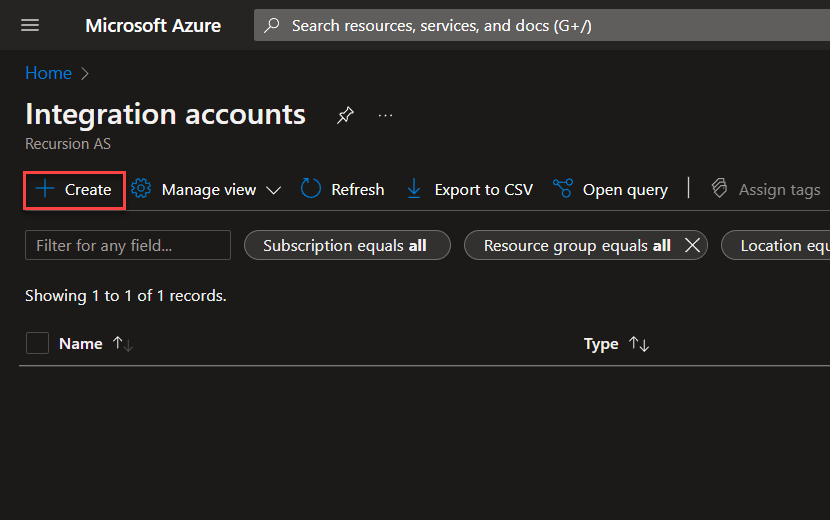
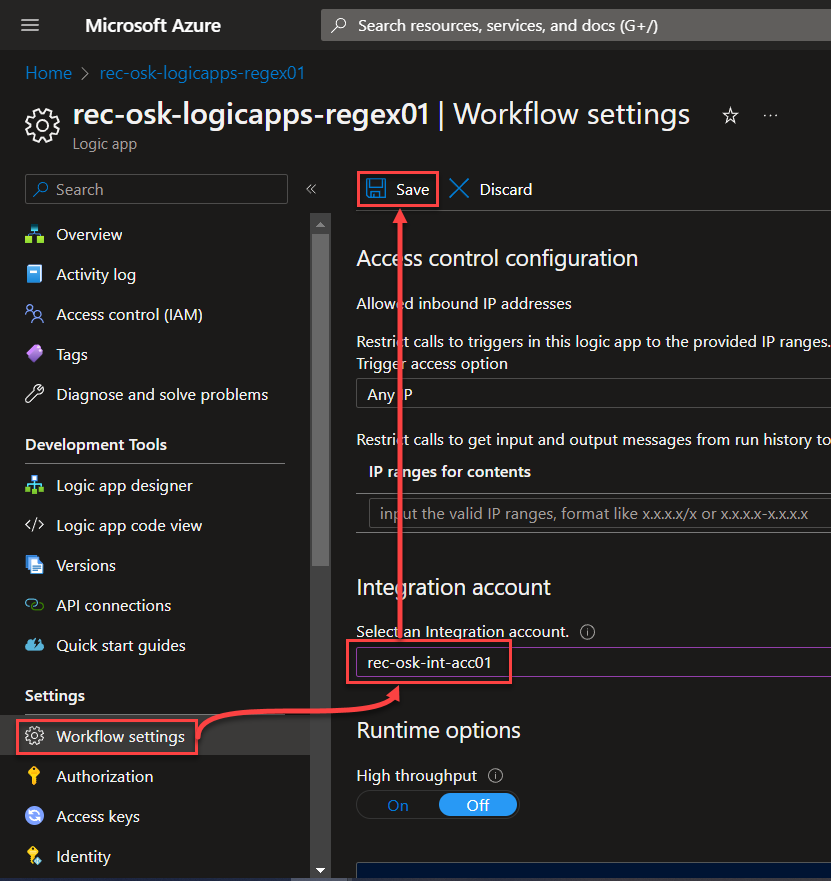
Creating the Azure Integration Account
The Azure Integration Account is needed to take advantage of the JavaScript tools for Logic Apps. We want to set it up before we make use of the Logic Apps in advance.
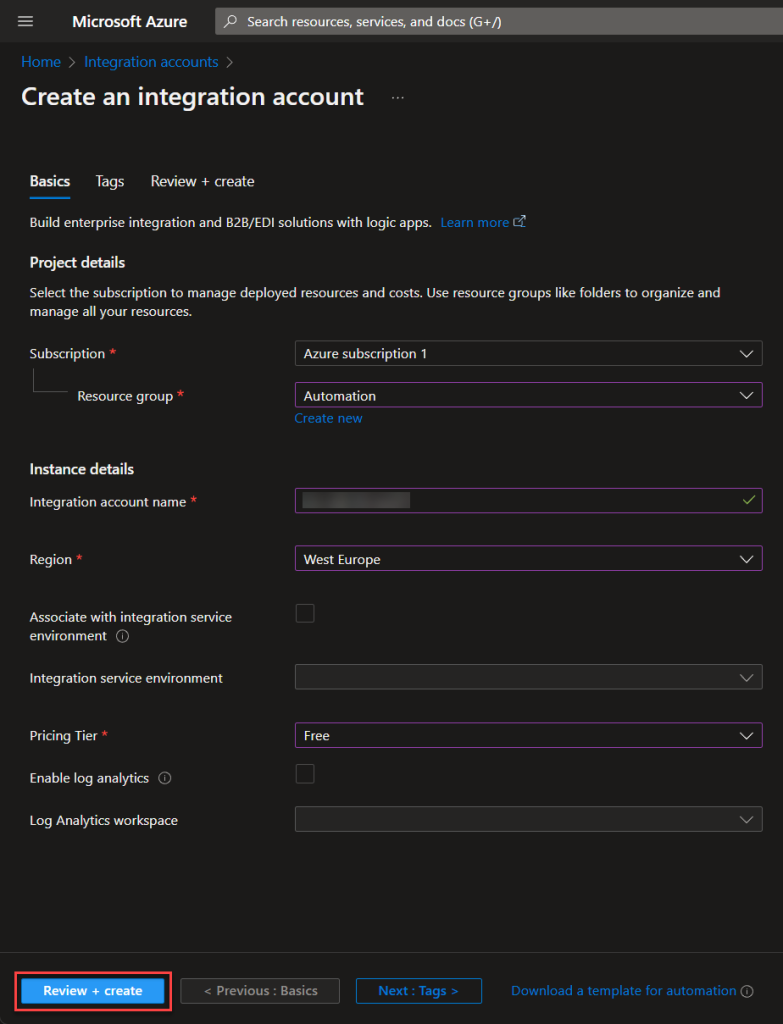
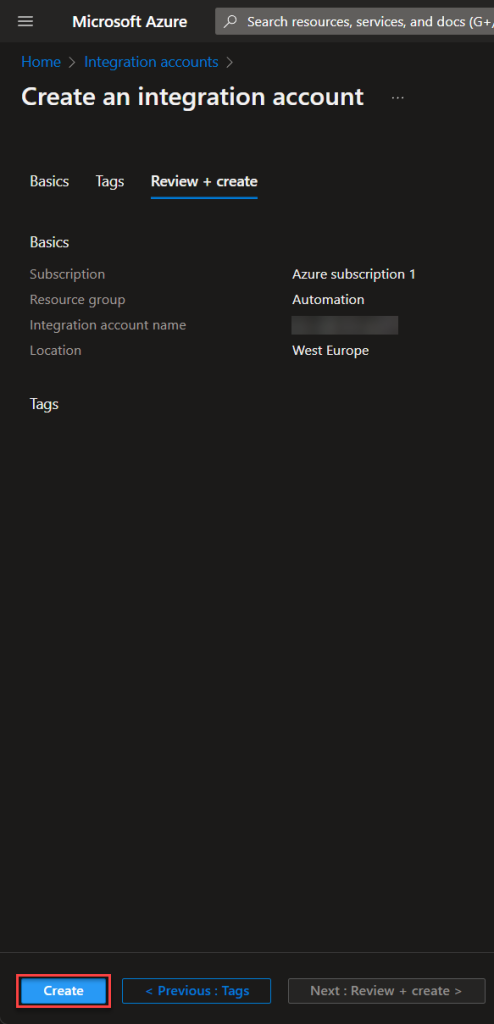
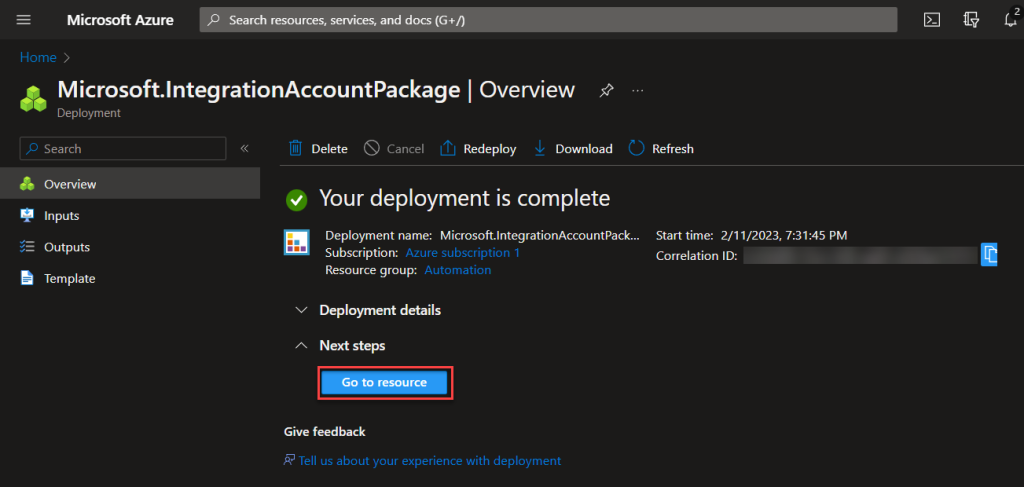
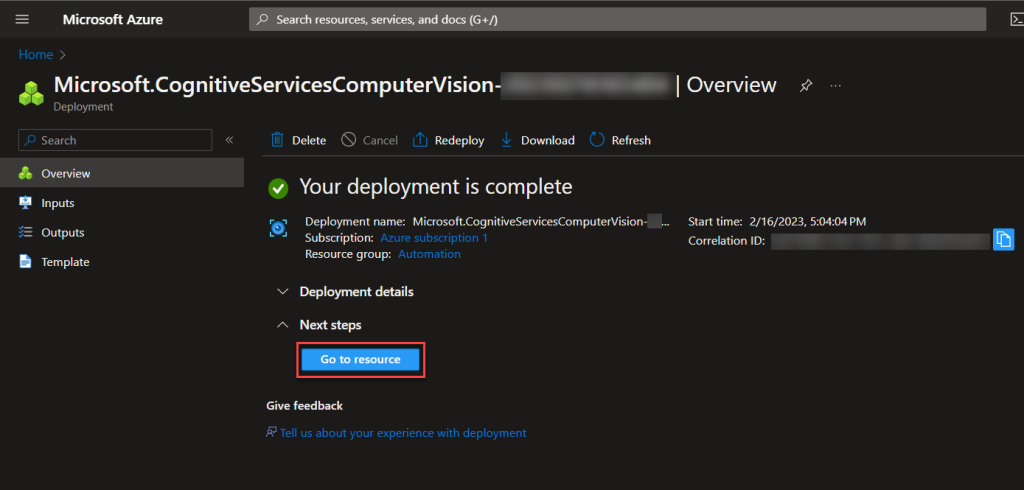
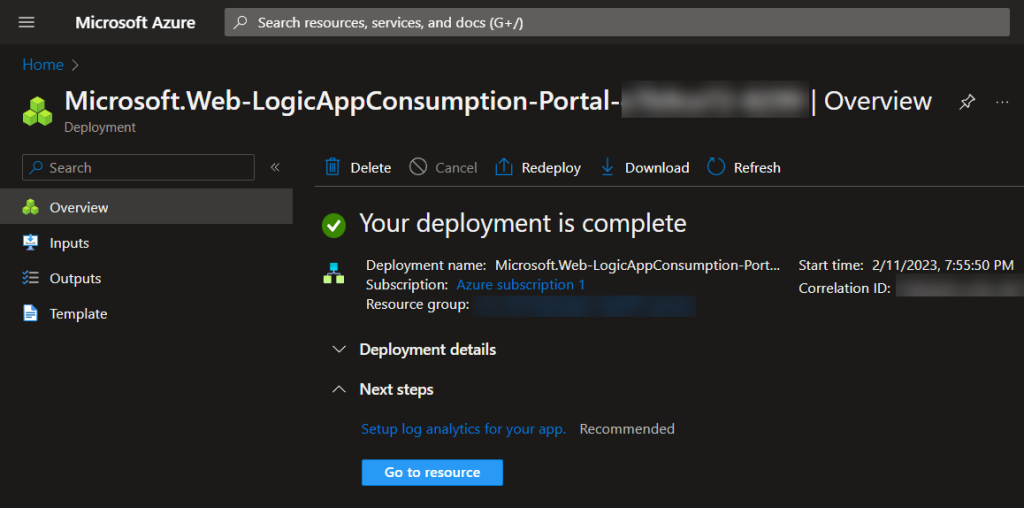
When the deployment has completed, you can move on to creating the Azure Logic Apps. Yay!
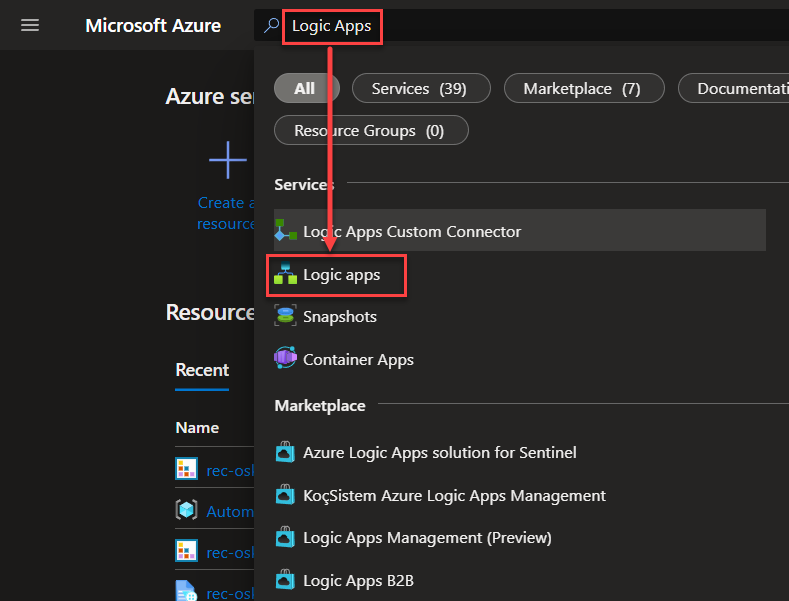
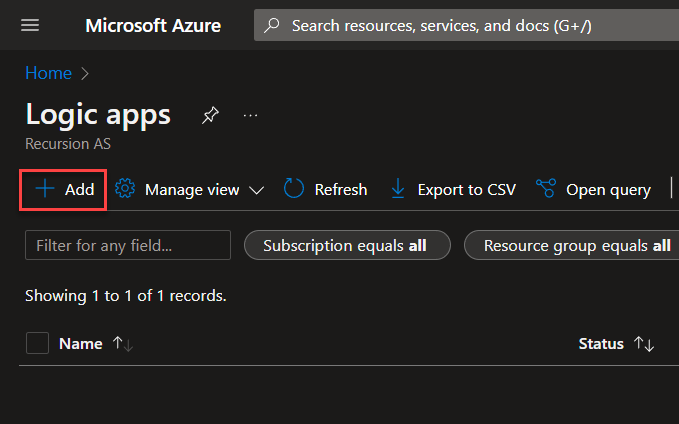
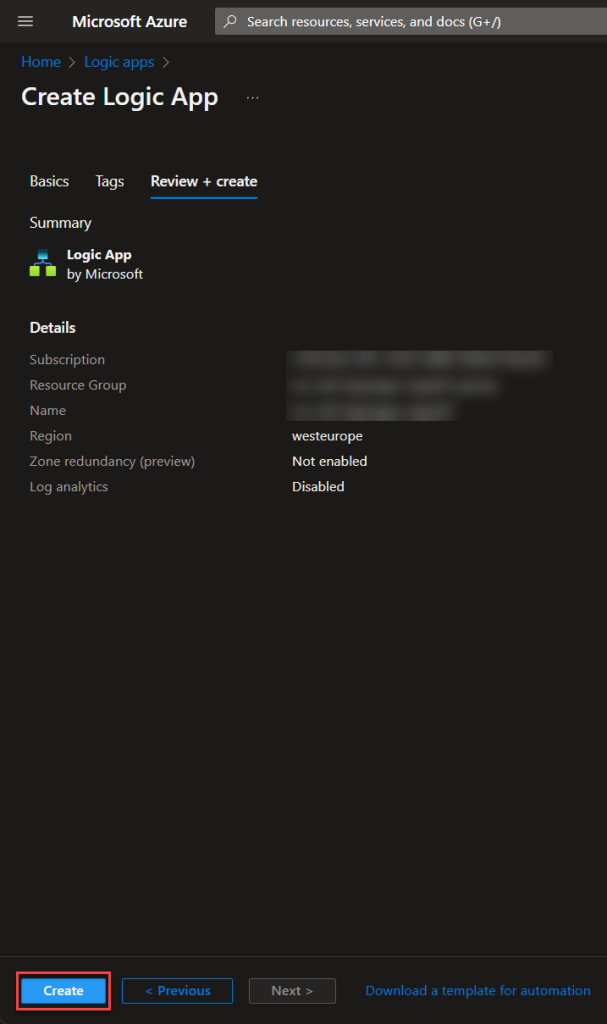
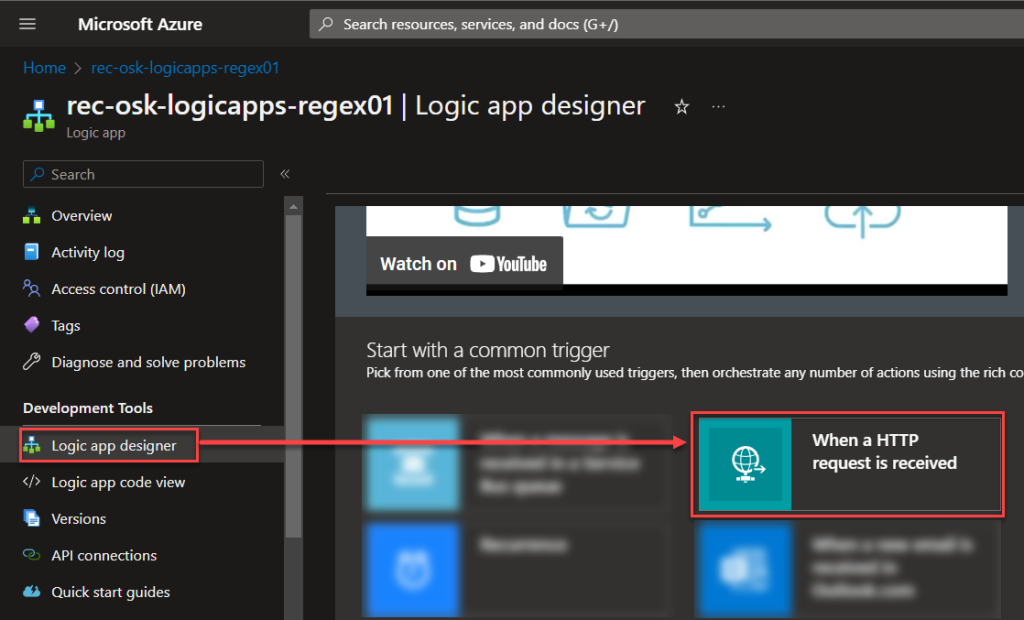
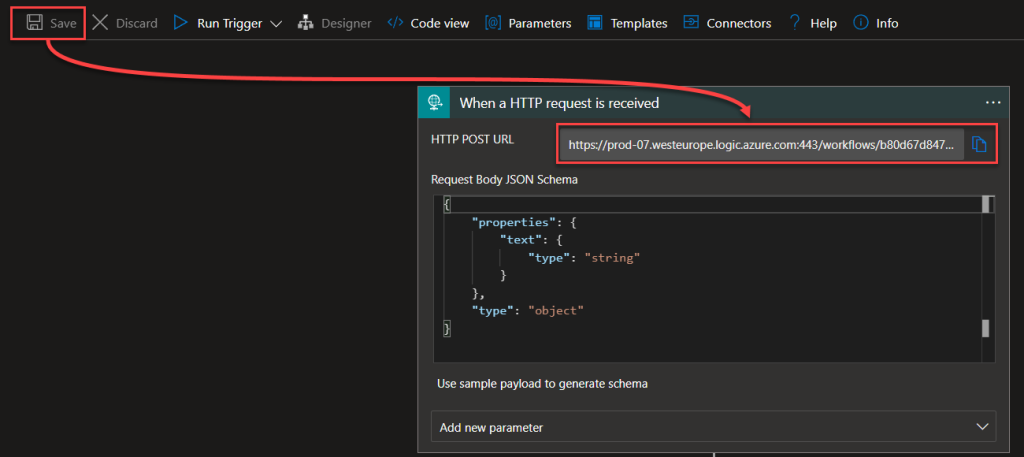
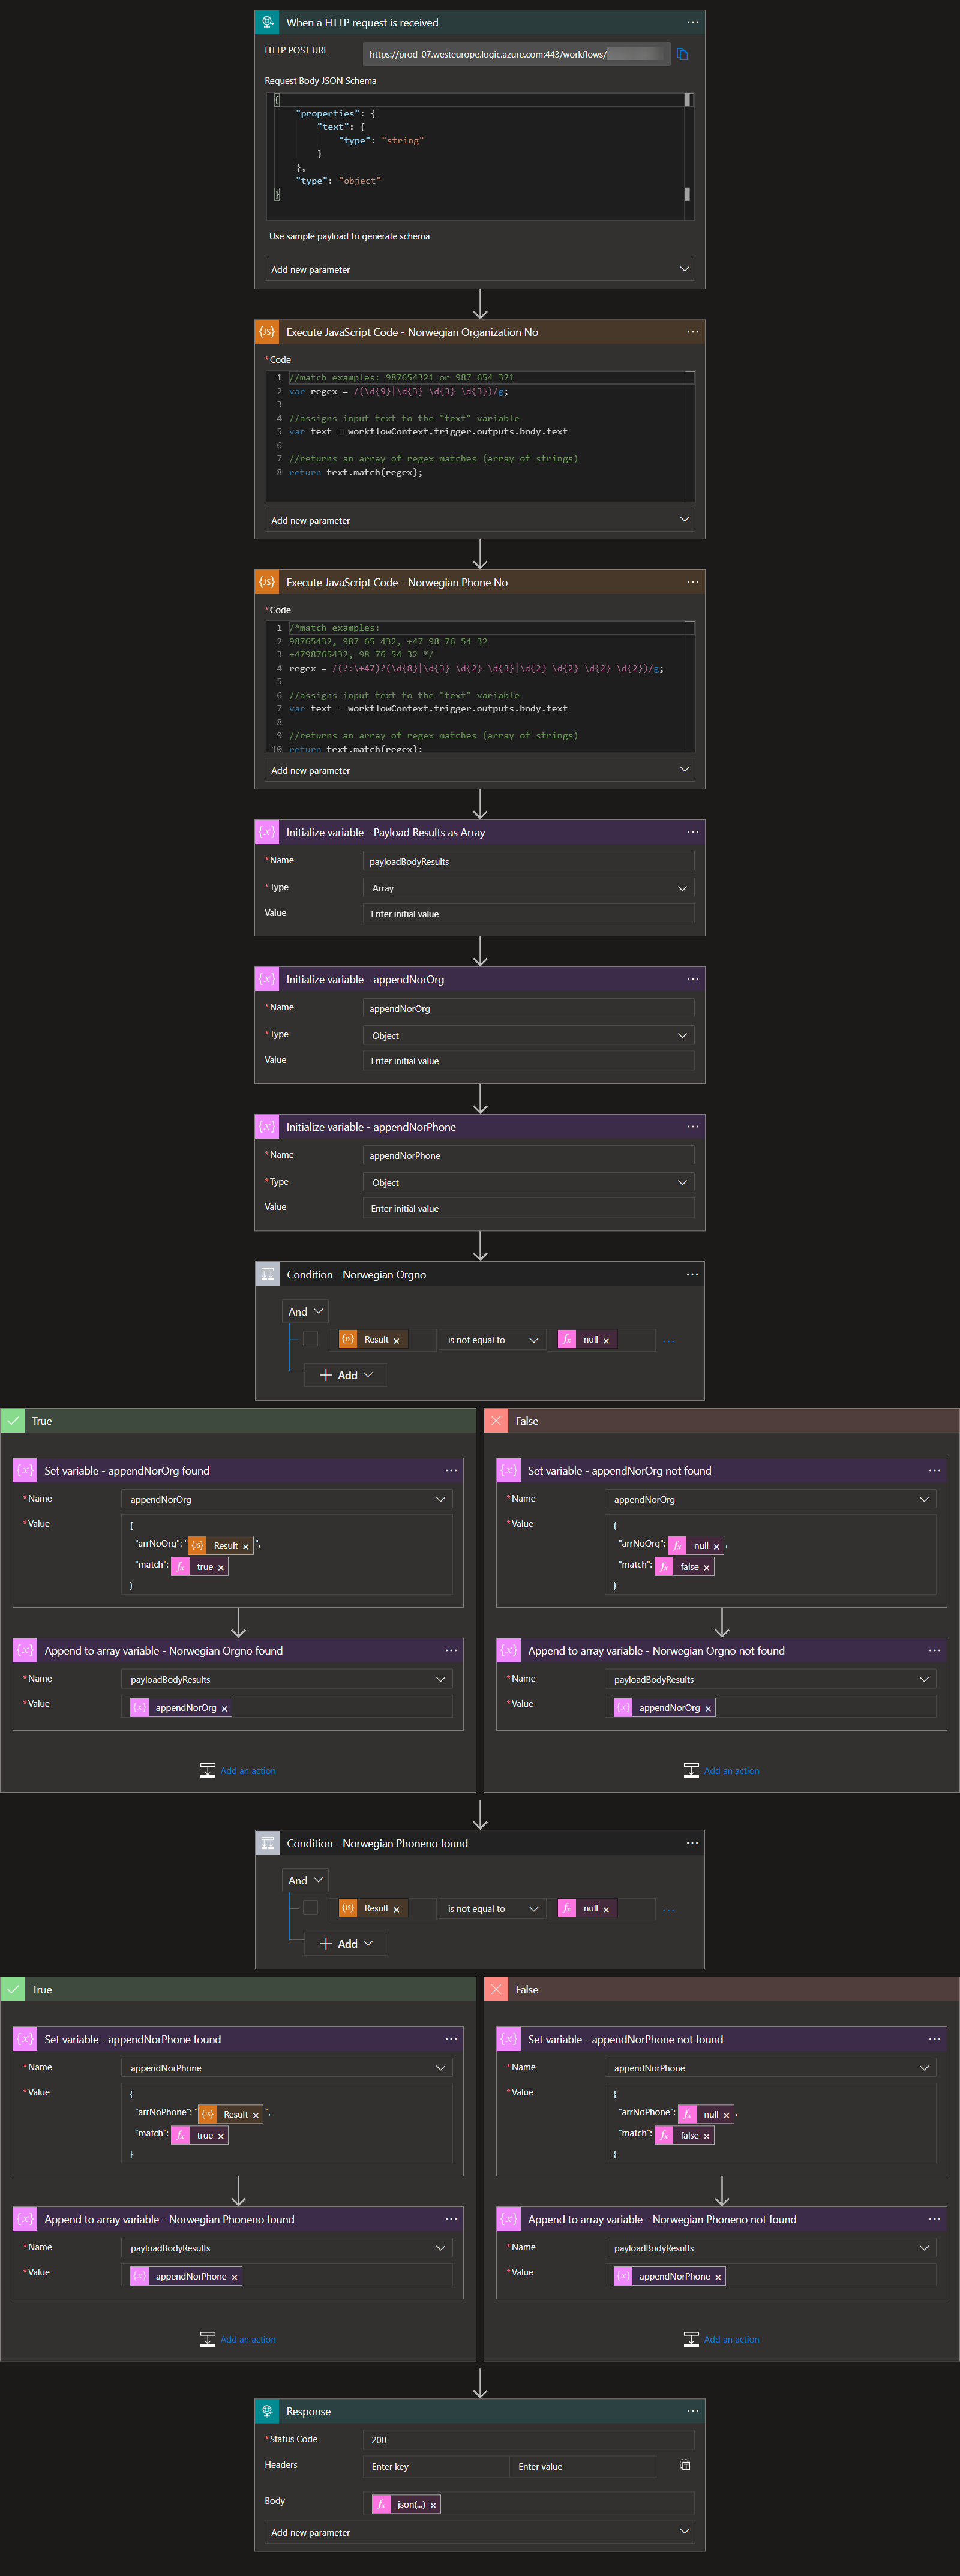
Creating the Azure Logic Apps
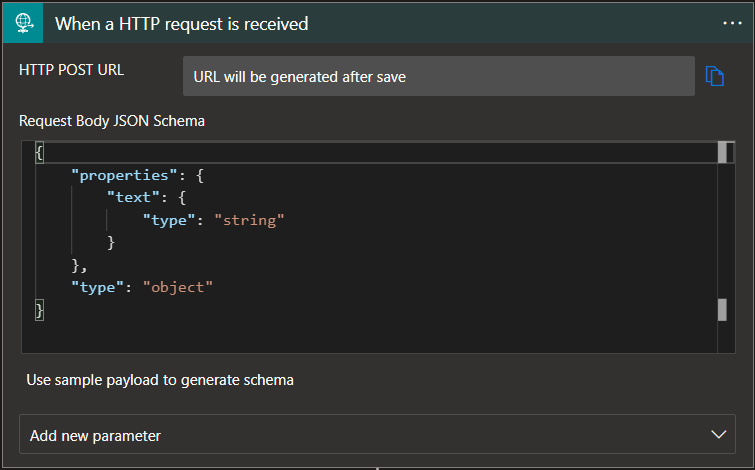
Request Body JSON Schema:
{
    "properties": {
        "text": {
            "type": "string"
        }
    },
    "type": "object"
}
Code:
//match examples: 987654321 or 987 654 321
var regex = /(\d{9}|\d{3} \d{3} \d{3})/g;

//assigns input text to the "text" variable
var text = workflowContext.trigger.outputs.body.text

//returns an array of regex matches (array of strings)
return text.match(regex);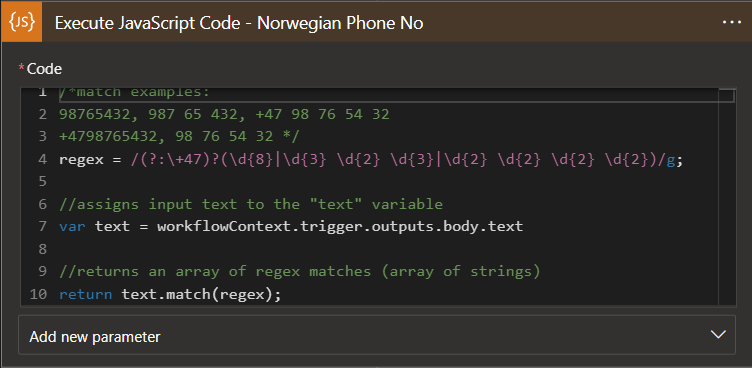
Code:
/*match examples:
98765432, 987 65 432, +47 98 76 54 32
+4798765432, 98 76 54 32 */
regex = /(?:\+47)?(\d{8}|\d{3} \d{2} \d{3}|\d{2} \d{2} \d{2} \d{2})/g;
//assigns input text to the "text" variable
var text = workflowContext.trigger.outputs.body.text
//returns an array of regex matches (array of strings)
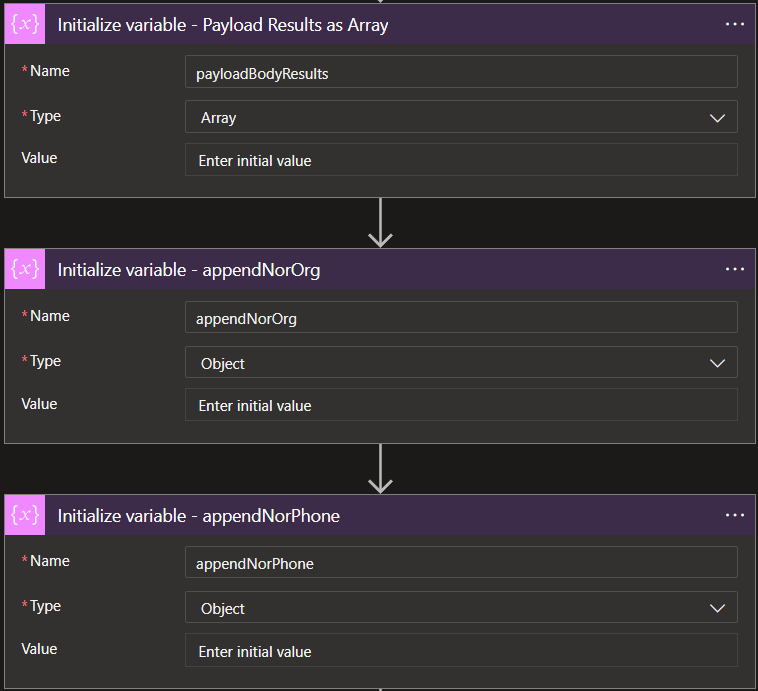
return text.match(regex);Now create and initialize three variables. 1x Array variable, 2x Object variable:
Add a Condition action:
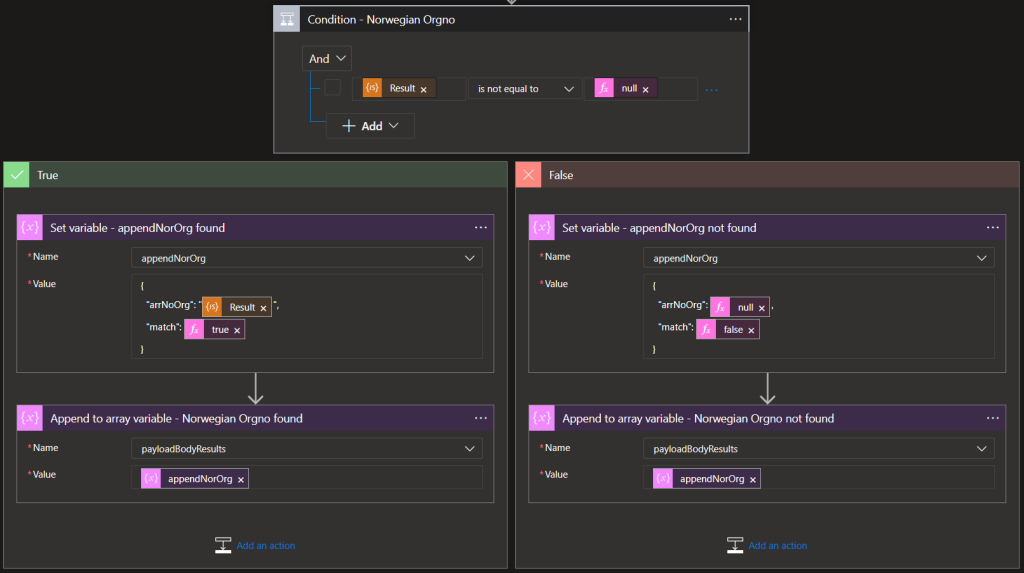
On the Condition – set the “Result” for Norwegian Orgno not equal to null
Add a “Set variable” on each branch of the If statement with the information below.
Add an “Append to array variable” action below it with the value of the “Set variable” for each branch.
True branch:
{
  "arrNoOrg": "@{body('Execute_JavaScript_Code_-_Norwegian_Organization_No')}",
  "match": @{true}
}
False branch:
{
  "arrNoOrg": @{null},
  "match": @{false}
}
Add another Condition action:
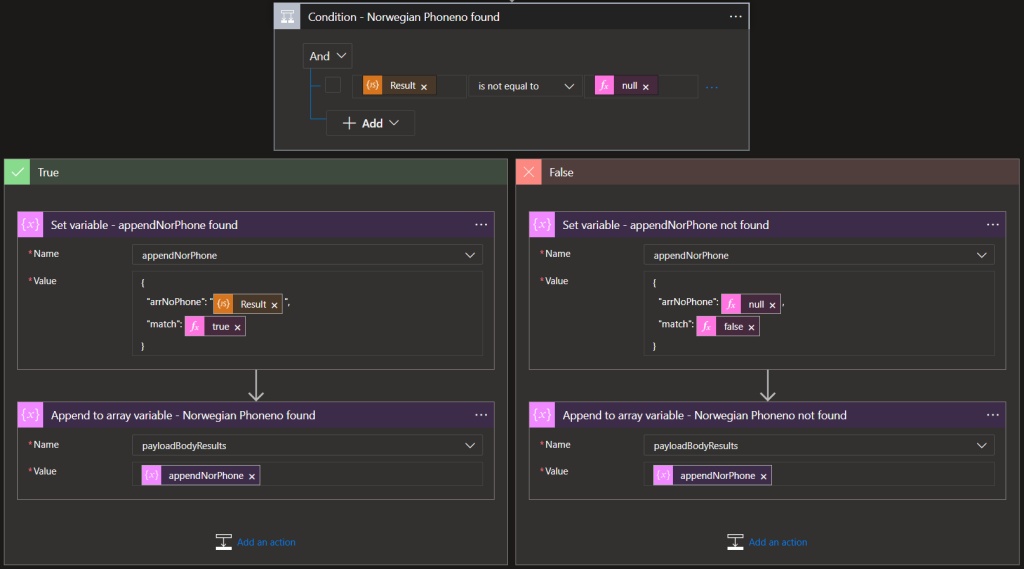
On the Condition – set the “Result” for Norwegian Phoneno not equal to null
Add the same structure as mentioned previously, this time based on the results from “Norwegian Phone Number“
True branch:
{
  "arrNoPhone": "@{body('Execute_JavaScript_Code_-_Norwegian_Phone_No')}",
  "match": @{true}
}
False branch:
{
  "arrNoPhone": @{null},
  "match": @{false}
}
When finished, we’ll end with a Response action that we need to return to our Power Automate flow.
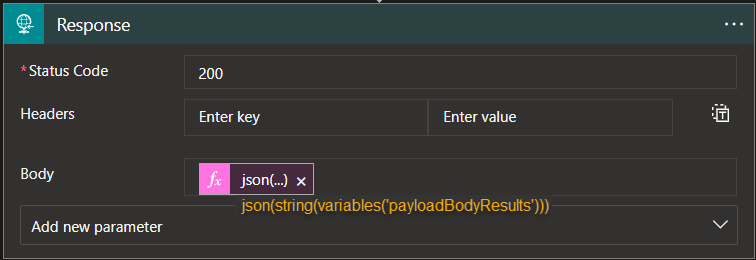
Code:
json(string(variables('payloadBodyResults')))Now save the flow and copy the URL for later use in our Power Automate flow:
Alriiight! 😎 We’re now ready with the Logic Apps flow! Let’s continue with the main Power Automate flow (luckily a short flow) to create the original trigger logic!
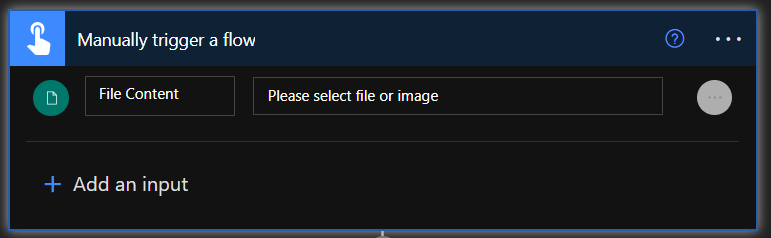
Creating the Power Automate flow
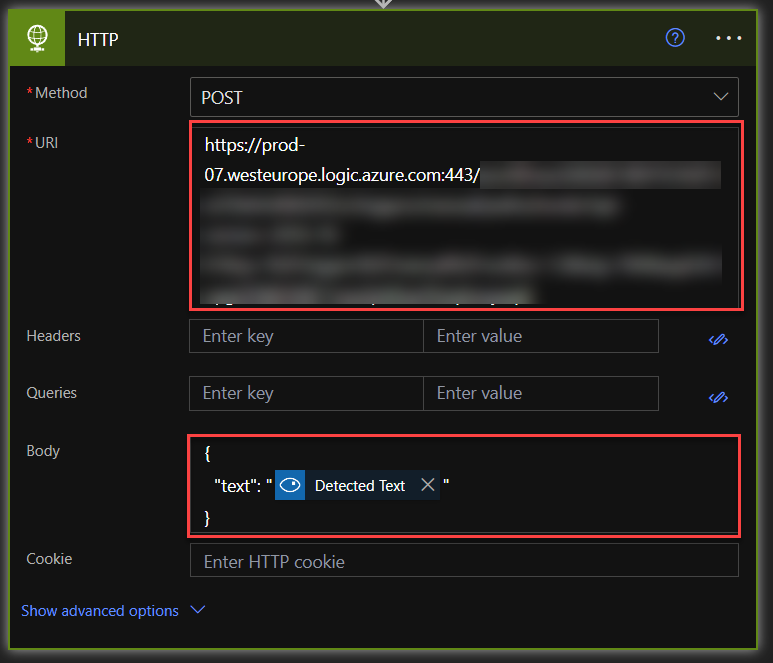
Body payload:
{
  "text": "@{outputs('Optical_Character_Recognition_(OCR)_to_Text')?['body/text']}"
}
Wow! We’re actually finished with the basics for this demo! Now I am NOT going to include anything else, but you may store it to a SharePoint list for new information handling, search for a customer in the CRM-system or Dataverse. The limit is yours to what you want to achieve with extracting text from images.
Now, to finish it off – Run the Power Automate flow! For the demo runs, I am going to make use of and upload the following PNG-image – a randomly generated “Agreement for Partnership“:

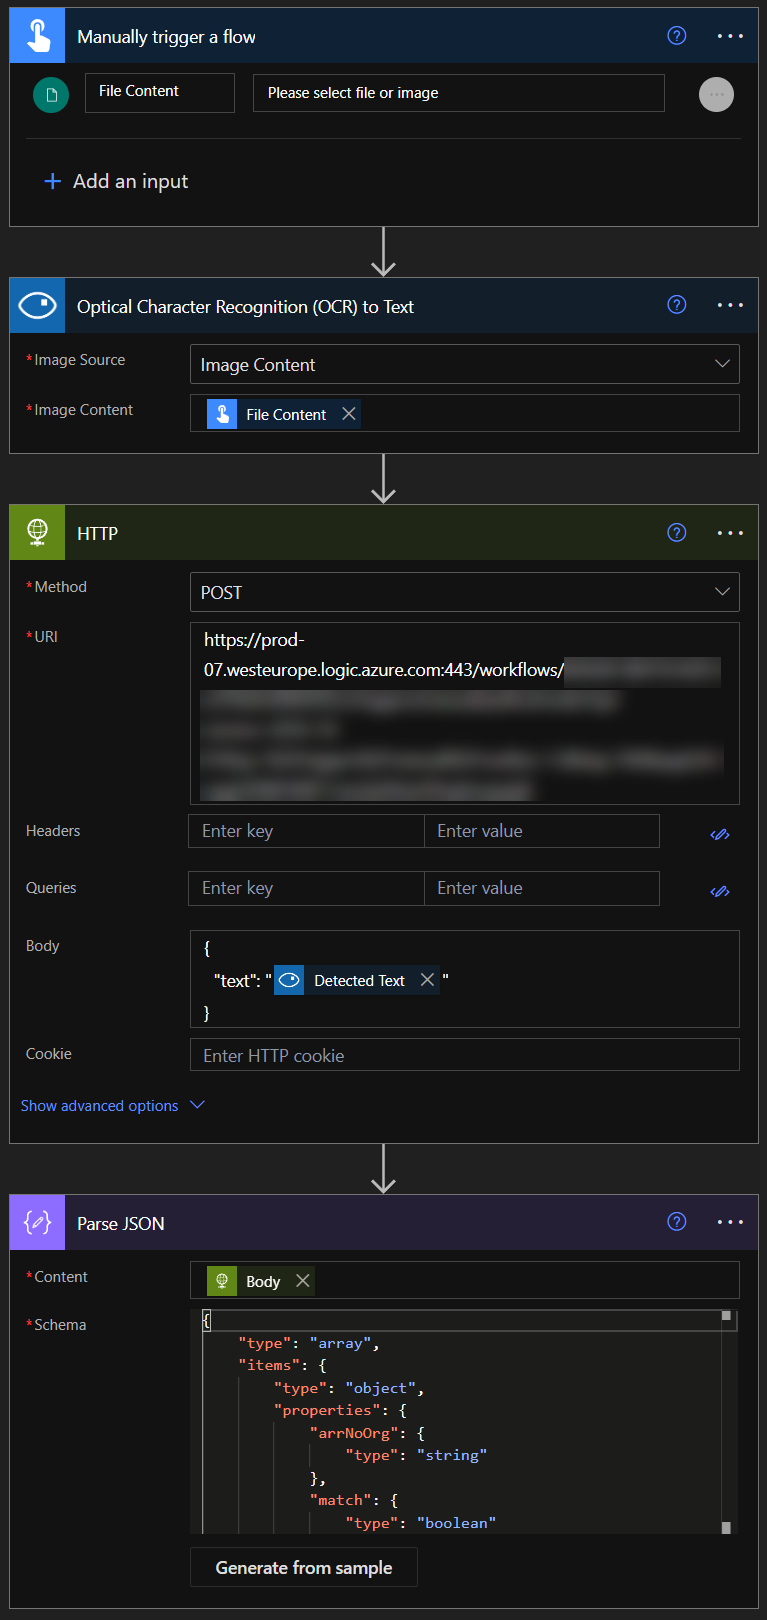
Your Power Automate starts, converts the image to text through Computer Vision, sends the datao to Logic Apps trigger, which runs the JavaScript code and return the matches as a response body:
Tadaaa! your RegEx match results are returned in an array in Power Automate flow! Use it however you wish from this step on. And remember to parse the JSON body with a Parse JSON action!😁
Summary
The Power Automate Flow
The Logic Apps Flow
In this guide, we’ve explored how to use Azure Computer Vision service and Power Automate flow to convert text in images to structured text, which is passed to a dedicated Logic App for RegEx filtering with JavaScript code invocation. This approach allows for efficient and accurate extraction of important information from image-based content, while also providing powerful RegEx filtering capabilities through Logic Apps.
Overall, this approach can be used to automate the extraction and processing of text data from various sources, enabling more efficient and accurate data management and analysis. With the right tools and resources, developers can quickly and easily implement these solutions in their workflows, improving productivity and accuracy in their work.
Leave a Reply